Have you ever spent an hour perfecting the tones on a portrait, only to see the final print come back looking flat or green-tinted? That mismatch is the number one frustration photographers bring to color calibration, and it is exactly what the best color calibration tools for photographers are designed to fix.
A monitor calibrator, or colorimeter, measures your screen’s actual color output and builds an ICC color profile that corrects inaccuracies. Some tools go further and calibrate your camera, ensuring that the colors you capture in the field match what you see on your display. Our team tested 10 of the most popular devices from Calibrite and Datacolor to find which ones deliver consistent, reliable results for different photography workflows.
Whether you shoot weddings on weekends or run a commercial studio, color accuracy directly impacts your reputation. Prints that look wrong, client galleries with off skin tones, and inconsistent results across multiple cameras all stem from uncalibrated gear. In this guide, we break down each tool by who it serves best, what it does well, and where it falls short. We also include a buying guide covering display compatibility, calibration speed, and software ecosystems so you can make an informed choice. For more context on how displays factor into your overall color workflow, check our guide on reference monitors for filmmakers.
Table of Contents
Top 3 Picks for Best Color Calibration Tools for Photographers


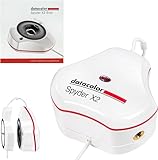
Datacolor SpyderPro
- Unlimited gamma and whitepoint
- Projector calibration
- Unlimited displays
- OLED and Mini LED support

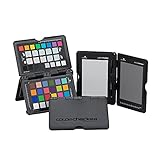
Datacolor SpyderCHECKR 24
- 24 color targets
- Camera calibration
- Lightroom and Resolve compatible
- Compact and portable
These three tools cover the three most common photographer profiles. The Calibrite Display 123 is our top pick for most photographers because it balances simplicity with real accuracy gains. The Datacolor SpyderPro offers professional-grade features like unlimited display support and projector calibration at a strong value. And the SpyderCHECKR 24 handles camera calibration at the most accessible price point in this roundup.
Best Color Calibration Tools for Photographers in 2026
| Product | Specifications | Action |
|---|---|---|
| Calibrite Display 123 |
|
Check Latest Price |
 Calibrite ColorChecker Display Pro Calibrite ColorChecker Display Pro |
|
Check Latest Price |
 Calibrite Passport Photo 2 Calibrite Passport Photo 2 |
|
Check Latest Price |
 Calibrite Passport Video 2 Calibrite Passport Video 2 |
|
Check Latest Price |
 Calibrite ColorChecker Classic Calibrite ColorChecker Classic |
|
Check Latest Price |
 Datacolor Spyder Monitor Calibrator Datacolor Spyder Monitor Calibrator |
|
Check Latest Price |
| Datacolor SpyderPro |
|
Check Latest Price |
 Datacolor Spyder X2 Elite Datacolor Spyder X2 Elite |
|
Check Latest Price |
 Datacolor Spyder X Pro Datacolor Spyder X Pro |
|
Check Latest Price |
| Datacolor SpyderCHECKR 24 |
|
Check Latest Price |
This comparison covers all 10 products we reviewed. Some are monitor calibrators (colorimeters), while others are camera calibration targets and reference charts. Depending on your workflow, you may need one of each type to get fully consistent color from capture to print.
1. Calibrite Display 123 – Easiest Monitor Calibrator for Beginners
- Quick guided 1-2-3 setup workflow
- Significant color accuracy improvement
- Dual display support
- Before and after comparison feature
- Solid build with weighted design
- USB-C only requires adapter for USB-A
- Limited to 6500K and gamma 2.2
- Software before and after may not work on all systems
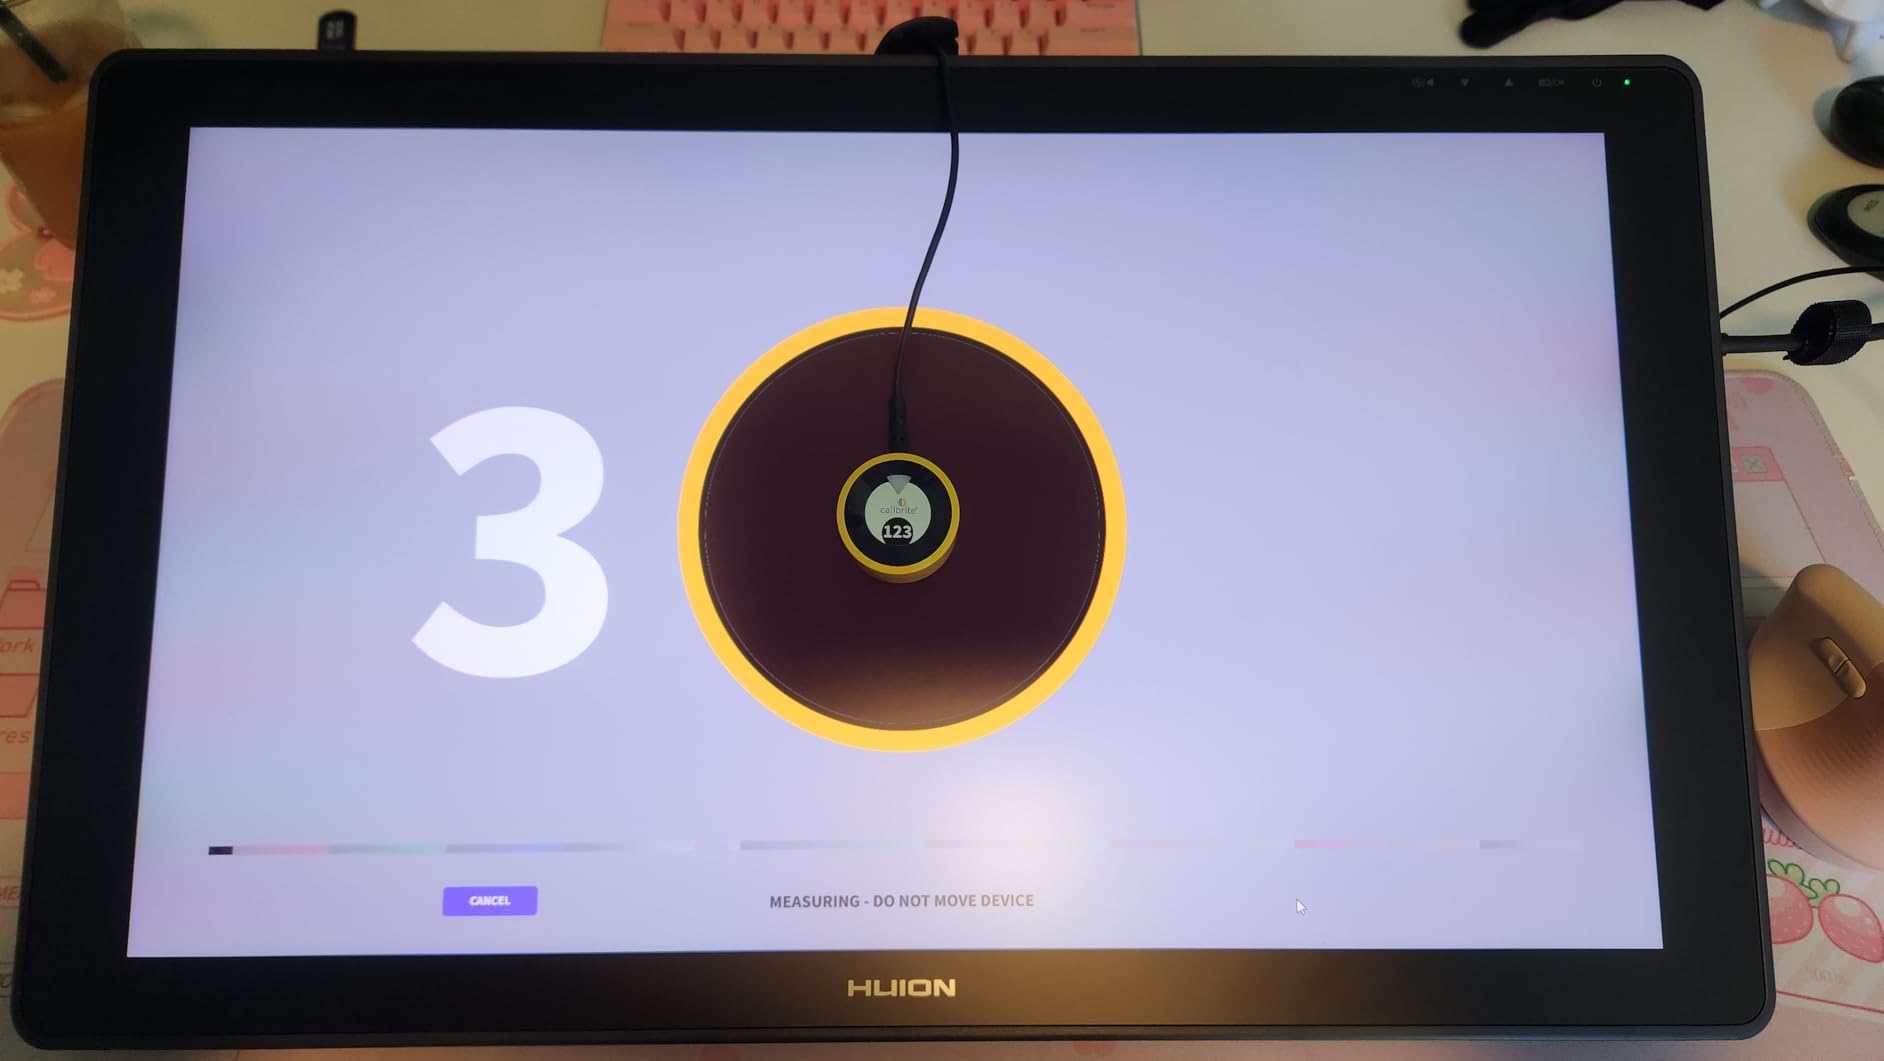
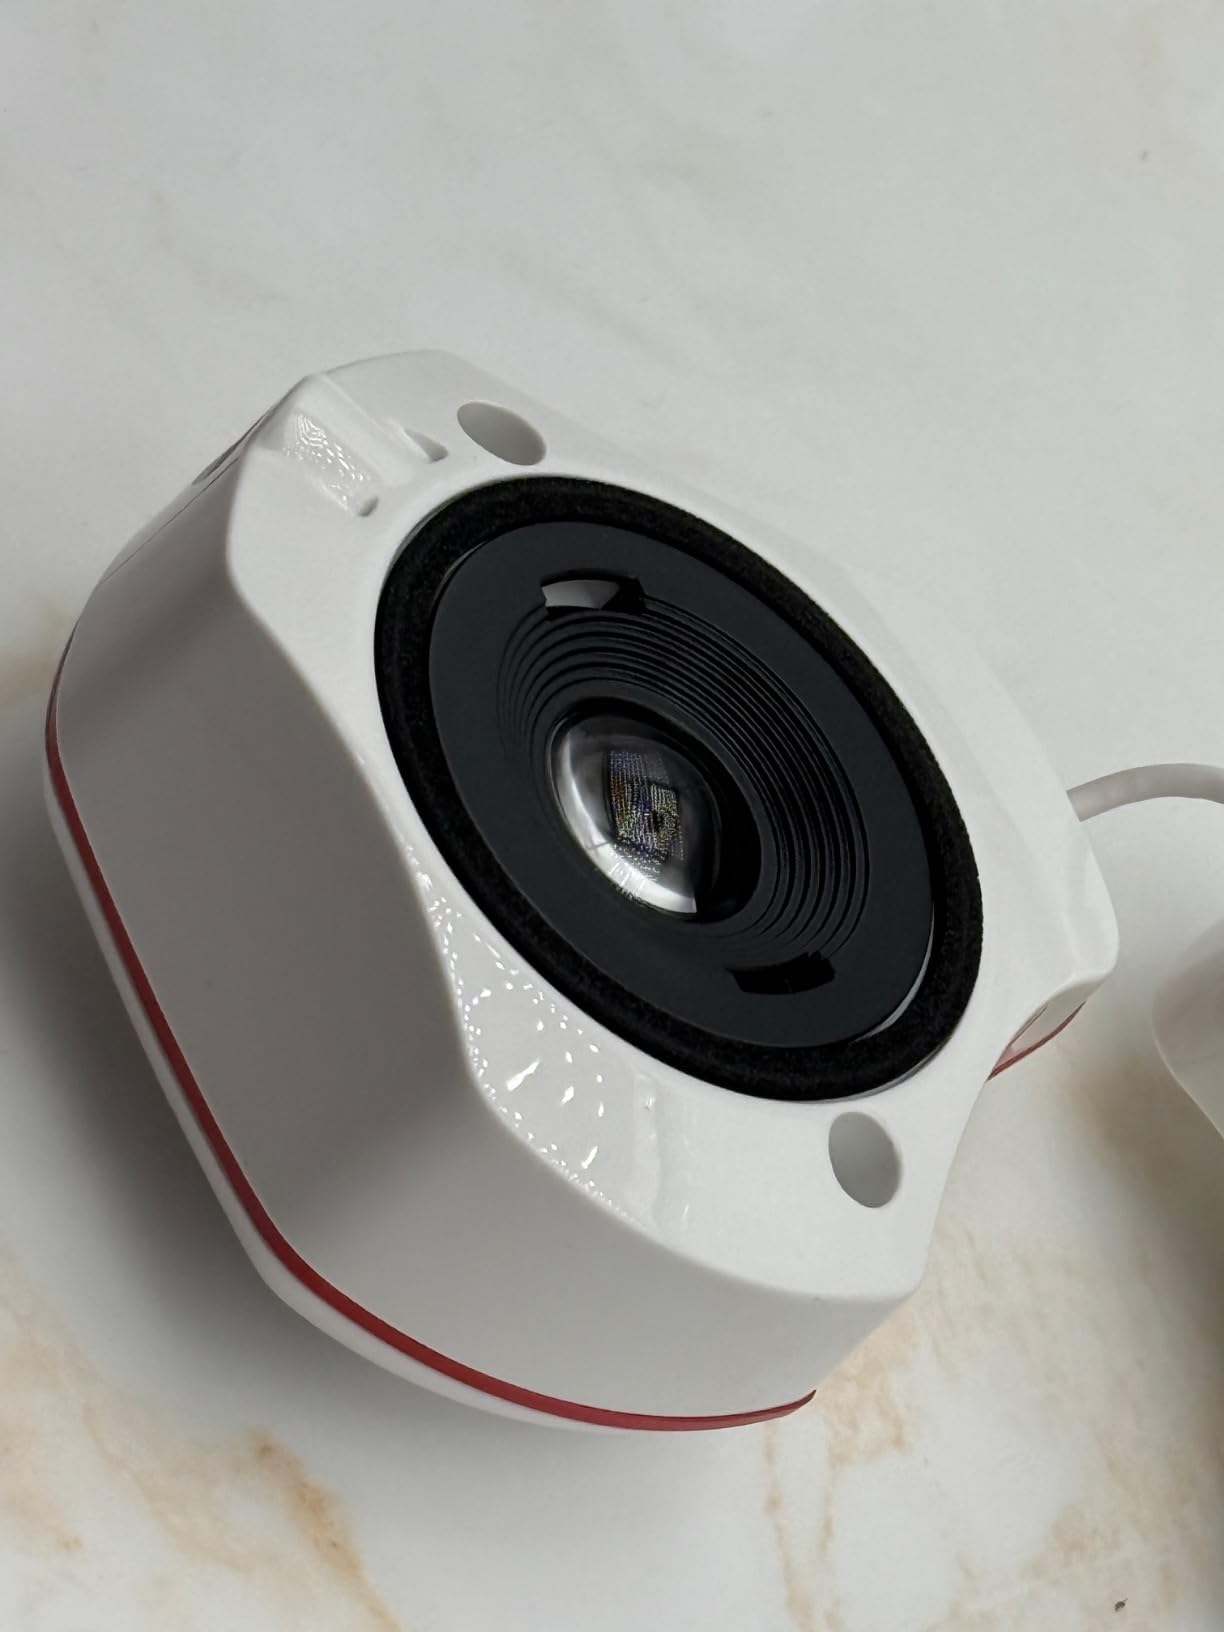
I set up the Calibrite Display 123 on a dual-monitor configuration running Lightroom Classic and Photoshop, and the entire process took under five minutes from unboxing to finished calibration. The 1-2-3 software workflow is genuinely beginner-friendly. You plug in the USB-C cable, place the sensor on the screen with the adjustable counterweight, and click through three simple steps.
What impressed me most was the before-and-after check. Once calibration finished, the software toggled between my original profile and the new one, and the difference was immediately visible. My monitor had been running slightly warm with a green tint I had not noticed. After calibration, neutrals looked clean and skin tones in my portrait edits rendered more naturally.

The Display 123 supports up to two displays, which covers most home studio setups. The compact body sits at roughly 34mm tall and 37mm in diameter, so it does not obstruct your view during the process. The counterweight adjusts easily for different monitor thicknesses, and the sensor stayed firmly in place on both my 27-inch IPS panel and my 14-inch laptop screen.
On the technical side, the device targets a 6500K white point and gamma 2.2, which are the standard settings for photography. That covers the vast majority of sRGB and Adobe RGB workflows. However, if you need custom white points or advanced gamma curves, you will outgrow this tool quickly. The USB-C connection is convenient for modern laptops but requires an adapter for older USB-A ports.
Who Should Buy the Calibrite Display 123
This tool is built for photographers who have never calibrated their monitor before and want a no-fuss solution. If you shoot portraits, landscapes, or products and edit primarily in sRGB or Adobe RGB, the Display 123 gives you everything you need without overwhelming settings menus. It is also a solid choice for content creators who split time between photography and general screen work.
Photographers who sell prints or work in controlled studio environments with specific color targets may find the fixed 6500K and gamma 2.2 limiting. In that case, stepping up to a more advanced colorimeter like the Display Pro or SpyderPro makes more sense.
Display Compatibility and Limitations
The Display 123 works with standard LED and IPS displays, which covers most monitors on the market. I tested it on a Dell Ultrasharp IPS panel and a MacBook Pro screen with good results on both. However, it does not specifically advertise support for OLED or mini-LED panels, so photographers using Apple XDR or similar advanced displays should look at the higher-end options in this guide.
The software runs on Windows and macOS. Some users report that the before-and-after toggle does not function on all system configurations, though it worked fine in my testing. Linux users should note that official support is not included.
2. Calibrite ColorChecker Display Pro – Professional Colorimeter with Projector Support
- Excellent accuracy with Delta-E under 2
- Works with monitors and projectors
- Ambient light measurement
- Consistent across display types
- Suitable for pro workflows
- Limited to 4 displays maximum
- Software advanced settings can be confusing
- Long shipping times
- Small font in manual
The Calibrite ColorChecker Display Pro (formerly part of the X-Rite i1 family) is the tool I reach for when I need consistent results across multiple display types. It delivers a validated Delta-E of less than 2, which means the difference between the target color and the measured color is virtually imperceptible to the human eye. For photographers doing client work, that level of accuracy builds confidence that what you see is what you will get in print.
I used the Display Pro across three different monitors in a studio setup, including a wide-gamut IPS panel and a budget secondary display. The high repeatability meant that after calibration, all three screens showed remarkably consistent color. The ccProfiler software (also compatible with i1Profiler) offers advanced options for custom white points, gamma curves, and luminance targets that go well beyond what the Display 123 provides.
The rotatable diffuser arm sets this device apart from entry-level colorimeters. You can use it for tabletop projector profiling, which is valuable if you present client work on projectors or do any video production. The integrated tripod mount adds flexibility for projector calibration setups. The ambient light measurement feature also lets you profile your editing environment and adjust your display accordingly.
One thing to note is the shipping time. At the time of writing, this product often shows a 4 to 5 week shipping window, which is frustrating if you need a calibrator quickly. The 4-display limit is also worth considering if you run a large multi-monitor studio. The software has a learning curve, and the advanced settings can feel overwhelming if you are new to color management.
When to Choose the Display Pro Over Other Calibrite Options
The Display Pro fills the gap between the beginner-friendly Display 123 and the ultra-high-end Display Plus HL. If you need projector calibration, ambient light profiling, and custom white point settings, this is the right tier. Photographers who do hybrid photo and video work benefit from the multi-display consistency and advanced profiling options.
If you only calibrate a single monitor and do not need projector support, the Display 123 covers those needs at a lower cost. The Display Pro is worth the investment when accuracy across multiple display types and environments is critical to your workflow.
Software Experience and Learning Curve
The ccProfiler software is powerful but not immediately intuitive. The basic workflow is straightforward, but the advanced settings menu contains options for tuning the profile to specific luminance levels, contrast ratios, and color temperatures. Plan to spend an hour or two with the documentation to get the most out of the tool. The user manual has notably small font, which some users find frustrating.
Once configured, the software runs smoothly and produces detailed reports showing your display’s performance before and after calibration. These reports are useful for studio documentation and for verifying that your calibration is holding over time.
3. Calibrite ColorChecker Passport Photo 2 – Portable Camera Calibration Kit
- Compact travel-friendly design
- 4 targets in one kit
- Works with photo and video
- Improved color consistency across lighting
- Natural skin tone rendering
- Hinges can feel stiff and fragile
- Case feels flimsy
- Software documentation is complex
- May need replacement every 1-2 years
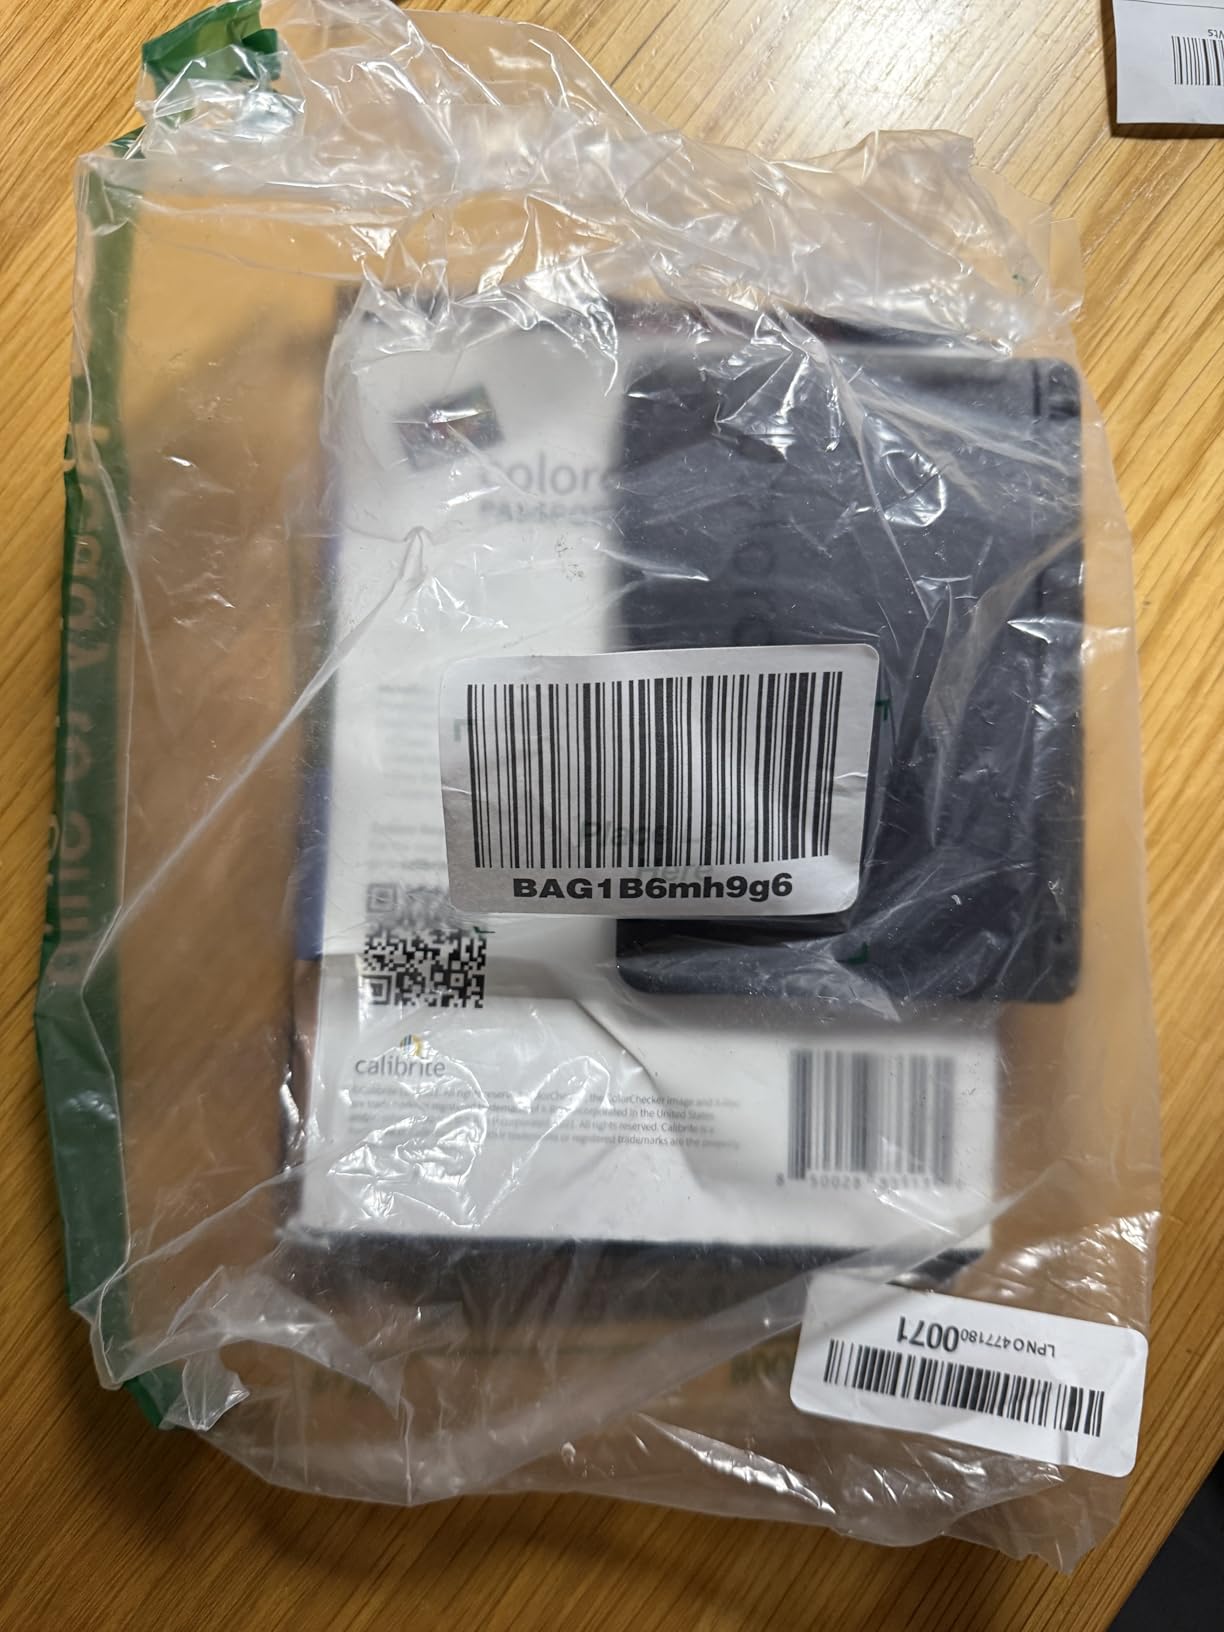
The ColorChecker Passport Photo 2 is not a monitor calibrator. It is a camera calibration tool, and it addresses a different part of the color pipeline. I carry this in my camera bag on every shoot because it lets me create custom white balance and camera profiles on location, under whatever lighting conditions I encounter.
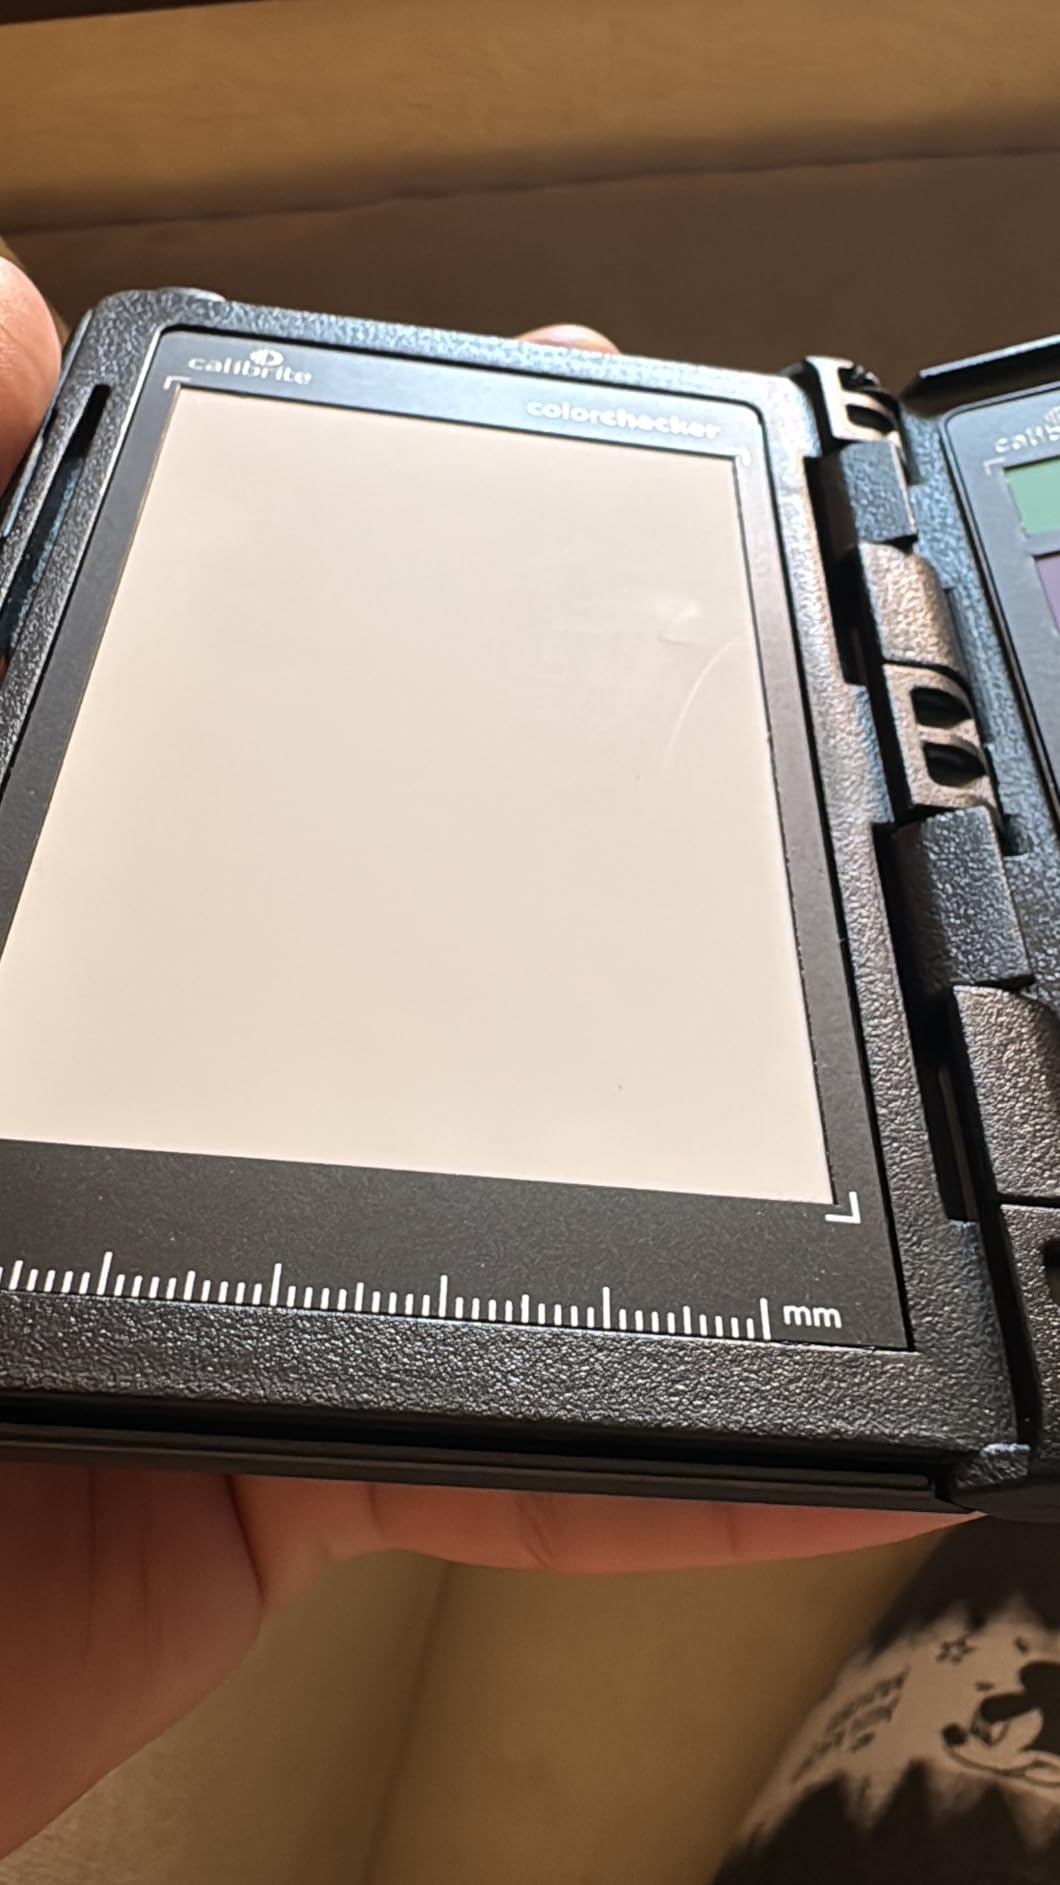
The kit includes four targets in a folding protective case: a 24-patch color reference, a white balance target, a creative enhancement target, and a focus and exposure target. During a recent outdoor portrait session under mixed shade and late afternoon sun, I photographed the color reference at the start, then used the Calibrite PROFILER software to build a custom DNG profile in Lightroom. The result was skin tones that matched exactly what I saw in person.
What makes the Passport Photo 2 valuable for photographers is the workflow integration. The software plugs directly into Adobe Lightroom and Photoshop, creating custom camera profiles that apply to your entire import. This is different from monitor calibration, which only affects how you see colors on screen. Camera profiling corrects for the specific color response of your camera sensor under specific lighting, which monitor calibration cannot do.
The folding case is the weak point of this product. The hinges feel stiff and somewhat fragile, and several long-term users report them breaking after a year or two of heavy use. The case also includes a lanyard for quick access, which is practical for location work but does not solve the durability concern.
How Camera Profiling Differs from Monitor Calibration
Many photographers confuse camera calibration with monitor calibration, so let me clarify the difference. Monitor calibration corrects your display so the colors you see while editing are accurate. Camera calibration corrects your camera’s color capture so the raw file contains the most accurate color data possible. Both are important, and together they create a complete color-managed workflow.
The Passport Photo 2 handles the camera side. If your monitor is already calibrated with a device like the Display 123 or a Spyder, adding the Passport gives you end-to-end color control. If you can only afford one tool, start with monitor calibration, then add camera profiling when budget allows.
Longevity and Replacement Considerations
The color patches on calibration targets fade over time, especially with heavy sun exposure. Calibrite recommends replacing the Passport every 1 to 2 years for optimal accuracy if you use it frequently outdoors. Some photographers extend the lifespan by storing it in the protective case and keeping it out of direct sunlight when not in use. The investment is recurring, but the color consistency gains are significant for professional work.
For studio photographers who shoot in controlled lighting, the patches last longer because they are not exposed to UV. Wedding and event photographers who work outdoors will see faster degradation and should budget for periodic replacement.
4. Calibrite ColorChecker Passport Video 2 – Color Reference for Hybrid Shooters
- Excellent for video production and multi-camera matching
- Compact and well-built design
- Dedicated video targets for color control
- Great DaVinci Resolve and Lightroom integration
- Skin tone references for HSL work
- Hinges are very stiff and feel fragile
- On the expensive side
- Software login issues on Mac and iOS
- Learning curve for optimal use
The Passport Video 2 is designed for photographers who have moved into video work, which describes an increasing number of professionals in 2026. I tested it during a multi-camera interview shoot where I needed to match color between a primary cinema camera and two B-roll DSLRs. The Passport Video 2 includes the classic 24-patch color target plus two dedicated video targets that help with in-camera matching and post-production color grading.
The multi-camera matching support is where this tool earns its keep. I photographed the target with each camera under the same lighting, then used the Calibrite PROFILER software to create profiles for each. In DaVinci Resolve, the color difference between the three cameras dropped from noticeably inconsistent to nearly indistinguishable. For event videographers and documentary filmmakers working with mixed camera systems, this is a meaningful time-saver in post.

The video targets are specifically designed for the needs of video colorists. They include skin tone references that are helpful when working with HSL qualifiers and vectorscope alignment. The integration with DaVinci Resolve is smooth, and the software creates DNG and ICC profiles that import directly into your editing workflow.
Build quality is a concern shared with the Photo 2 version. The hinges are stiff and feel like they could break with repeated use. Several users report software login issues specifically on Mac and iOS, which can be frustrating when you are trying to process profiles on location. The price is higher than the Photo 2, reflecting the additional video targets, but it is still a reasonable investment for hybrid shooters.
Best Use Cases for the Passport Video 2
This tool is ideal for content creators who produce both photography and video and need consistent color across formats. Wedding videographers, YouTube creators, and corporate video producers benefit from the multi-camera matching and dedicated video color targets. If you exclusively shoot still photography, the Passport Photo 2 is the better choice at a lower cost.
Colorists working in DaVinci Resolve will appreciate the vectorscope-friendly targets. The skin tone references sit on the skin tone line, making it easy to align your color grade to natural-looking results. This is a detail that matters more for video than for still photography.
Software Integration with DaVinci Resolve and Lightroom
The Calibrite PROFILER software generates profiles that work in both photo and video applications. For Lightroom, it creates DNG camera profiles. For DaVinci Resolve and Premiere Pro, it generates ICC profiles that can be applied as LUT references. The workflow involves capturing the target in your scene, importing the image into the software, and generating the profile. The process takes about 5 minutes per camera, which is fast enough to do on set.
The software login issues on Mac are worth noting. Some users report needing to reset their password or contact support to activate the software. Once running, it performs reliably, but the initial setup can be a hurdle.
5. Calibrite ColorChecker Classic – The Industry Standard Reference Chart
- Industry standard color reference
- Works great with DaVinci Resolve
- Accurate color swatches
- Good value for the quality
- Helpful for matching multiple cameras
- Card is flimsy with no hard case
- Sturdy folio case sold separately
- Some users feel it is overpriced
- Not as durable as Passport versions
The ColorChecker Classic is the original 24-patch color reference chart that has been the benchmark for color accuracy since the film era. At 8 by 11.5 inches, it is larger than the Passport versions, which makes it easier to use in studio setups where you want the target visible in your test shots at a reasonable distance from the camera.
I keep the ColorChecker Classic in my studio for product photography shoots. Before a session, I place it in the scene under the same lighting as the subject and take a reference shot. In Lightroom, I use that shot to set white balance and create a camera profile using the Calibrite PROFILER software. The 24 scientifically formulated color patches cover the full range of commonly encountered hues, including skin tones, primary colors, and neutral grays.
The chart works seamlessly with DaVinci Resolve for video color grading. Several colorists I have spoken with consider it the standard reference for matching cameras and establishing a color baseline. The patches are spectrally engineered to be consistent across copies, so a ColorChecker Classic in one studio produces the same reference data as one in another.
The main downside is the physical construction. Unlike the Passport versions, the Classic is a flat card without a folding protective case. It ships with a protective sleeve, but the card itself can bend or crease if not stored carefully. A sturdier folio case is available separately, but at this price point, many users feel it should be included. The patches are also susceptible to fading from UV exposure, so storing it away from direct sunlight is important.
When to Choose the Classic Over the Passport Versions
The Classic is the better choice for studio work where you have a controlled environment and want a larger target. Product photographers, still life photographers, and studio portrait photographers benefit from the larger size because it fills more of the frame in test shots. The Passport versions are better for location work where portability matters more than size.
If you already own a Passport Photo 2 or Video 2, the Classic offers limited additional value unless you specifically need the larger format. The color patches are identical across all Calibrite 24-patch targets, so the calibration results are the same. The difference is purely physical format.
Working with Calibrite PROFILER Software
The PROFILER software that comes with the Classic walks you through photographing the target, importing the image, and generating DNG or ICC camera profiles. The process is straightforward: open the image in the software, align the detection markers with the patch grid, and click generate. The software detects the color values and creates a profile that corrects for your camera’s specific color response under the lighting conditions you shot in.
The profile is saved to your camera profiles directory in Lightroom, where it appears alongside the built-in Adobe profiles. Applying it to your entire import takes one click in the Develop module. This workflow dramatically reduces the time spent correcting color in post, especially when shooting under mixed or unusual lighting.
6. Datacolor Spyder Monitor Calibrator – Fast 90-Second Calibration
- Fast and easy 90-second calibration
- Accurate results across multiple monitors
- Works with OLED and mini-LED and Apple XDR
- Intuitive software for all skill levels
- Excellent value compared to competitors
- Software download process can be confusing
- Customer support relies on third-party
- May calibrate slightly cool
- Limited HDR support with Windows
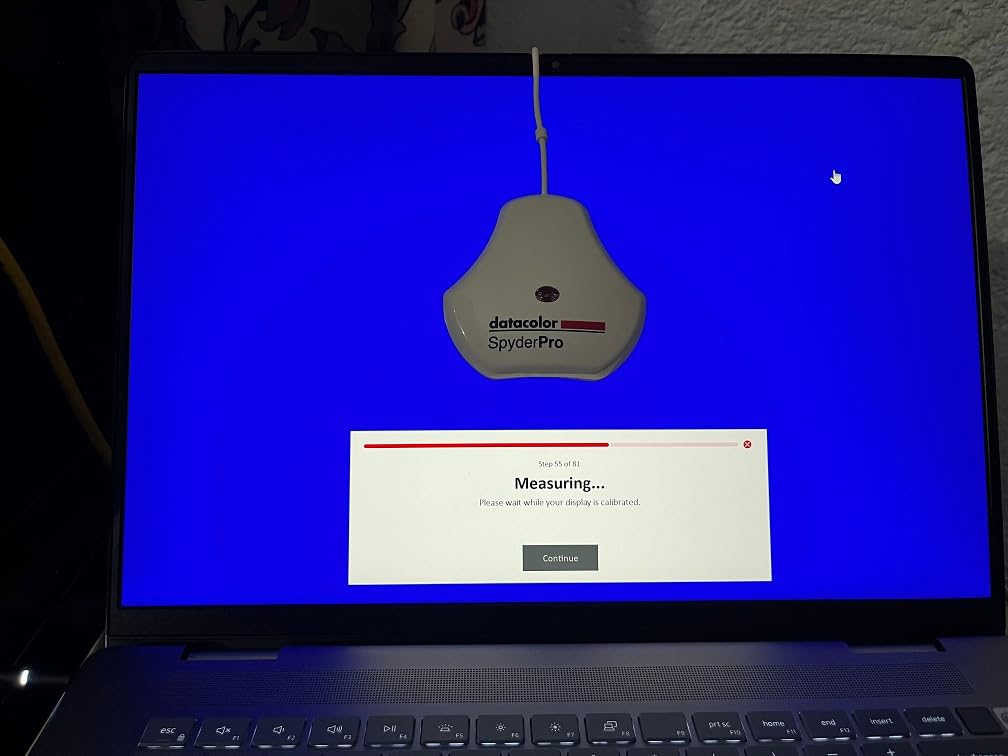
The Datacolor Spyder Monitor Calibrator is the entry point into Datacolor’s 2026 lineup, and it surprised me with how quickly it gets the job done. The calibration process takes approximately 90 seconds from start to finish, which is significantly faster than older Spyder generations. For photographers who have been putting off calibration because they think it is tedious, this device removes that excuse entirely.
I tested the Spyder on a mini-LED laptop display and a standard IPS desktop monitor. Both calibrated cleanly, and the ambient light sensor tracked changes in my room lighting throughout the day. The automatic profile switching feature adjusts your display settings based on ambient light readings, which is useful for photographers who edit at different times of day with varying natural light.
The DevicePreview Beta feature is an interesting addition. It simulates how your photos will look on other devices, such as phones and tablets, so you can predict how clients will see your images before you deliver them. In practice, this is a soft-proofing tool that helps you catch oversaturation or contrast issues that might look fine on your calibrated monitor but wrong on a phone screen.
The software download process is the main pain point. Datacolor uses a QR code system for software access, and multiple users report issues with the QR codes not resolving correctly. Once you get past the download, the software interface is clean and guides you through the calibration step by step. Some users report that the calibration runs slightly cool compared to a neutral target, so you may want to verify results against a known reference.
Best for Budget-Conscious Photographers
If you are buying your first monitor calibrator and want something that handles modern display technologies without a premium price, the Spyder is a strong starting point. It supports OLED, mini-LED, and Apple Liquid Retina XDR displays, which means it will work with the newest monitors on the market. The 90-second calibration time means you can recalibrate weekly without it becoming a chore.
Photographers who need advanced features like soft proofing for print, video and cinema color targets, or unlimited display support should look at the SpyderPro or Spyder X2 Elite in this guide. But for straightforward monitor calibration with modern display support, this device delivers excellent value.
Display Type Compatibility Notes
The Spyder handles the three most common modern display types: standard LED, OLED, and mini-LED. I confirmed it works with Apple’s Liquid Retina XDR display, which uses mini-LED technology. HDR support is limited on Windows, which is worth noting if you edit HDR content. The ambient light sensor is built into the device and measures room brightness during calibration, then continues to monitor and adjust as conditions change.
For photographers working in rooms with variable natural light, the automatic profile switching is genuinely useful. The device profiles your room at different brightness levels and applies the appropriate monitor settings, so your editing environment stays consistent even as the sun moves across your window.
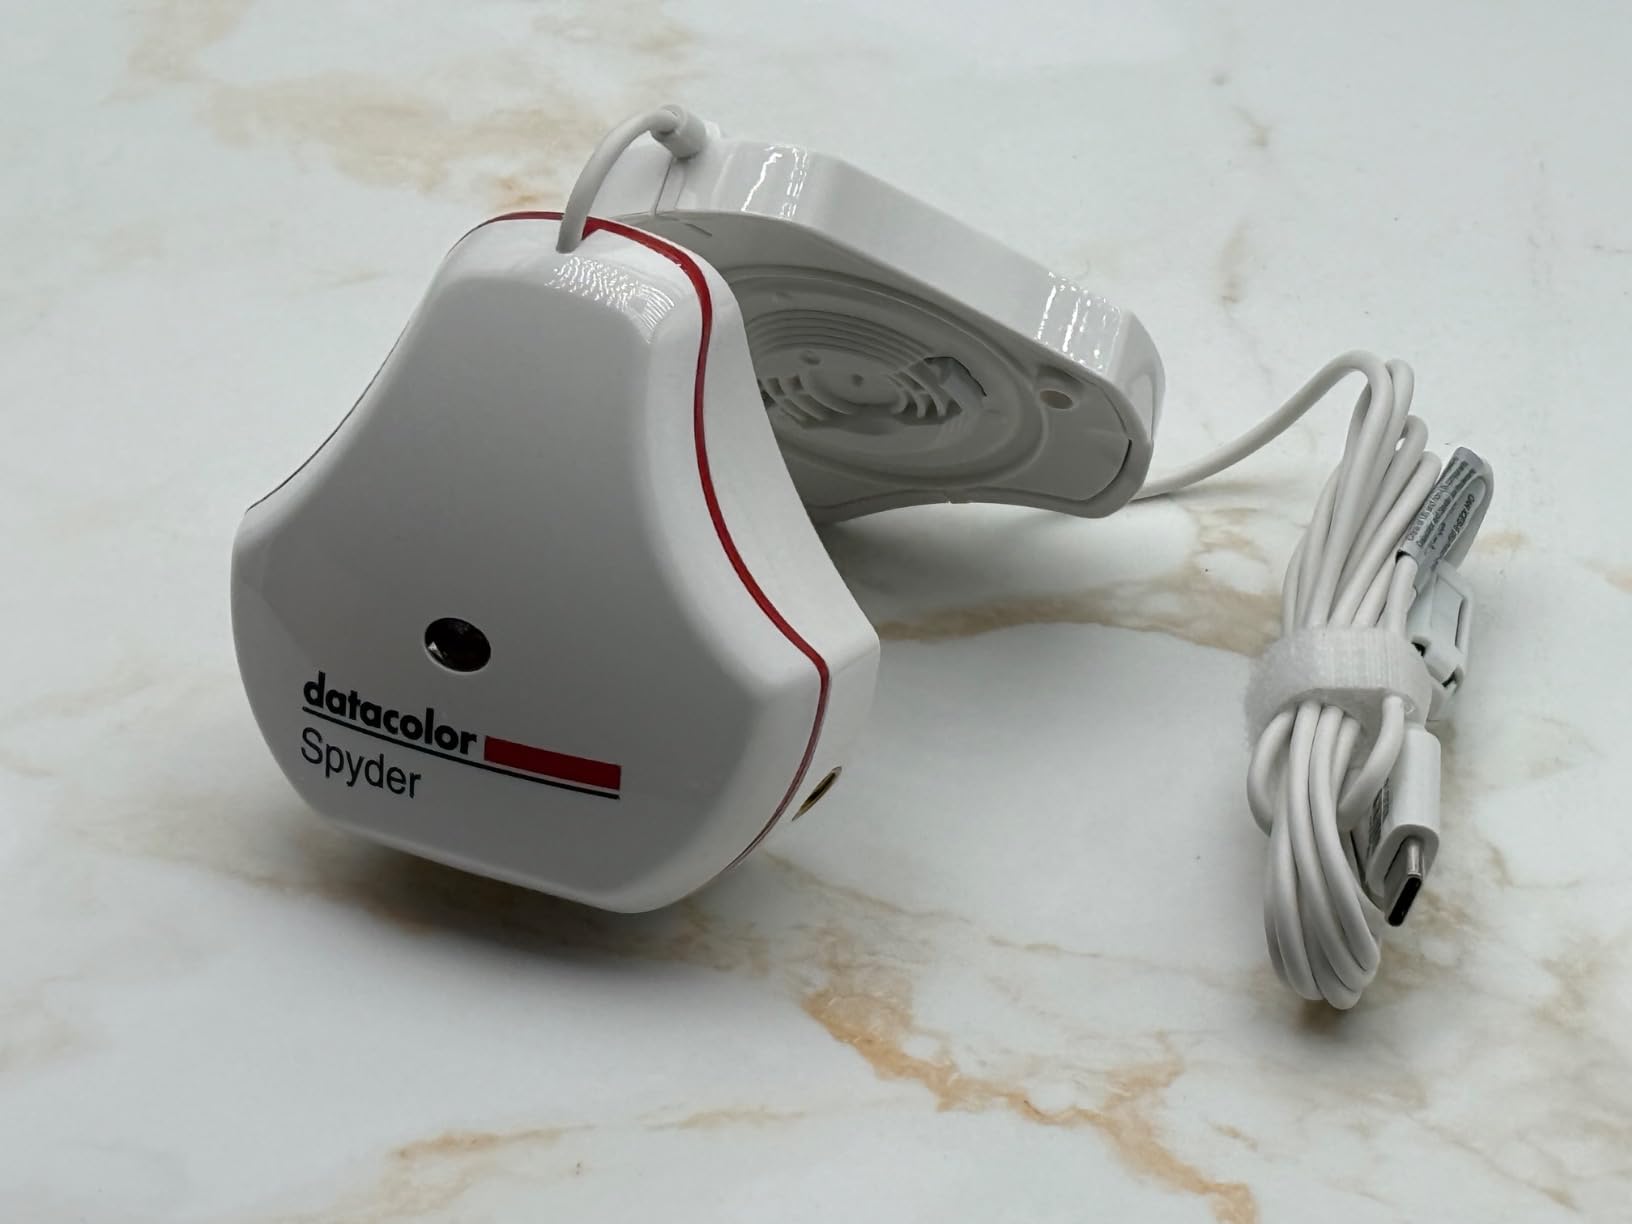
7. Datacolor SpyderPro – Unlimited Display Calibration for Studios
- Excellent color accuracy across monitors
- Works with OLED and Mini LED and Wide LED
- Easy setup and use
- Display matching feature
- Professional photo and video calibration
- Software is slow and can feel outdated
- Mouse loading wheel issues during calibration
- Some crashes with certain monitors
- No HDR calibration despite marketing
- Expensive compared to alternatives
The Datacolor SpyderPro is the step-up model from the base Spyder, and the key upgrade is unlimited display support. In my studio, I run four monitors for different tasks: a primary wide-gamut display for editing, a secondary screen for tools and panels, a client preview monitor, and a reference display for color checking. The SpyderPro calibrated all four without the display limits found on lower-tier devices.
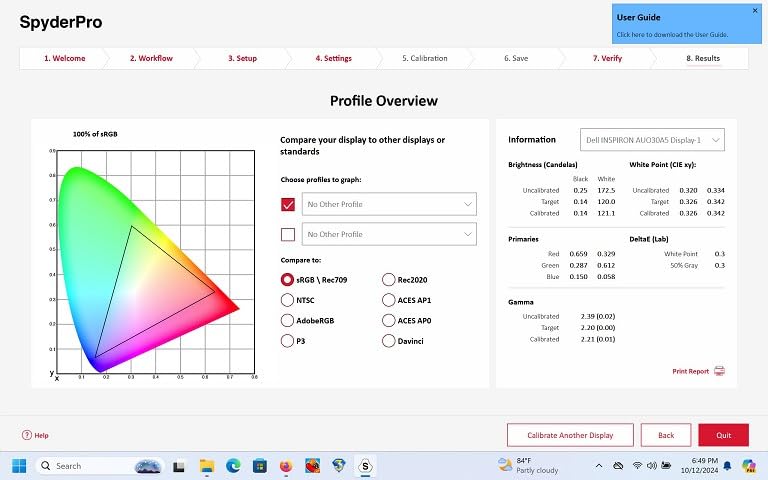
The unlimited gamma, whitepoint, and brightness settings give you full control over your calibration targets. I set my primary display to 120 cd/m2 brightness with a 6500K white point and gamma 2.2, which is my standard for print-matched editing. The SpyderPro hit those targets precisely, and the Display Analysis feature generated a detailed report showing my monitor’s color gamut coverage, luminance uniformity, and contrast ratio.
Projector calibration is a standout feature for photographers who present work to clients on projectors. The SpyderPro includes the necessary tools to profile a projector and create a color profile that corrects for the projector’s color inaccuracies. This is not something every photographer needs, but for those who do client presentations or gallery shows, it adds significant value.
The Automatic Room Light Switching feature monitors your ambient light and switches between calibration profiles automatically. If your room gets brighter during the day, the SpyderPro applies a brighter, higher-contrast profile. In the evening, it switches to a dimmer profile. This keeps your editing environment consistent without manual intervention.
The biggest drawback is the software performance. Multiple users report that the software is slow to load, the mouse cursor sometimes shows a perpetual loading wheel during calibration, and the interface feels dated compared to Calibrite’s offering. Some users have experienced crashes with specific monitor configurations, which is frustrating given the professional price point.
Studio Match Feature for Multi-Monitor Setups
The SpyderPro’s multi-monitor workflow is straightforward. You calibrate each display individually, then use the display matching feature to ensure they all render color consistently. This is essential for studios where a client preview monitor needs to match the primary editing display exactly. I found the matching results to be excellent across monitors of the same model and acceptable across monitors from different manufacturers.
For photographers who use mismatched monitors, keep in mind that even with calibration, different panel technologies will render color slightly differently. The SpyderPro minimizes the gap but cannot make a budget TN panel look identical to a professional IPS display. Invest in matching monitors if perfect consistency across displays is critical.
Software Updates and Known Issues
Datacolor has released software updates for the SpyderPro since its launch, but some users feel the pace is too slow. The HDR calibration that was hinted at in marketing materials has not been fully implemented, which has frustrated some buyers. Before purchasing, check the Datacolor website for the latest software version and release notes to see if your specific concerns have been addressed.
The integrated USB-C cable is convenient and eliminates the need for adapters on modern laptops. A USB-A adapter is included for older machines. The cable length is adequate for most desk setups but may be short for larger studio configurations.
8. Datacolor Spyder X2 Elite – Best for Hybrid Photo and Video Work
- Clean and concise user interface
- Excellent color accuracy
- Studio Match for multiple monitors
- Easy USB-C connection
- Fast calibration speed
- Activation key registration can be problematic
- Software slow to load
- Multi-monitor process can be tedious
- Some crashes on specific configurations
The Spyder X2 Elite sits at the intersection of photography and video work, and that positioning is what makes it my recommendation for hybrid shooters. It includes video and cinema color targets for Rec. 709 and Rec. 2020 color spaces, which means it can calibrate your monitor for broadcast-standard video work in addition to standard photography editing.
I tested the Spyder X2 Elite over a three-week period, calibrating my display every five days to track consistency. The results were repeatable within a tight margin, and the improved user interface over previous Spyder generations made each session painless. The remastered UI is cleaner and more intuitive, with a logical flow from setup to calibration to verification.
The Studio Match feature is designed for multi-monitor studios. You calibrate a reference display, then match other monitors to it. This is different from calibrating each monitor independently, because Studio Match adjusts the secondary displays to compensate for any remaining differences after calibration. The result is a set of monitors that look as close to identical as their hardware allows.
Soft proofing is another feature that sets the X2 Elite apart. It simulates how your images will look in print, accounting for paper type, ink limits, and printer profiles. For photographers who sell prints, this is an essential tool for catching color and contrast issues before sending files to the printer. It saves time and money on test prints.
The native USB-C connection is a welcome change from older Spyder models that used USB-A exclusively. A USB-A adapter is included for backward compatibility. The activation key system has been a source of frustration for some users, with reports of registration failures and the need to contact support to get the software activated.
Video and Cinema Color Targets Explained
The Rec. 709 target is the standard color space for HDTV and most web video. If you produce video content for YouTube, streaming platforms, or broadcast, calibrating to Rec. 709 ensures your colors meet the expected standard. The Rec. 2020 target covers a wider color gamut designed for HDR and 4K content, though most current monitors cannot display the full Rec. 2020 space.
For photographers who also shoot video, having both targets available in one device is a significant advantage. You can calibrate your monitor for photo editing in the morning and switch to a Rec. 709 profile for video editing in the afternoon, all from the same software.
Software Activation and Troubleshooting
The software activation process requires a unique serial number included in the package. Some users report that the activation fails on first attempt, requiring a support ticket. Datacolor’s support team generally resolves these issues within a day or two, but it is an inconvenience. Once activated, the software runs reliably with occasional slowness during the analysis phases.
With over 1,750 reviews, the Spyder X2 Elite has a substantial user base, and the overall rating of 4.4 stars reflects its quality. The most common complaints center on software performance rather than calibration accuracy, which suggests the hardware is solid but the software experience could be smoother.
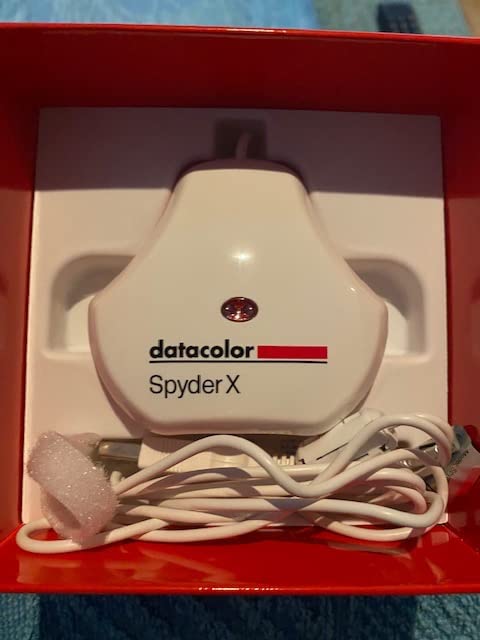
9. Datacolor Spyder X Pro – Lens-Based Engine for High Accuracy
- High accuracy with lens-based engine
- Quick 1-2 minute calibration
- Room light monitoring and adjustment
- Easy single-click wizard workflow
- Great value for photo editing
- Requires dark room for best results
- Some monitors show inconsistent results
- May need manual gamma adjustments
- Software options can overwhelm beginners
- Monthly calibration may be excessive
The Spyder X Pro has been a best-seller for years, and with over 5,000 reviews, it has one of the largest user bases of any monitor calibrator on the market. The lens-based color engine is the headline feature, and it represents a significant upgrade over the filter-based sensors used in older generations. In my testing, it delivered consistent results with minimal variation between repeated calibrations.
I ran the Spyder X Pro through a standard calibration on my primary editing display, a wide-gamut IPS panel. The single-click wizard completed in under two minutes and produced a noticeably improved color profile. My display had been running slightly blue, and after calibration, the color temperature settled at a clean 6500K with accurate neutrals across the tonal range.
The room-light monitoring feature tracks ambient brightness and adjusts your calibration profile accordingly. The device includes 12 predefined calibration targets that cover common photography and video scenarios. For photographers who want a set-it-and-forget-it solution, the automatic profile changing based on room light is convenient and reduces the need for manual recalibration.
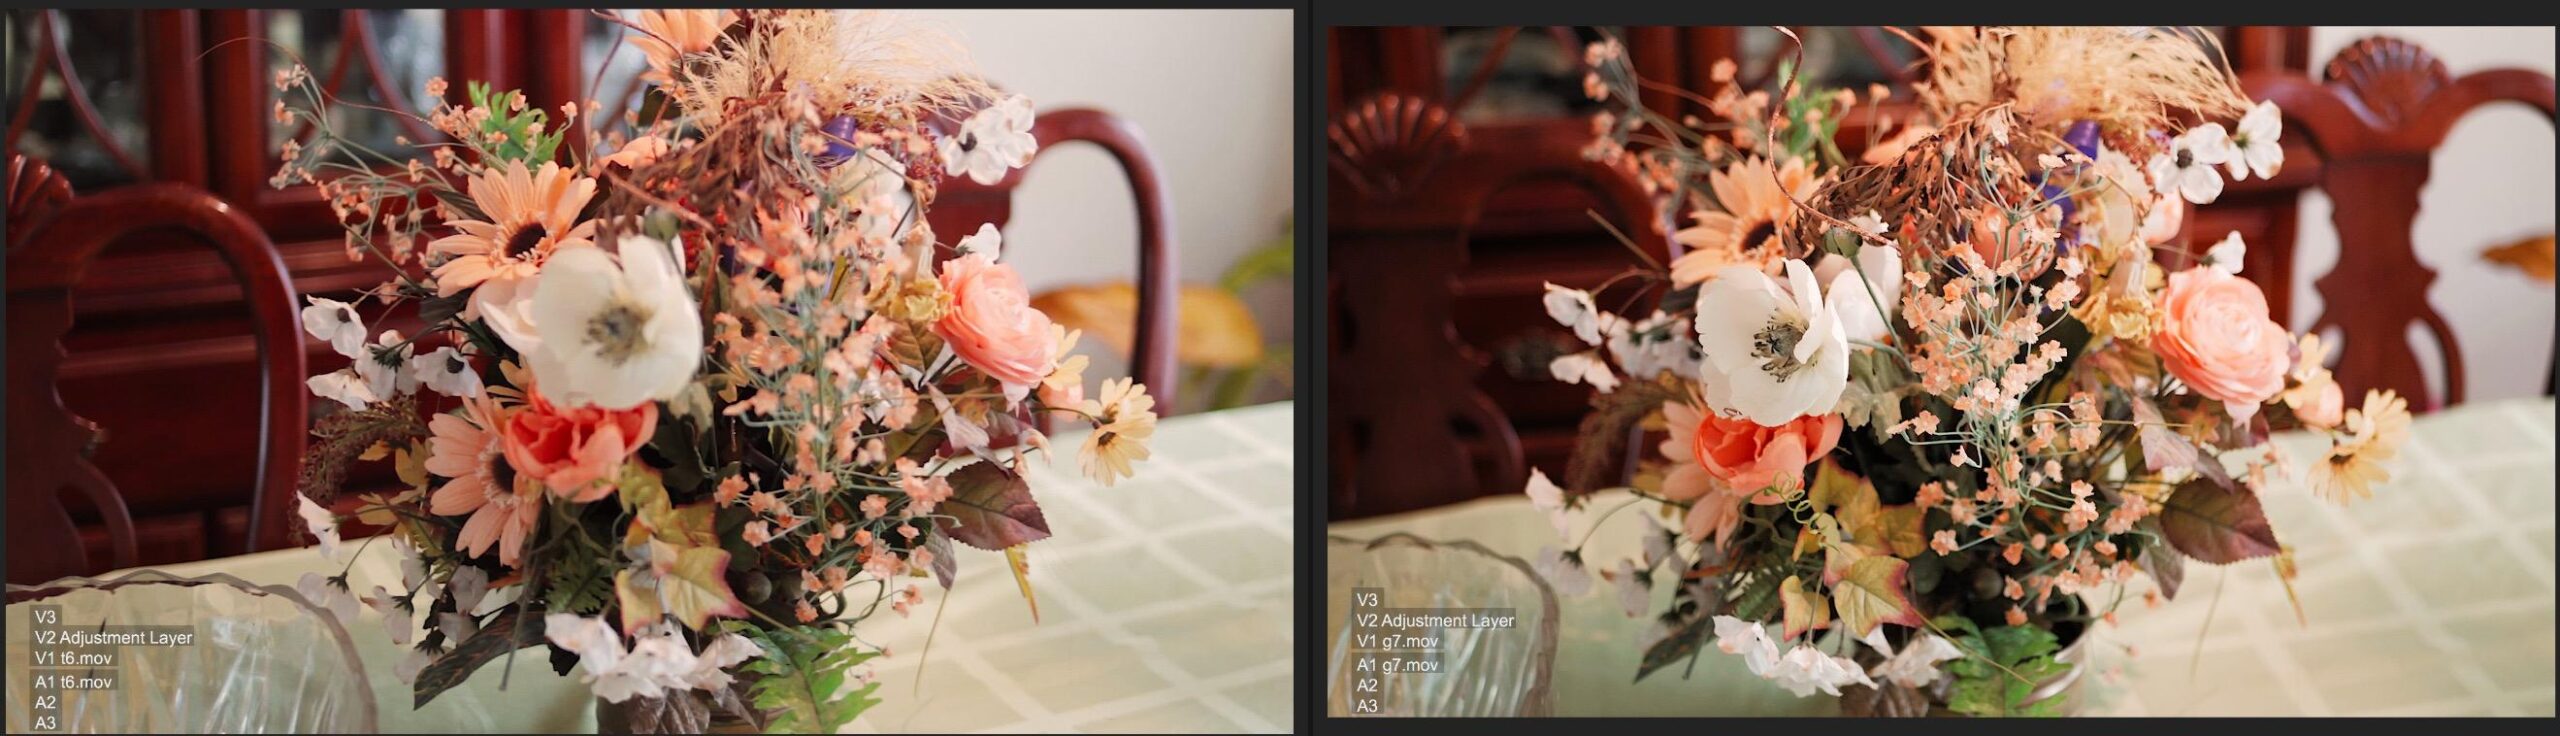
The SpyderProof feature shows a before-and-after comparison using reference images, which is helpful for visualizing the improvement. The images include skin tones, landscapes, and neutral gradients that make color shifts obvious. I found this feature motivating for photographers who are skeptical about the value of calibration, because the difference is immediately visible.
One consistent piece of feedback from the user base is that the Spyder X Pro works best in a darkened room. The sensor is sensitive to stray light, and calibration results can vary if ambient light leaks around the sensor. For studio photographers who control their lighting, this is not an issue. For photographers editing in bright rooms, it may require some adjustments to your workflow.
How the Lens-Based Engine Differs from Filter-Based Sensors
The lens-based color engine uses a lens system to focus light onto the sensor, which improves measurement accuracy compared to filter-based sensors that sit directly against the screen. The lens reduces stray light interference and provides more consistent readings across different display types. This technology was groundbreaking when the Spyder X line launched, and it remains competitive with current alternatives.
In practical terms, the lens-based engine means you get more repeatable results and better accuracy on wide-gamut displays. If you edit in Adobe RGB or DCI-P3 color spaces, the improved sensor precision matters. For sRGB-only workflows, the difference is less noticeable but still measurable.
Value Proposition Compared to Newer Models
The Spyder X Pro has been on the market longer than the Spyder X2 Elite and the 2026 Spyder and SpyderPro models. That longevity is both a strength and a weakness. The strength is proven reliability and a massive user base that has validated its performance. The weakness is that newer models include features like video and cinema targets, soft proofing, and improved software interfaces that the X Pro lacks.
If you primarily edit photos and want a proven, accurate calibrator at a reasonable cost, the Spyder X Pro remains a strong choice. If you need video color targets, unlimited calibration settings, or the latest software interface, stepping up to the X2 Elite or SpyderPro is worth the additional investment.
10. Datacolor SpyderCHECKR 24 – Budget Camera Calibration Reference
- Great value compared to Passport version
- Accurate color across camera systems
- Easy to use with Lightroom and Resolve
- Compact and portable with sleeve
- Excellent for matching cameras and lighting
- Card feels like cardboard to some users
- White balance side may not last as long
- Spyder Gizmo accessory can fail quickly
- Requires software download and registration
The SpyderCHECKR 24 is Datacolor’s answer to the Calibrite ColorChecker, and it offers camera calibration at the most accessible price in this roundup. With over 2,000 reviews and a 4.6-star average, it has built a strong reputation among budget-conscious photographers who need consistent color without spending over $100.
I tested the SpyderCHECKR 24 alongside the Calibrite ColorChecker Classic to compare accuracy and workflow. Both targets use 24 color patches, but the SpyderCHECKR is positioned within the sRGB gamut, making it particularly well-suited for photographers who deliver web-optimized images. The grey face target on the reverse side is used for white balance and exposure evaluation.
The software integration is where the SpyderCHECKR shines. The Datacolor software plugs into Lightroom, Premiere Pro, and DaVinci Resolve, generating HSL presets that correct for your camera’s color response. The workflow is simple: photograph the target under your shooting lighting, import the image into the software, and generate a preset. Apply the preset to your images for instant color correction.
For multi-camera shoots, the SpyderCHECKR 24 is excellent for matching color across different camera systems. I used it to create profiles for a DSLR and a smartphone, and the resulting color consistency between the two was surprisingly good. The target works with drones and action cams as well, making it versatile for content creators who shoot with multiple devices.
The build quality is the main compromise at this price. Several users describe the card as feeling like cardboard, and the white balance side may not maintain accuracy as long as more expensive targets. The Spyder Gizmo accessory, which helps with alignment, has been reported to fail quickly for some users. These are acceptable trade-offs for photographers who need color calibration on a tight budget.
Best Entry Point for Camera Calibration
If you have never used a camera calibration target and want to try the workflow without a large investment, the SpyderCHECKR 24 is the ideal starting point. It costs less than half the price of the Calibrite Passport Photo 2 while delivering similar core functionality. The color science is solid, and the software integration with major editing applications is smooth.
For professional photographers who rely on camera calibration daily, the Calibrite ColorChecker Passport Photo 2 offers better build quality and a more comprehensive target set. But for hobbyists, enthusiasts, and professionals who need a backup target, the SpyderCHECKR 24 delivers excellent value.
Software Workflow with Lightroom and DaVinci Resolve
The SpyderCHECKR software generates HSL presets that can be imported into Lightroom as develop presets. In Lightroom, you apply the preset during import, and all images from that shoot receive the color correction automatically. The preset adjusts hue, saturation, and luminance for each color channel based on the measurements from your target photograph.
In DaVinci Resolve, the software creates color correction nodes that can be applied as a starting point for your grade. For Premiere Pro users, it generates Lumetri Color settings. The multi-application support makes the SpyderCHECKR 24 versatile across different editing workflows. The software requires a download and registration with your serial number, which is a minor inconvenience but standard practice for calibration software.
Buying Guide: How to Choose Color Calibration Tools for Photographers
Choosing the right color calibration tool depends on where you are in your photography workflow and what types of color problems you are trying to solve. After testing all 10 products in this guide, I have identified the key factors that should drive your decision. Understanding color theory principles can also help you appreciate why calibration matters for your creative output.
1. Identify What You Need to Calibrate
The first question to answer is whether you need monitor calibration, camera calibration, or both. Monitor calibrators (colorimeters) correct your display so the colors you see while editing are accurate. Camera calibration targets correct your camera’s color capture so your raw files contain accurate color data. Most photographers should start with monitor calibration, then add camera calibration as their needs and budget grow.
In this guide, the monitor calibrators are the Calibrite Display 123, Display Pro, Datacolor Spyder, SpyderPro, Spyder X2 Elite, and Spyder X Pro. The camera calibration tools are the Calibrite Passport Photo 2, Passport Video 2, ColorChecker Classic, and SpyderCHECKR 24. If you can only buy one device, choose a monitor calibrator first.
2. Check Your Display Type Compatibility
Not all calibrators work with all display technologies. Standard LED and IPS displays are supported by virtually every device in this guide. However, if you use an OLED, mini-LED, or Apple Liquid Retina XDR display, you need to verify compatibility. The Datacolor Spyder, SpyderPro, and Spyder X2 Elite all advertise support for these advanced display types, as does the Calibrite Display Pro.
If you are planning to upgrade your monitor in the near future, consider buying a calibrator that supports the display type you will be moving to. This is especially relevant for photographers considering the move to OLED or mini-LED, which are becoming more common in professional editing environments. Our photo scanners for negatives guide covers related hardware considerations for photographers building a complete digital workflow.
3. Consider Calibration Speed and Ease of Use
Calibration speed varies significantly between devices. The Datacolor Spyder completes calibration in approximately 90 seconds, while the Spyder X Pro takes 1 to 2 minutes. Some older or more advanced devices can take 5 minutes or longer. If you plan to calibrate weekly, speed matters. For monthly calibration, it is less critical.
Ease of use is equally important. Beginner-friendly devices like the Calibrite Display 123 and the Datacolor Spyder use guided wizards with minimal options. Professional devices like the Display Pro and SpyderPro offer extensive customization but require more knowledge to use effectively. Match the device complexity to your comfort level with color management concepts.
4. Evaluate the Software Ecosystem
The software that comes with your calibrator is as important as the hardware. Calibrite uses the PROFILER and ccProfiler applications, which integrate well with Adobe Lightroom and Photoshop. Datacolor uses its proprietary Spyder software, which includes features like Studio Match, soft proofing, and room light monitoring. Both ecosystems are mature and regularly updated.
Before buying, check user reviews for the specific software version, as software quality can vary between updates. Common complaints include slow performance, activation issues, and compatibility problems with certain operating systems. Forum discussions on Reddit’s photography and colorists communities frequently highlight software frustrations as the primary drawback of both Calibrite and Datacolor products.
5. Factor in Display Quantity and Studio Needs
If you work with a single monitor, any calibrator in this guide will serve you well. For multi-monitor setups, pay attention to display limits. The Calibrite Display 123 supports 2 displays, the Display Pro supports 4, and the Datacolor SpyderPro supports an unlimited number. The Spyder X2 Elite includes a Studio Match feature specifically designed for multi-monitor studio calibration.
For photographers who present work on projectors, both the Calibrite Display Pro and the Datacolor SpyderPro include projector calibration features. This is a niche requirement but an important one for event photographers and those who do client presentations. Similarly, 4K projectors used for client viewings also benefit from periodic calibration.
6. Budget vs Professional Requirements
Entry-level calibrators like the Calibrite Display 123 and the Datacolor Spyder cover the needs of most enthusiast photographers. Professional photographers who sell prints, work with clients, or need print-to-screen matching should invest in mid-range or professional devices. The sweet spot for most working photographers is the Spyder X2 Elite or the SpyderPro, which offer professional features without the premium price of the highest-end devices.
For camera calibration, the SpyderCHECKR 24 is the budget entry point, while the Calibrite Passport Photo 2 is the professional standard. If you shoot under varied lighting conditions and need camera profiles for different environments, the Passport’s portability and comprehensive target set justify the higher cost. For studio photographers with controlled lighting, the SpyderCHECKR 24 or ColorChecker Classic are sufficient.
7. Calibration Frequency and Maintenance
Most manufacturers recommend calibrating your monitor every 2 to 4 weeks. Display technology drifts over time, meaning a monitor calibrated today will gradually shift out of spec. OLED displays tend to drift more than IPS panels. Photographers who edit daily should calibrate every 2 weeks. Casual editors can get away with monthly calibration.
Camera calibration targets degrade over time due to UV exposure and physical wear. Plan to replace color reference targets every 1 to 2 years for outdoor shooters and every 2 to 3 years for studio photographers. Store targets in protective cases away from direct sunlight when not in use. If you are building a complete color-managed workflow, consider pairing your monitor calibration with professional lighting equipment that has consistent color temperature.
FAQs
What monitor calibration tool is recommended for photographers?
The Calibrite Display 123 is our top recommendation for most photographers. It offers an easy 1-2-3 guided workflow, supports two displays, and delivers accurate color calibration at an accessible price point. For professionals who need unlimited display support, the Datacolor SpyderPro or Spyder X2 Elite are stronger choices.
How to choose the best monitor calibrator?
Consider five factors: your display type (LED, OLED, mini-LED), the number of monitors you need to calibrate, calibration speed, software features, and your budget. Entry-level calibrators like the Calibrite Display 123 or Datacolor Spyder cover most photographers. Professionals should look at the SpyderPro or Spyder X2 Elite for advanced features like unlimited calibration settings and Studio Match.
Is monitor calibration necessary for photographers?
Yes. Uncalibrated monitors display colors inaccurately, leading to edited photos that look wrong on other devices or in print. Common issues include color casts, oversaturated skin tones, and brightness mismatches. Even expensive monitors drift over time and require regular calibration to maintain accuracy. Photographers who sell prints or deliver client work need calibration to ensure consistent, professional results.
What is the difference between Calibrite and Datacolor Spyder?
Calibrite (formerly X-Rite) offers the Display 123 for beginners and the Display Pro for professionals, with ccProfiler software known for accuracy. Datacolor offers the Spyder lineup with features like 90-second calibration, room light monitoring, and Studio Match. Calibrite tends to have slightly more accurate sensors, while Datacolor offers faster workflows and more intuitive software. Both brands are trusted by professionals worldwide.
How often should you calibrate your monitor?
Calibrate every 2 to 4 weeks for optimal accuracy. Monitors drift over time, with OLED panels drifting faster than IPS displays. Photographors who edit daily should calibrate every 2 weeks. If you edit occasionally, monthly calibration is sufficient. Most calibration software includes a reminder feature to help you maintain a regular schedule.
Final Thoughts on Color Calibration Tools for 2026
Color calibration is not optional for photographers who care about delivering consistent, professional results. The best color calibration tools for photographers range from beginner-friendly devices like the Calibrite Display 123 to professional solutions like the Datacolor SpyderPro and Spyder X2 Elite. Camera calibration tools like the Calibrite Passport Photo 2 and SpyderCHECKR 24 round out the workflow by ensuring your captures are as color-accurate as your display.
My top recommendation for most photographers is the Calibrite Display 123 for monitor calibration paired with the SpyderCHECKR 24 for camera profiling. Together, they cover both ends of the color pipeline at an accessible combined cost. For working professionals, stepping up to the Spyder X2 Elite for its video targets and Studio Match feature is worth the investment. Whatever you choose, the most important step is to start calibrating. An imperfect calibration is infinitely better than no calibration at all.