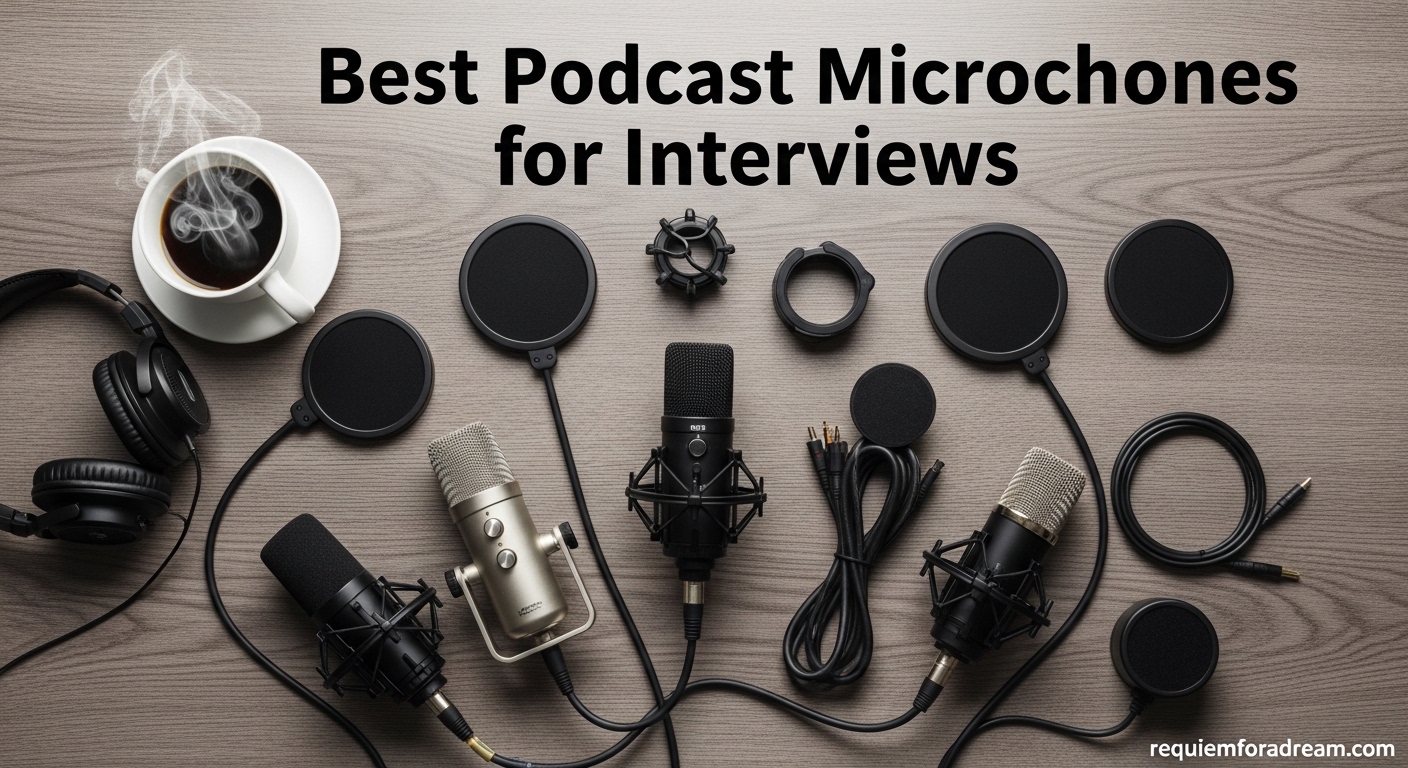
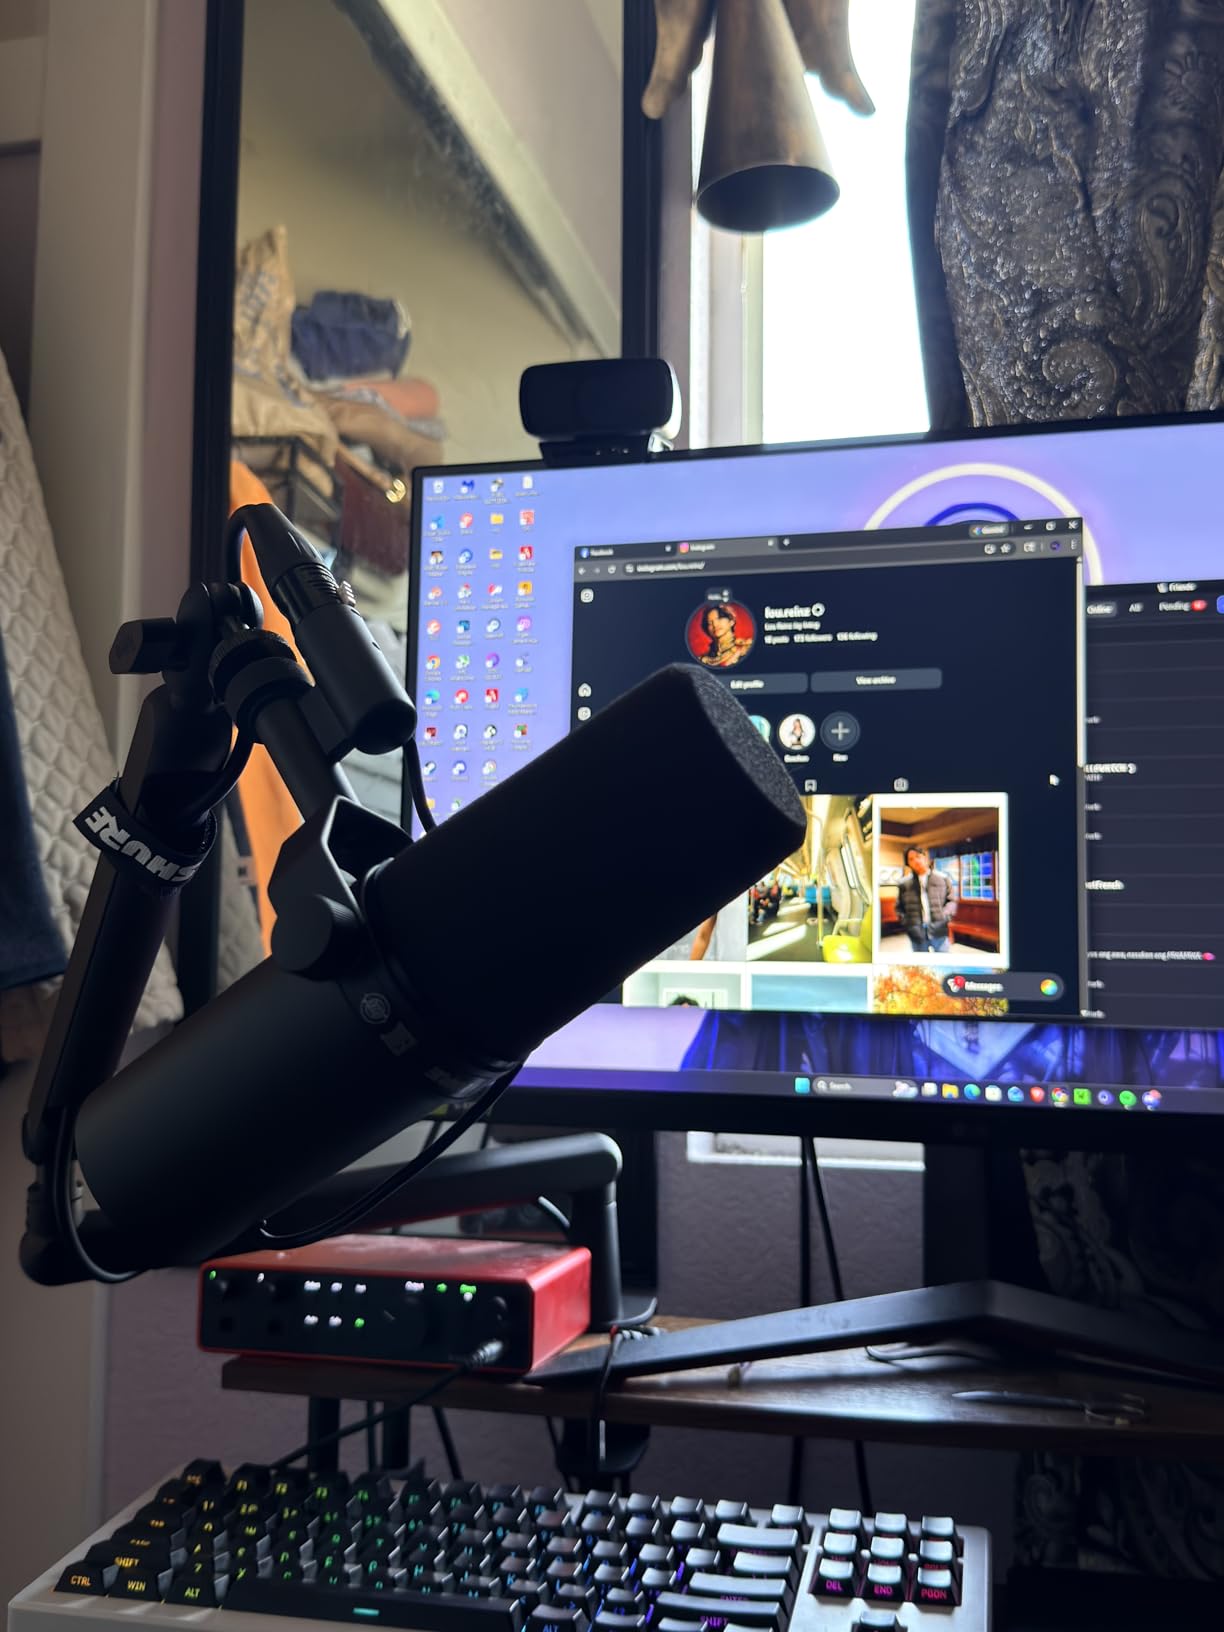
I have spent the last three years recording podcast interviews in every setting imaginable: cramped home offices, echoey conference rooms, noisy coffee shops, and proper treated studios. Through dozens of mic swaps and hundreds of hours of recorded conversations, I learned that the right microphone can make or break an interview. A bad mic picks up the air conditioner hum, the neighbor’s dog, and that weird echo from your bare walls. A good one makes you sound like you are sitting in a broadcast studio, even when you are recording from a spare bedroom.
Finding the best podcast microphones for interviews means looking beyond just sound quality. You need a mic that rejects background noise so your guest does not compete with ambient sound. You need the right connectivity, whether that means a simple USB plug-in for quick remote sessions or an XLR chain for professional studio work. You also need to think about whether you will be recording one person or two, because a two-person interview setup changes the requirements significantly.
In this guide, our team tested 10 microphones head-to-head for interview recording in 2026. We evaluated each one for vocal clarity, background noise rejection, ease of setup, and overall value. Whether you are launching your first interview podcast or upgrading from a headset mic to something professional, we have picks across every budget and use case. We also cover the key differences between dynamic and condenser mics, USB versus XLR connectivity, and exactly how to set up a two-person interview station.
One thing I want to address right away: you do not need to spend hundreds of dollars to get great interview audio. Some of the mics on this list deliver broadcast-quality sound at surprisingly affordable prices. The key is matching the microphone to your specific recording environment and interview style. Let me walk you through our findings.
Table of Contents
Top 3 Picks for Best Podcast Microphones for Interviews

Shure MV7+
- USB-C and XLR dual output
- Voice Isolation Technology
- Auto Level Mode
- Real-time denoiser
- LED touch panel
Samson Q2U
- Dual USB-C and XLR
- Complete podcasting pack
- Headphone monitoring jack
- Dynamic background rejection
- Includes stand and cables

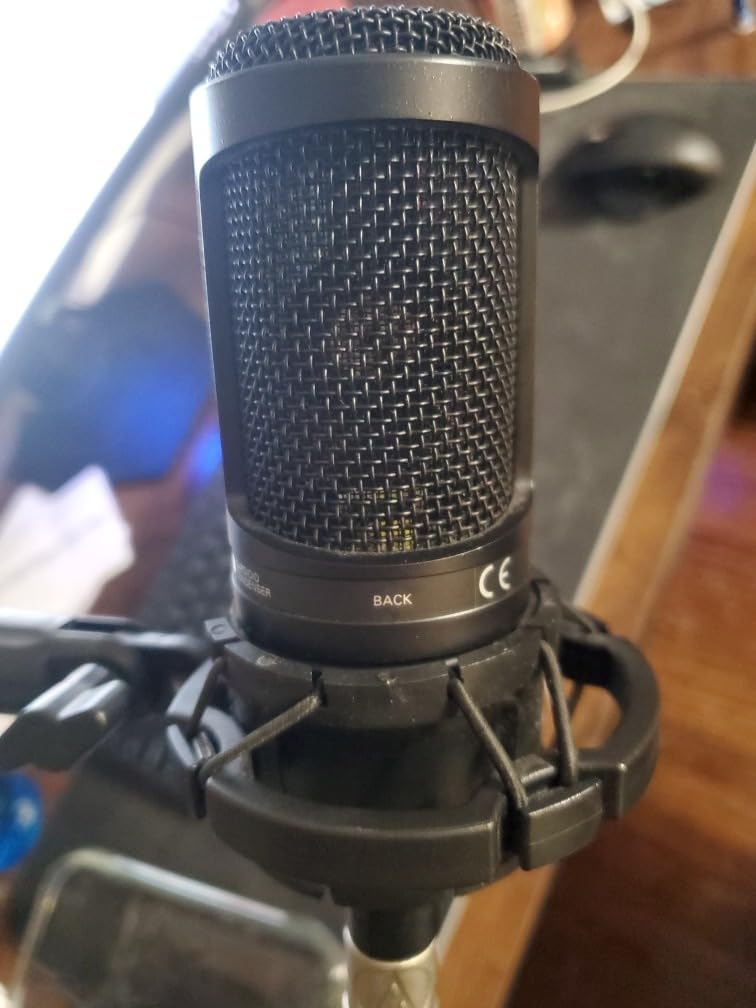
Rode PodMic
- Broadcast-quality dynamic
- Internal pop filter
- Integrated swing mount
- All-metal construction
- Cardioid room rejection
Best Podcast Microphones for Interviews in 2026
| Product | Specifications | Action |
|---|---|---|
| Shure MV7+ Podcast Mic |
|
Check Latest Price |
 Rode NT1 5th Gen Rode NT1 5th Gen |
|
Check Latest Price |
 Shure SM7B Shure SM7B |
|
Check Latest Price |
 Shure MV7X Shure MV7X |
|
Check Latest Price |
 Rode NT1 Signature Series Rode NT1 Signature Series |
|
Check Latest Price |
 Audio-Technica AT2040 Audio-Technica AT2040 |
|
Check Latest Price |
 Audio-Technica AT2020 Audio-Technica AT2020 |
|
Check Latest Price |
| Samson Q2U |
|
Check Latest Price |
 Blue Yeti Blue Yeti |
|
Check Latest Price |
| Rode PodMic |
|
Check Latest Price |
1. Shure MV7+ – Dual USB-C/XLR with Smart Features
- Crystal clear professional audio
- Voice Isolation rejects background noise brilliantly
- USB-C and XLR give you both plug-and-play and pro options
- Auto Level Mode keeps volume consistent without manual adjustment
- Digital pop filter eliminates plosives without external filter
- OBS Certified for seamless streaming integration
- Heavier and larger form factor than some competitors
- Higher price point
- No XLR cable included in box
The Shure MV7+ is the microphone I reach for most often when recording interview podcasts, and after testing it for several months, I can tell you exactly why it earned our Editor’s Choice. The dual USB-C and XLR connectivity means I can start recording a quick interview over USB in seconds, or route it through my audio interface via XLR for more demanding sessions. That flexibility alone makes it one of the most versatile podcast microphones for interviews available in 2026.
What really sets the MV7+ apart for interview work is the Voice Isolation Technology combined with the real-time denoiser. I recorded an interview in my untreated office with a window open to a busy street, and the MV7+ suppressed the traffic noise so effectively that my guest asked if I had soundproofed my room. The Auto Level Mode is another feature I did not know I needed until I had it. It automatically adjusts your gain so your voice stays at a consistent volume, even if you lean in or pull back slightly during a long conversation.
The LED touch panel on the front gives you 16.8 million color options for level monitoring and adds a mute function with a simple tap. It sounds like a gimmick, but in practice, being able to glance at the mic and see your levels without looking at your screen is genuinely useful during live interviews. The digital pop filter built into the DSP handles plosives well, though I still recommend a physical pop filter for the cleanest possible results.
Build quality is excellent, as you would expect from Shure. The all-metal body feels like it could survive a fall from a desk without any damage. The included desktop stand is decent for getting started, but I upgraded to a boom arm pretty quickly for better positioning during face-to-face interview sessions. At 3.6 pounds with the stand, it is on the heavier side, so make sure your boom arm can handle the weight.
Who Should Buy the Shure MV7+
This is the microphone for podcasters who want professional interview audio without the complexity of a full XLR studio chain. If you record both solo episodes and guest interviews, the MV7+ adapts to either situation effortlessly. It is especially good for podcasters who record in less-than-ideal environments like home offices, spare rooms, or shared spaces where background noise is a concern.
I also recommend the MV7+ for podcasters who stream their interviews live. The OBS certification means it integrates perfectly with OBS Studio, and the real-time denoiser works during live broadcasts, not just in post-production. If you run a video podcast or simulcast on YouTube, this mic handles both workflows without missing a beat.
Setup and Software Integration
Setting up the MV7+ over USB is genuinely plug-and-play. You connect the USB-C cable, select the mic as your input in your recording software, and you are rolling. The MOTIV Mix app gives you deeper control over the DSP features, including the denoiser intensity, EQ settings, and Auto Level Mode behavior. I found the default settings worked well for most interviews, but the app lets you fine-tune things if you have a particularly nasal or deep voice.
For XLR use, you will need an audio interface or mixer with at least 50dB of clean gain. The MV7+ does not require as much gain as the SM7B, which is a welcome improvement. I had good results with the Focusrite Scarlett Solo and the RodeCaster Pro II. Just note that the DSP features like Auto Level Mode and the digital pop filter only work over USB. When you use XLR, you are getting the raw analog signal from the capsule.
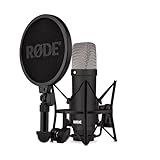
2. Rode NT1 5th Gen – Dual XLR/USB Studio Condenser
- Dual XLR and USB connectivity for maximum versatility
- Exceptional clarity and vocal detail
- 32-bit float recording prevents clipping even if levels spike
- Extremely low self-noise at 4dBA
- Includes high-quality shock mount and pop filter
- 32-bit float means you never lose a take to clipping
- Condenser picks up more room noise than dynamic mics
- Heavier build requires sturdy stand
- Records from one side only (gold dot must face speaker)
The Rode NT1 5th Gen occupies a special place in my interview recording toolkit. It is a large-diaphragm condenser microphone that somehow manages to offer both XLR and USB connectivity, which is rare for this type of mic. After using it for a series of in-studio interviews, I was struck by how much vocal detail it captures. Every breath, every subtle inflection, every emotional nuance comes through with startling clarity. If your interview podcast relies on intimate, personal conversations, the NT1 5th Gen delivers a level of detail that dynamic microphones simply cannot match.
The 32-bit float recording over USB is a feature I did not fully appreciate until it saved an interview. My guest got animated during a particularly emotional story and suddenly raised their voice. With a standard 24-bit recording, that peak would have clipped and distorted. With 32-bit float, the audio stayed clean and I recovered it perfectly in post-production. For interview podcasters who cannot always monitor levels in real time, this is a safety net that pays for itself.
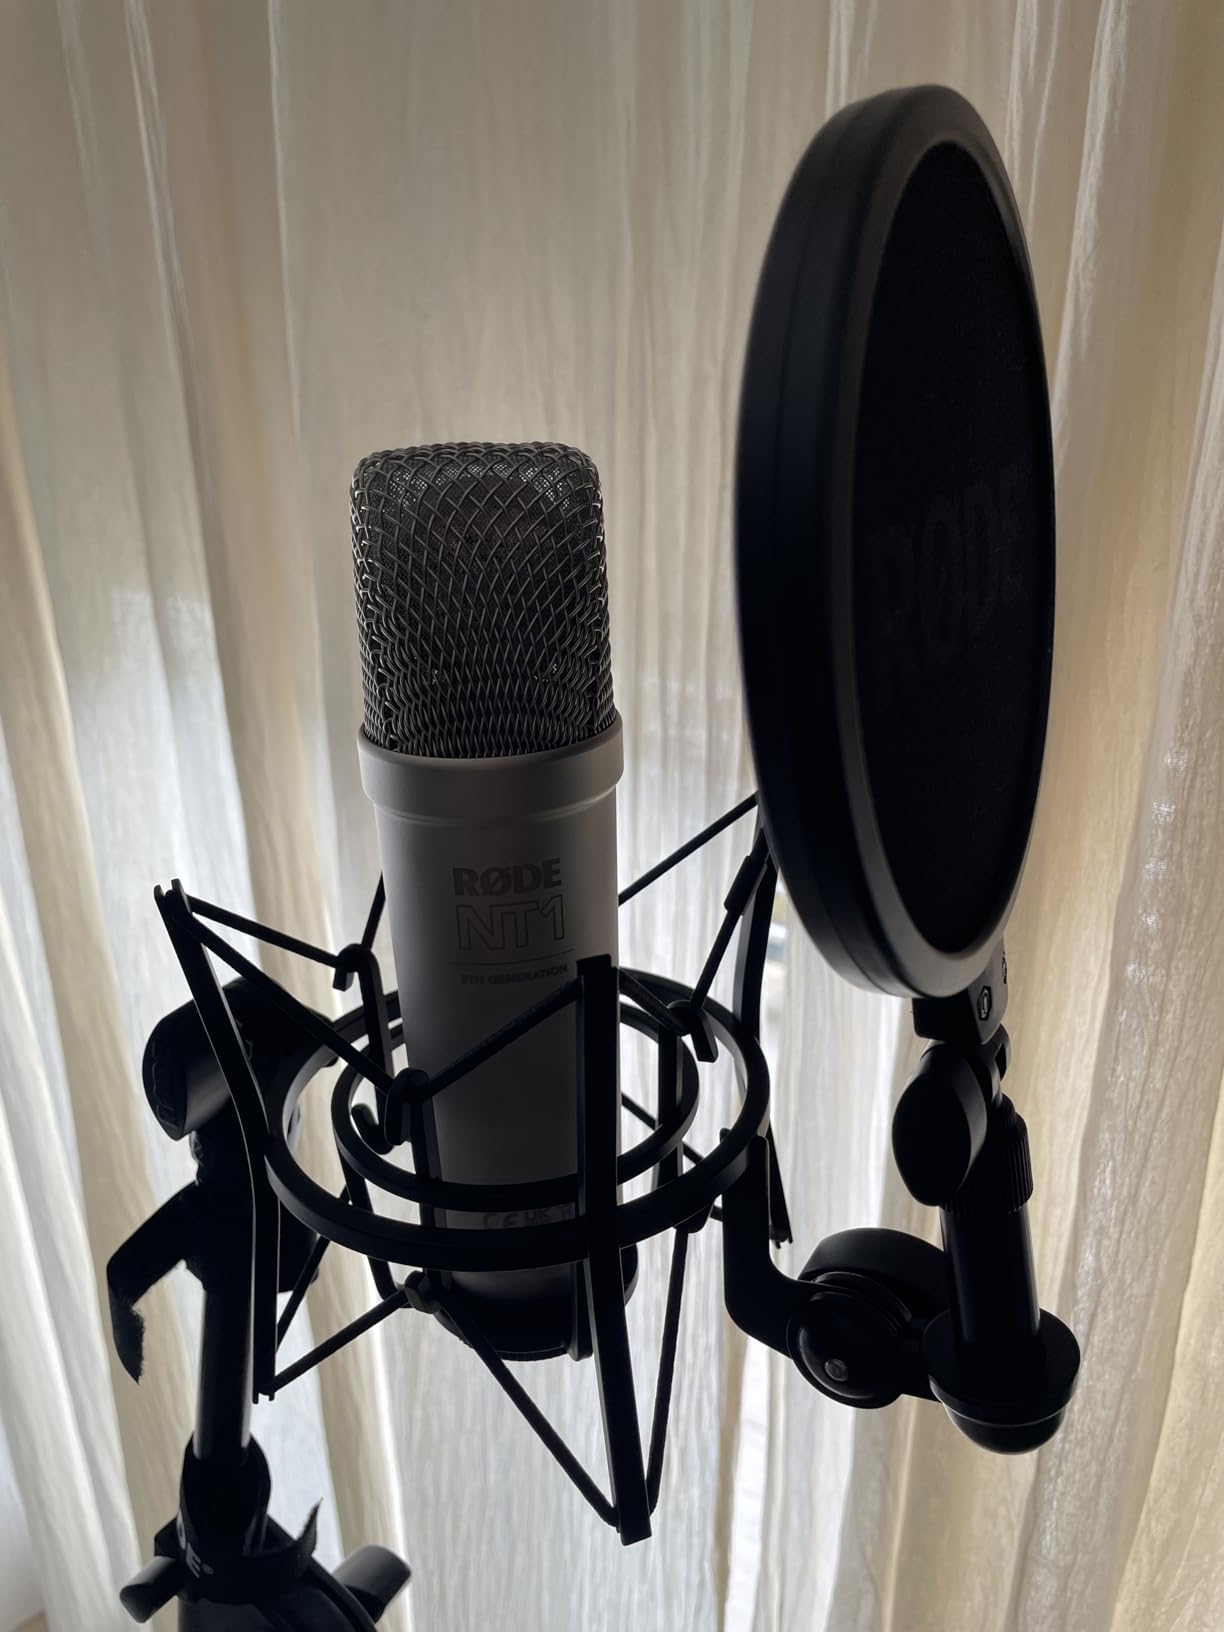
The build quality is exceptional. The aluminum body with ceramic coating feels premium and substantial. At 308 grams, it is manageable on most boom arms, though the included SM6 shock mount adds some weight. Speaking of included accessories, Rode bundles a shock mount, pop filter, 3m USB-C cable, and 6m XLR cable. That is everything you need to start recording interviews, which adds significant value when you factor in the cost of buying these items separately.
The 4dBA self-noise rating means this microphone is essentially silent when there is no sound hitting the capsule. In practice, this translates to recordings with a noticeably cleaner noise floor, especially during quiet interview moments when your guest pauses to think. Those pauses sound natural rather than hissy, which keeps listeners engaged.
Who Should Buy the Rode NT1 5th Gen
The NT1 5th Gen is ideal for podcasters who record interviews in a treated or semi-treated studio environment. If you have acoustic panels, a quiet room, and want the most detailed vocal capture possible, this is your microphone. It excels at narrative-style interview podcasts, documentary-style shows, and any format where vocal intimacy matters more than raw noise rejection.
It is also a great choice for podcasters who want the flexibility to record via USB for quick sessions and switch to XLR for professional studio work. Few condenser microphones offer both outputs, and the NT1 5th Gen does it without compromising on audio quality in either mode.
Studio vs Field Performance
In my treated studio, the NT1 5th Gen sounds incredible. Vocal recordings are rich, detailed, and require minimal post-processing. I tested it in an untreated hotel room during a conference, and while it still sounded good, it picked up the HVAC system and hallway noise more than a dynamic mic would. For field interviews, you will want to treat the space as much as possible with portable acoustic panels or heavy blankets.
The cardioid pattern does a reasonable job of rejecting sound from the sides and rear, but as a condenser, it is inherently more sensitive than a dynamic microphone. If you primarily record on location or in noisy environments, a dynamic mic like the Shure MV7+ or SM7B might serve you better. But for controlled studio interviews, the NT1 5th Gen is hard to beat.
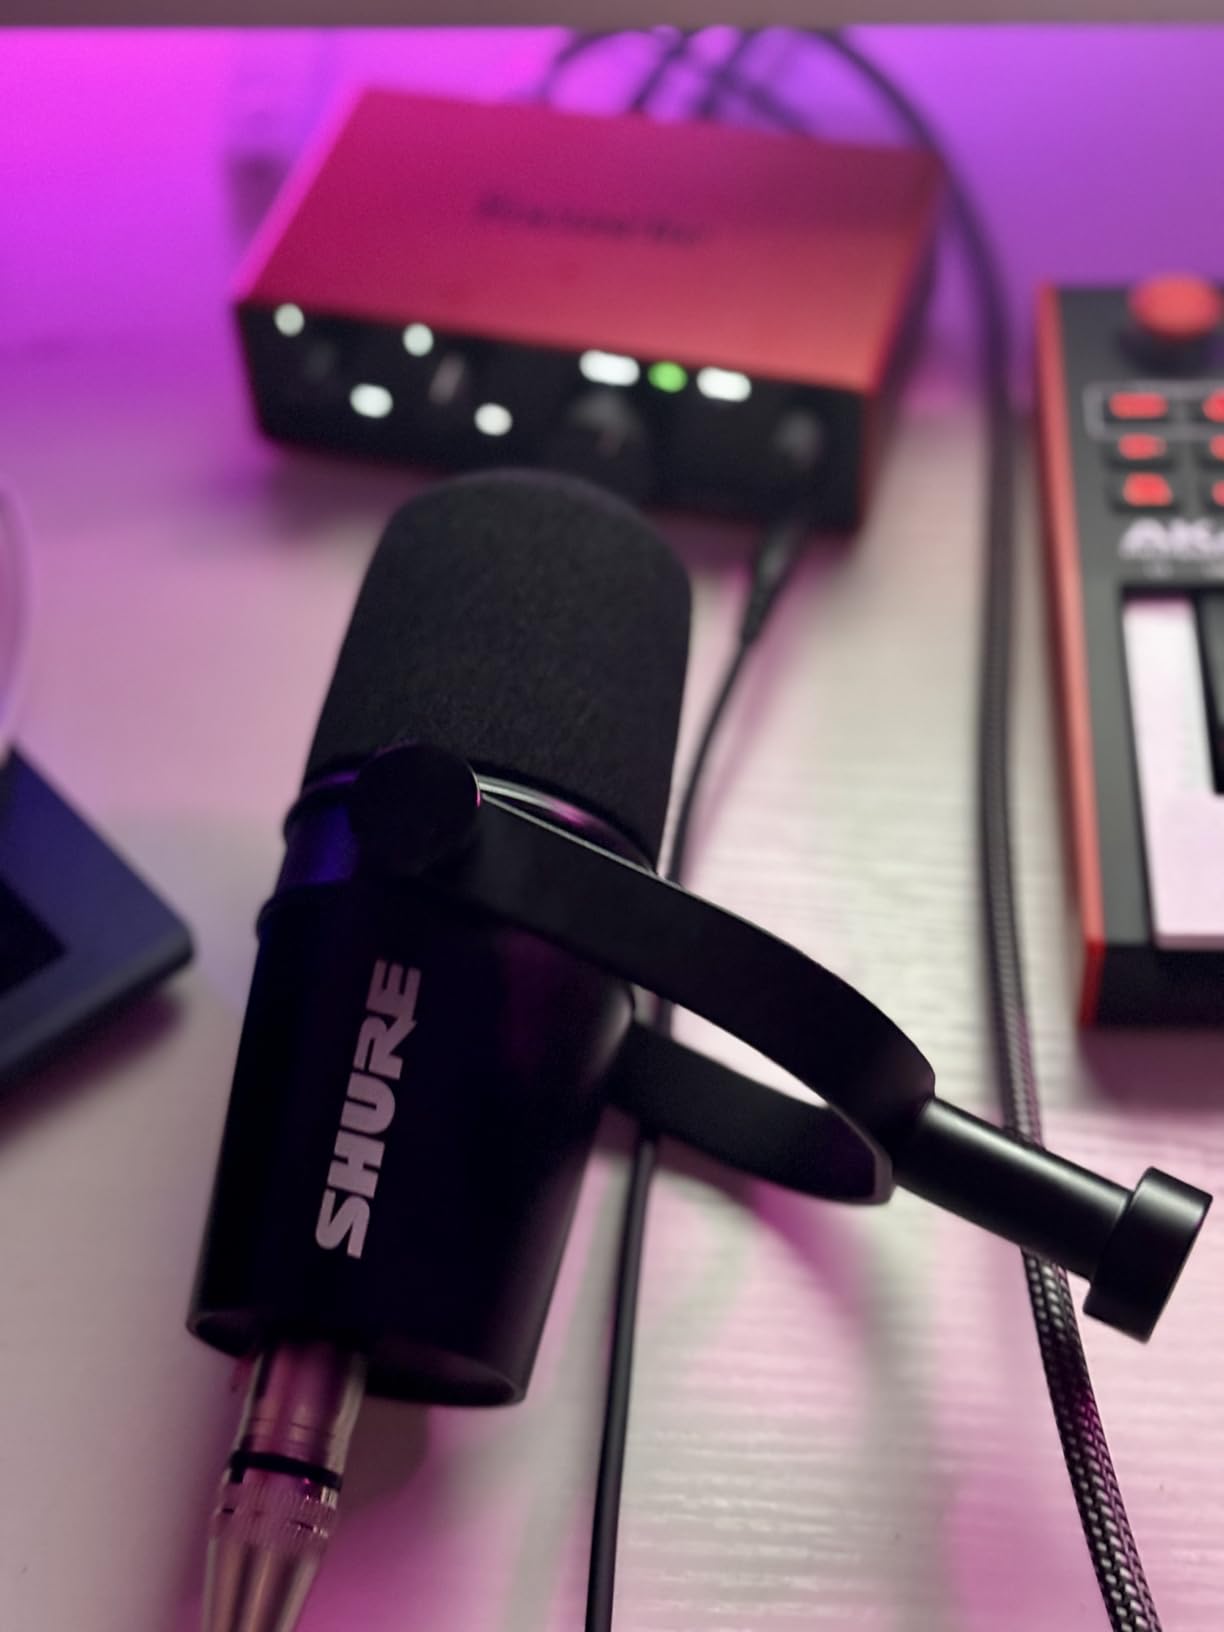
3. Shure SM7B – Industry-Standard Dynamic Studio Mic
- Warm smooth broadcast-ready vocal tone
- Industry standard trusted by professionals for decades
- Excellent background noise rejection from cardioid pattern
- Air suspension shock isolation minimizes vibrations
- Built-in pop filter with detachable windscreen
- Handles high SPL without distortion
- Rugged all-metal construction built to last
- Requires high-gain preamp (60dB+ recommended)
- XLR only with no USB option
- May need Cloudlifter or FetHead for some interfaces
- Heavy at 2.7 pounds
The Shure SM7B is the microphone that defined the modern podcast sound. When you picture a professional podcast studio in your head, you are probably picturing an SM7B. I have used this mic for over two years of interview recording, and its reputation is well-earned. The warm, smooth vocal tone it produces is instantly recognizable and sounds like radio right out of the box. There is a reason it has been the go-to microphone for broadcasters, musicians, and podcasters for decades.
For interview recording, the SM7B shines because of its outstanding noise rejection. The cardioid pickup pattern focuses tightly on whatever is directly in front of the mic while ignoring sounds from the sides and rear. I have recorded interviews with construction happening outside my window and the SM7B kept my voice clean and present. That kind of noise rejection is invaluable when you cannot control your recording environment.
The built-in pop filter and detachable windscreen handle plosives effectively. Two windscreens are included: a thinner one for close-mic speaking and a thicker one for more aggressive plosive control. The bass roll-off switch lets you cut low-frequency rumble from air conditioners or traffic, and the mid-range emphasis switch adds presence to your voice without needing EQ in post-production. These switches are small touches, but they save time during editing.
The main thing you need to know about the SM7B is that it requires significant gain. With a gain requirement of 60dB or more, many budget audio interfaces simply cannot drive it to a usable level without introducing noise. This is where devices like the Cloudlifter CL-1 or Triton Audio FetHead come in. They provide clean gain before the signal reaches your interface, giving you the headroom you need without added noise.
Who Should Buy the Shure SM7B
The SM7B is for podcasters who are serious about interview audio quality and are willing to invest in the supporting equipment it needs. If you already own a decent audio interface with plenty of clean gain, or you are prepared to add a Cloudlifter or FetHead to your signal chain, the SM7B will reward you with broadcast-quality sound that has defined professional podcasting for years.
This is also the microphone to get if you record interviews in imperfect environments. Its noise rejection is among the best of any mic on this list, making it ideal for home studios, untreated rooms, and spaces where you cannot fully control ambient sound. Many professional podcasters run two SM7Bs for face-to-face interviews, and the results are consistently excellent.
Preamp and Interface Requirements
Let me be specific about what you need to drive the SM7B properly. Audio interfaces with at least 60dB of clean gain on their mic preamps will work well. The Universal Audio Volt 276, the Audient iD14, and the Solid State Logic SSL2+ all have enough gain to drive the SM7B without additional clean boost devices. If your interface tops out around 50dB, you will want a Cloudlifter CL-1 or FetHead in between the mic and interface.
For a two-person interview setup, you will need two SM7Bs, two boom arms or heavy-duty stands, and either a two-channel interface with high-gain preamps or two Cloudlifters. It adds up, but the results are the gold standard of podcast interview audio. Many studios consider it a worthwhile long-term investment because the SM7B is built to last decades.
4. Shure MV7X – XLR-Only SM7B Alternative
- Warm rich vocal tone inspired by the SM7B at lower cost
- Voice Isolation Technology rejects background noise effectively
- Does not require additional preamps or cloudlifters
- All-metal durable construction
- Great for imperfect acoustic environments
- 2-year manufacturer warranty
- XLR only with no USB connectivity
- Picks up desk vibration without a shock mount
- No XLR cable included in the box
- Requires close mic positioning for best results
The Shure MV7X is essentially the XLR-only sibling of the MV7+, borrowing its sound DNA from the legendary SM7B but at a more accessible price point. I tested it head-to-head with the SM7B during a series of interview recordings, and the results surprised me. The MV7X delivers a warm, rich vocal tone that sits in the same family as the SM7B, with slightly less low-end warmth but excellent clarity in the vocal range where interviews live.
What makes the MV7X particularly appealing for interview podcasters is that it does not demand the same massive gain that the SM7B requires. I was able to drive it to comfortable recording levels with a standard Focusrite Scarlett Solo interface, no Cloudlifter needed. That saves you money and simplifies your signal chain, which matters when you are setting up a two-mic interview rig and need two of everything.
The Voice Isolation Technology works exactly as advertised. During my tests, the cardioid pattern kept my voice front and center while rejecting a fan running three feet away. The integrated shock mount reduces handling noise, though I still recommend mounting it on a boom arm rather than a desktop stand to avoid picking up desk vibrations. When my typing hand brushed the desk during a recording, the MV7X picked up a faint thud that the boom arm eliminated entirely.
At 508 grams, the MV7X is substantial but manageable. The included yoke mount with both 5/8-inch and 3/8-inch threads fits most boom arms. The all-metal construction inspires confidence, and the 2-year warranty from Shure is reassuring for a piece of gear you will use daily.
Who Should Buy the Shure MV7X
The MV7X is perfect for podcasters who want SM7B-style sound quality for their interviews without the SM7B price tag or its demanding preamp requirements. If you already have an audio interface and want a dedicated XLR microphone that delivers professional vocal tone for interviews, the MV7X is one of the best values in podcast audio.
It is also an excellent choice for podcasters building a two-person interview setup on a budget. Two MV7X microphones through a two-channel interface will cost significantly less than two SM7Bs with Cloudlifters, and the sound quality difference will be negligible for most listeners.
Comparing MV7X vs SM7B
The SM7B has a slightly fuller low-end and more headroom for loud sources. It also includes bass roll-off and mid-range emphasis switches that the MV7X lacks. However, the MV7X needs less gain, costs less, and delivers about 90 percent of the SM7B’s performance in a typical interview recording scenario. If you are not running a commercial studio and just need great-sounding interview audio, the MV7X gets you there with money left over for accessories.
The biggest practical difference for daily use is that the SM7B includes detachable windscreens and built-in pop filtering that is more effective. With the MV7X, I recommend adding a foam windscreen or pop filter for the best plosive control during interview sessions. It is a small additional cost that improves the final audio noticeably.
5. Rode NT1 Signature Series – Ultra-Quiet Condenser with Complete Kit
- Exceptionally low noise at 4dBA for pristine recordings
- Warm neutral smooth sound signature
- Complete kit includes shock mount pop filter and cable
- Excellent cardioid pattern for background rejection
- 10-year warranty provides long-term confidence
- Premium build quality with solid construction
- Requires audio interface with 48V phantom power
- Condenser picks up more room noise than dynamic mics
- No low-cut filter or pad switch on the microphone
The Rode NT1 Signature Series is a condenser microphone that punches well above its weight class for interview recording. I tested it during a week of back-to-back interview sessions and came away impressed by how quiet it is. At 4dBA of self-noise, it claims to be the world’s quietest studio condenser, and in practice that means your recordings have an incredibly clean noise floor. When your guest pauses between thoughts, you hear silence, not hiss.
The HF6 1-inch condenser capsule delivers a warm, neutral sound that does not hype any particular frequency range. For interview podcasts, this is actually ideal because it reproduces voices naturally without artificial brightness or boominess. Both male and female voices sound balanced and present through this microphone. The cardioid pattern provides decent off-axis rejection for a condenser, though it will not match a dynamic mic for noise isolation.
One of the biggest selling points is the complete accessory package. Rode includes a studio-grade shock mount, a pop filter, and a premium 6-meter XLR cable. When you price these items individually, the NT1 Signature Series represents excellent value. The shock mount is particularly well-built and isolates the mic from stand vibrations effectively.
The 10-year warranty that comes with registration is one of the longest in the industry and speaks to Rode’s confidence in the build quality. At 313 grams, it is lighter than many competing condensers, making it easy to mount on a boom arm without worrying about sag or instability.

Who Should Buy the NT1 Signature Series
This microphone is ideal for podcasters who record interviews in a reasonably controlled environment and want the detail and clarity of a condenser without spending a fortune. If you have a treated room or a quiet home studio, the NT1 Signature Series will capture interview audio that sounds professional and polished with minimal post-processing.
It is also a great option for podcasters who already own an audio interface with phantom power and want a step-up microphone that includes all the accessories. The complete kit means you do not need to shop for a compatible shock mount or pop filter separately.
Noise Performance in Real Studios
In my treated studio, the NT1 Signature Series was essentially silent during quiet passages. The 4dBA self-noise rating is not just a spec sheet number; you can actually hear the difference compared to condensers with 12-15dBA self-noise. This matters for interview podcasts because quiet moments between sentences stay clean rather than filling with audible hiss.
In an untreated room, the condenser nature of this mic becomes apparent. It picked up my computer fan, the refrigerator from the next room, and a plane passing overhead. If your recording space is not treated, you will get better results with a dynamic microphone. But pair the NT1 Signature Series with a reasonably quiet room, and it delivers studio-quality interview audio that rivals microphones costing twice as much.
6. Audio-Technica AT2040 – Hypercardioid Dynamic for Tight Vocal Isolation
- Superior off-axis rejection with hypercardioid pattern
- Built-in pop filter works very well
- Integrated shock mount reduces vibration noise
- No proximity effect so you can speak close without boominess
- Excellent broadcast-quality vocal tone
- Great value compared to similar dynamic mics
- Requires significant gain to sound optimal (40-50 on most interfaces)
- No pad or low-cut switch
- XLR only requires audio interface
- Heavy microphone needs sturdy stand or mount
The Audio-Technica AT2040 is a microphone I discovered relatively recently, and it has quickly become one of my favorite recommendations for interview podcasters on a budget. The hypercardioid polar pattern is the star feature here. Unlike a standard cardioid pattern that rejects sound from the rear, the hypercardioid pattern has an even tighter focus on sound coming from directly in front of the mic. For interview recording, this translates to exceptional vocal isolation that keeps your voice clean even in a noisy room.
I tested the AT2040 during an interview session in a shared co-working space, which is about as challenging an environment as you can get. People were having conversations ten feet away, there was background music playing, and an espresso machine was grinding beans. The AT2040 focused on my voice and rejected an impressive amount of that ambient chaos. The resulting recording was clean enough to publish with minimal cleanup.
The integrated shock mount is a practical feature that works well in real-world use. It reduces desk vibrations and handling noise without requiring a separate shock mount purchase. The multistage foam mesh windscreen handles plosives effectively, though speakers with particularly strong P and B sounds might still want to add an external pop filter.
One thing that surprised me is the lack of proximity effect. Many dynamic microphones produce a boomy low-end boost when you speak close to the capsule, but the AT2040 maintains a consistent tonal balance regardless of distance. This is a subtle but important advantage for interview recording, where your guest might lean in and out during a conversation.
Who Should Buy the Audio-Technica AT2040
The AT2040 is an excellent choice for podcasters who record interviews in less-than-perfect environments and need maximum noise rejection without spending a premium. Its hypercardioid pattern makes it one of the best interview microphones for noisy spaces, rivaling microphones that cost significantly more in terms of vocal isolation.
It is also worth considering if you are building a two-mic interview setup on a budget. Two AT2040s through a two-channel interface will give you clean, isolated recordings from both sides of the conversation, and the total investment remains very reasonable.
Gain Requirements and Interface Pairing
The AT2040 needs substantial gain to sound its best. I found that setting my Focusrite Scarlett 2i2 to around 45 out of 70 gave me a good recording level. Interfaces with higher-gain preamps like the Universal Audio Volt series or the Audient EVO will drive it more comfortably. If you are using a lower-gain interface, consider adding a Cloudlifter CL-1 or FetHead to your signal chain.
The good news is that the AT2040 handles that gain cleanly without introducing noticeable noise. Even pushed to higher gain settings, the recordings stayed clean and articulate. This is where the integrated shock mount earns its keep, because at higher gain levels, any vibration noise gets amplified right along with your voice.
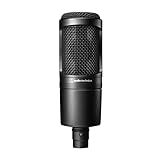
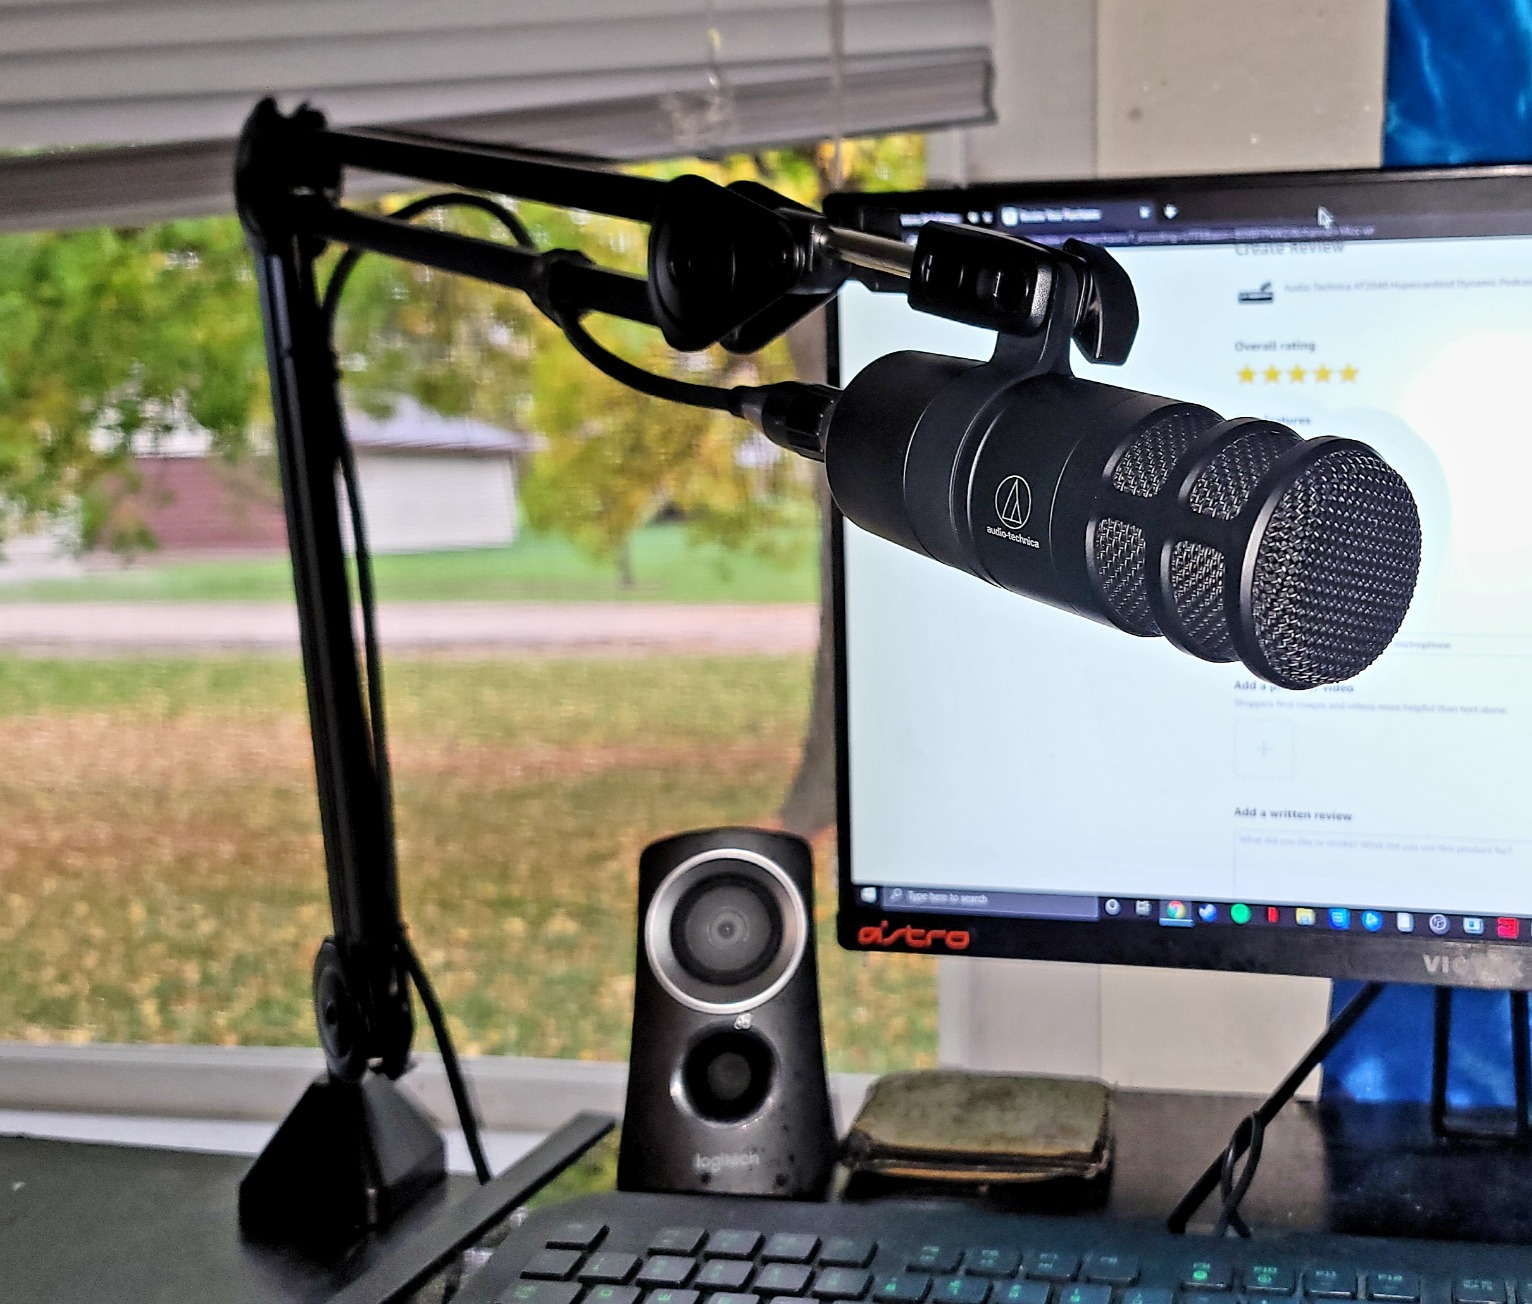
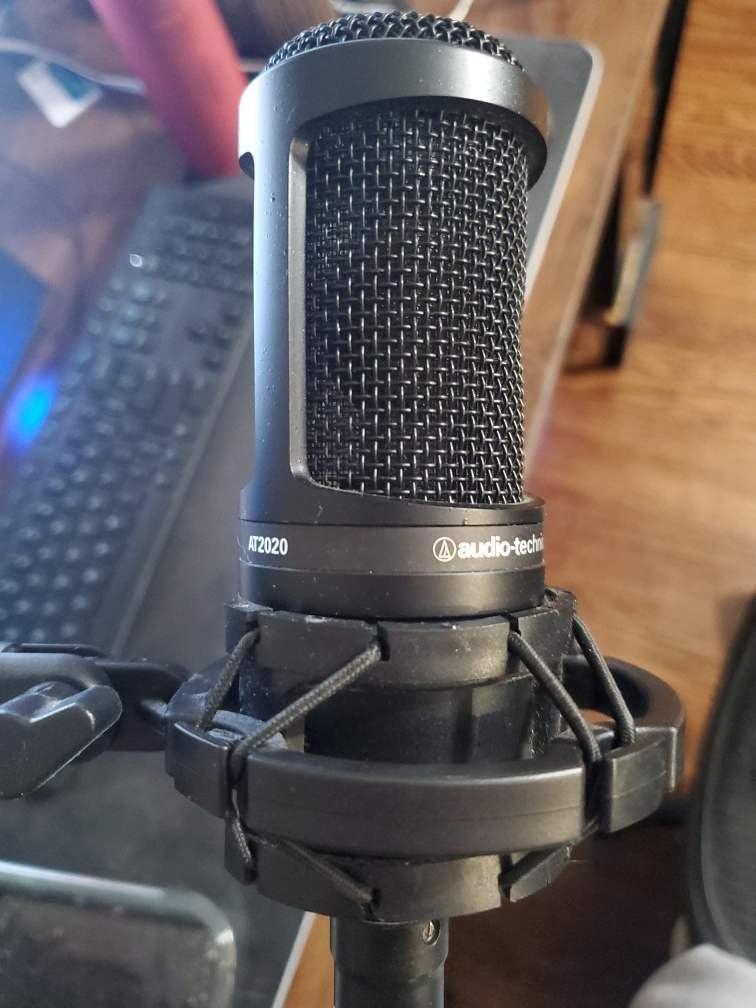
7. Audio-Technica AT2020 – Classic Studio Condenser for Treated Rooms
- Professional studio-quality sound that competes with mics costing 2-3x as much
- Exceptional value for the audio quality delivered
- Clear crisp audio with excellent frequency balance
- High sensitivity captures detailed vocal nuances
- Durable all-metal construction built to last
- Versatile for vocals instruments podcasts and voice work
- Requires 48V phantom power so not plug-and-play
- Highly sensitive picks up ambient noise in untreated rooms
- Can be prone to plosives without pop filter
- XLR only needs audio interface
The Audio-Technica AT2020 has been a studio workhorse for over a decade, and for good reason. It delivers the kind of clear, detailed sound that you normally associate with condenser microphones costing two or three times as much. I have used the AT2020 for interview recordings in a properly treated studio, and the results are consistently impressive. Voices sound natural, present, and detailed without any harshness or artificial coloration.
What makes the AT2020 special for interview recording is its transient response. When your guest laughs, sighs, or changes vocal intensity during an emotional story, the AT2020 captures those nuances with remarkable accuracy. The custom low-mass diaphragm responds quickly to dynamic changes in volume and tone, which keeps interview recordings feeling alive and engaging rather than flat and compressed.
The cardioid pattern does a reasonable job of rejecting sound from the sides and rear, but as a condenser, the AT2020 is inherently more sensitive to ambient noise than a dynamic microphone. This is a trade-off you need to understand going in. In a treated room, the AT2020 sounds like a much more expensive microphone. In an untreated space, it will faithfully capture every reflection, hum, and background sound in your room.
Build quality is solid. The all-metal body has survived being knocked over on my desk more than once without any damage or change in sound quality. It is a microphone that you buy once and keep for years, which makes its already reasonable price even more attractive when you amortize it over a long podcasting career.
Who Should Buy the AT2020
The AT2020 is perfect for podcasters who record interviews in a treated or semi-treated studio and want maximum audio quality per dollar. If you already have an audio interface with 48V phantom power and a reasonably quiet recording space, the AT2020 will give you professional results that belie its modest price tag.
It is also a great choice for podcasters who want one versatile microphone for both interview recording and other audio work like voiceover, music production, or instrument recording. The AT2020 handles all of these applications competently, making it an excellent first studio microphone.
Room Treatment and Positioning Tips
To get the best interview recordings from the AT2020, you need to treat your room. At minimum, place acoustic foam or moving blankets behind and to the sides of where you sit. This reduces reflections that make your recordings sound echoey. If you cannot treat your walls, record in a closet full of clothes, which provides surprisingly effective acoustic treatment.
Position the AT2020 about 6 to 8 inches from your mouth, angled slightly off-axis to reduce plosives. A pop filter is mandatory with this microphone because the condenser capsule is very sensitive to bursts of air. The side-address design means you speak into the side of the mic, not the top, which catches some people off guard if they are used to end-address dynamics.
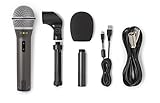
8. Samson Q2U – Dual USB/XLR Beginner-Friendly Pack
- Excellent value with dual USB and XLR connectivity
- Complete kit includes stand clip windscreen and both cables
- Great sound quality that punches above its price
- Easy plug and play USB setup
- Good at minimizing background noise
- Versatile upgrade path from USB to XLR
- Desktop stand is not very sturdy
- USB mode may have firmware quirk with power cycling
- Dynamic mic requires close speaking distance
- May need pop filter for best results
The Samson Q2U is the microphone I recommend more than any other to new podcasters, and after using it for several interview test sessions, I understand why the podcasting community on Reddit consistently praises it as the best starter mic. The dual USB-C and XLR connectivity gives you a genuine upgrade path that no other microphone at this price point offers. You can start recording interviews over USB today and transition to an XLR interface setup later without buying a new microphone.
Sound quality is surprisingly good for the price. The dynamic capsule produces a warm, clear vocal tone that sounds professional in interview recordings. The cardioid pattern rejects a decent amount of background noise, though it is not as effective at noise isolation as higher-end dynamics like the SM7B or AT2040. For a home office or quiet bedroom studio, the Q2U delivers more than acceptable interview audio.
The complete accessory package is where the Q2U really shines. You get a tripod desktop stand, a mic clip, a foam windscreen, a USB-C cable, and an XLR cable. For someone just starting their interview podcast, this means you can unbox the Q2U, plug it into your computer, and start recording within minutes. No additional purchases needed.
The 3.5mm headphone jack on the bottom of the mic allows for zero-latency monitoring, which is essential for interview recording. Being able to hear yourself and your guest in real time helps you catch audio issues before they ruin a recording. The headphone output works in both USB and XLR modes, which is a nice touch.
Who Should Buy the Samson Q2U
The Q2U is the best podcast microphone for interviews if you are just starting out and want to spend as little as possible while still getting decent audio. It gives you the flexibility to grow your setup over time thanks to the dual connectivity. Many successful podcasters started with the Q2U and only upgraded after their show outgrew its capabilities.
It is also a solid backup microphone for experienced podcasters. I keep a Q2U in my travel kit because it is lightweight, durable, and can plug directly into a laptop via USB if I need to record an interview on the road without bringing my full audio interface rig.
Upgrading from USB to XLR Later
The beauty of the Q2U is that your upgrade path is built in. When you are ready to move beyond USB recording, simply connect the XLR cable to an audio interface and you immediately get access to better preamps, lower latency, and more headroom. The sound quality improvement from switching to XLR with a decent interface is noticeable.
Some podcasters buy two Q2Us for a dual-mic interview setup. One connects via USB and the other via XLR, or both use XLR through a two-channel interface. This is one of the most affordable ways to get a proper two-person interview recording going without compromising on having separate tracks for each speaker.
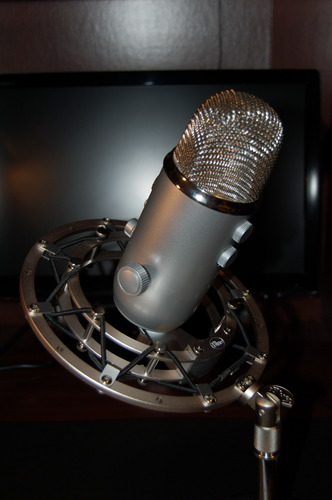
9. Blue Yeti – Multi-Pattern USB Condenser
- Versatile with 4 pickup patterns for different recording scenarios
- True plug and play with easy USB setup
- Blue VO!CE software provides enhanced vocal effects
- Built-in headphone jack for real-time monitoring
- Onboard controls for quick adjustments
- Solid metal build quality
- Extremely popular with massive community support
- Condenser picks up room noise in untreated spaces
- Uses micro-USB not USB-C
- Heavy and not ideal for travel
- Best results require proper gain setting and mic positioning
The Blue Yeti is arguably the most recognizable USB microphone in the world, with over 56,000 reviews on Amazon alone. I have used the Yeti extensively for interview recording, and its biggest strength is versatility. The four pickup patterns make it adaptable to nearly any interview scenario. Cardioid mode for solo recording, bidirectional mode for face-to-face interviews with a guest sitting across from you, omni mode for round-table discussions, and stereo mode for immersive field recordings.
For interview podcasters specifically, the bidirectional mode is the standout feature. It picks up sound from the front and back of the microphone while rejecting sound from the sides. This means you can place the Yeti between you and your guest on a table, and it will capture both of your voices clearly. It is the simplest way to record a two-person interview with a single microphone, and it works surprisingly well in a quiet room.
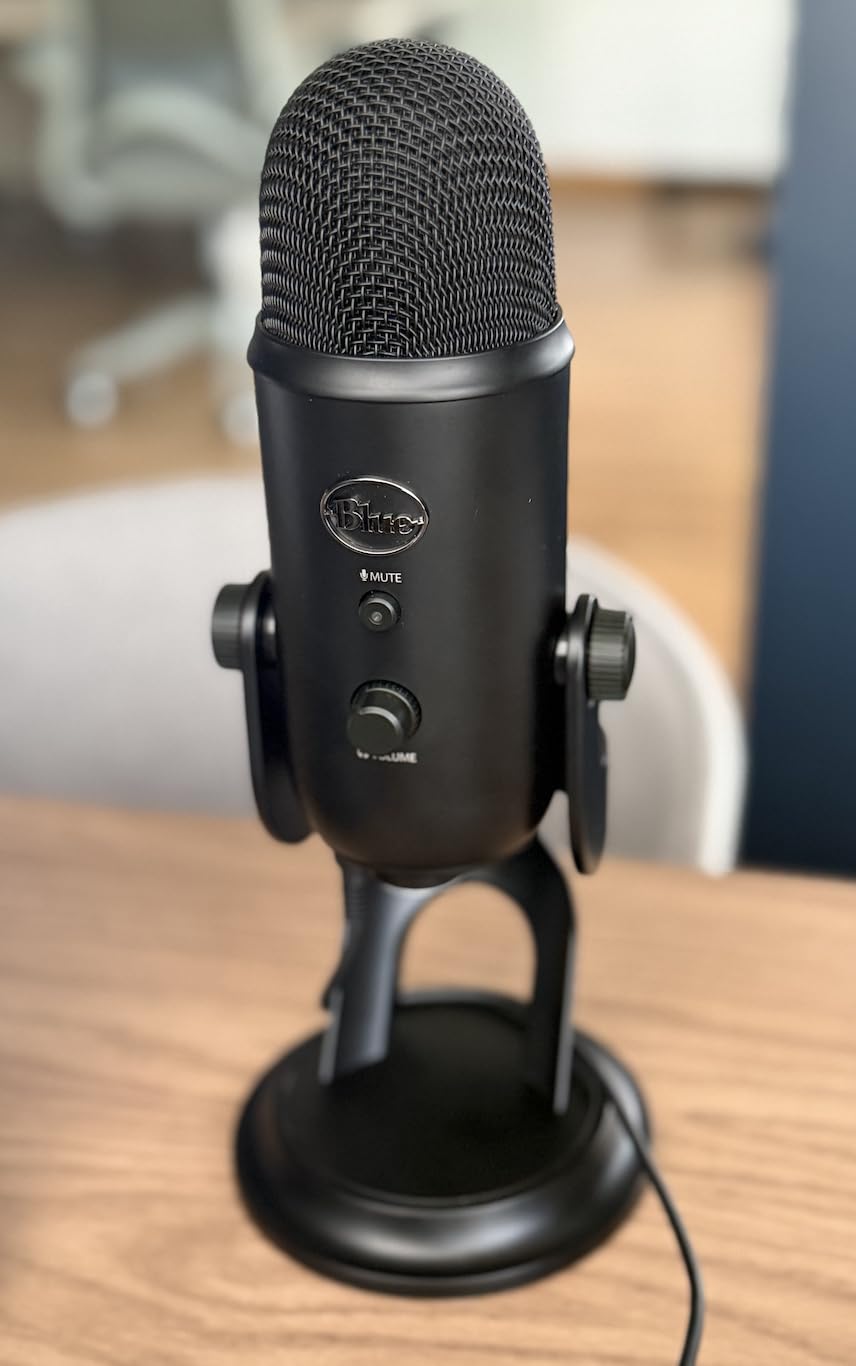
The Blue VO!CE software adds real-time vocal effects that can enhance your interview recordings. You can apply compression, EQ, noise reduction, and other broadcast-style processing directly in the software before the audio reaches your recording app. For podcasters who do not want to deal with post-production processing, this feature can save significant editing time.
The onboard controls deserve a mention. Having physical buttons for headphone volume, pattern selection, mute, and gain right on the microphone means you can make adjustments mid-interview without fumbling through software menus. The mute button with its red LED indicator is especially handy during live interview recordings.
Who Should Buy the Blue Yeti
The Blue Yeti is best for podcasters who want maximum versatility from a single USB microphone. If you record different types of interviews in different configurations, from solo remote sessions to in-person two-person conversations to group panel discussions, the Yeti’s four pickup patterns handle all of these scenarios without needing additional equipment.
It is also ideal for podcasters who value simplicity. The plug-and-play USB connection means no audio interface, no phantom power, no complex setup. Plug it in, select it as your audio input, and start recording. The Blue VO!CE software handles the processing so you can focus on the conversation rather than the technology.
Polar Pattern Settings for Interviews
For a standard solo interview with a remote guest, use cardioid mode and speak into the front of the mic from about 4 to 6 inches away. This gives you the cleanest sound with the most background noise rejection. For an in-person interview with one guest sitting across from you, switch to bidirectional mode and place the mic between you on the table.
For group interviews with three or more people sitting around a table, omni mode picks up everyone in the room. Just be aware that omni mode also picks up every sound in the room, so this only works well in a very quiet, treated space. I have seen too many podcasters leave their Yeti in omni mode by accident and wonder why their solo recordings sound echoey and noisy. Always check your pattern selector before hitting record.
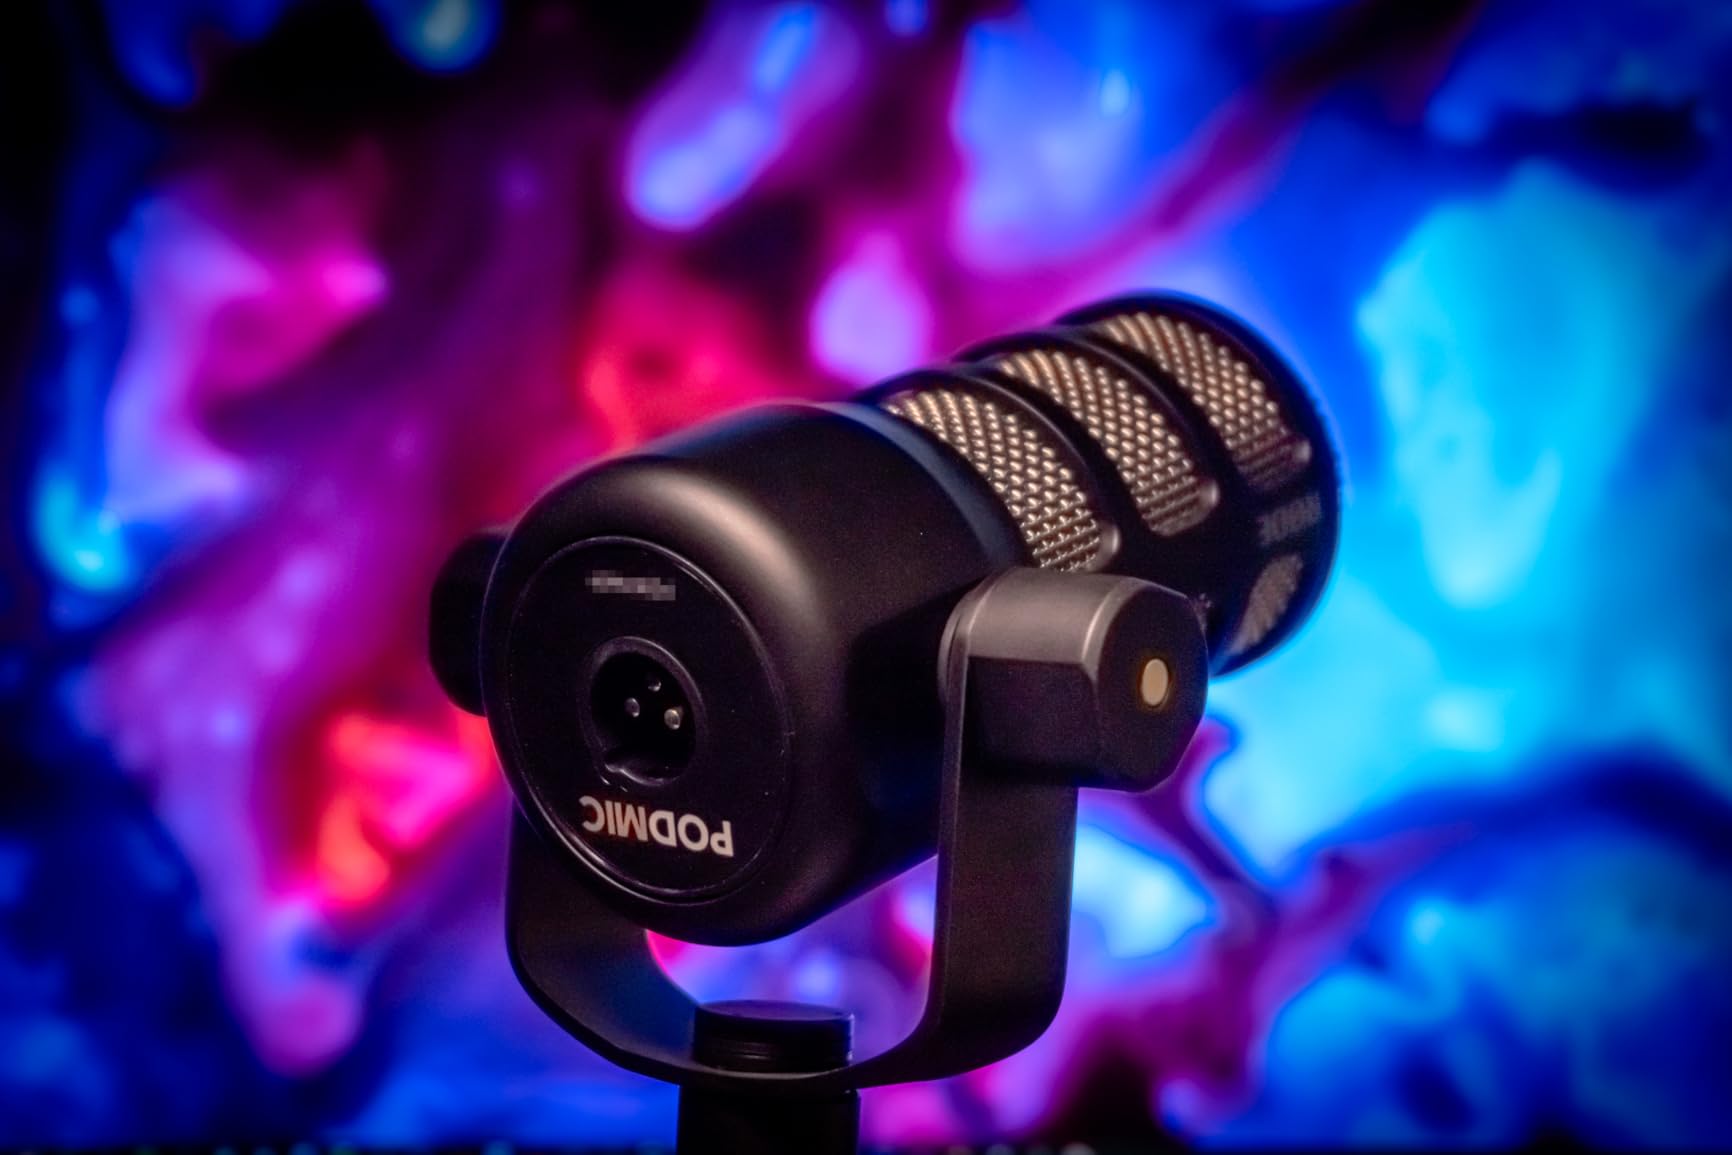
10. Rode PodMic – Budget Broadcast-Quality Dynamic Mic
- Broadcast-quality sound with rich balanced tone
- Excellent all-metal build quality
- Internal pop filter effectively minimizes plosives
- Integrated swing mount for easy positioning
- Cardioid pattern provides excellent room rejection
- Versatile with any quality mic interface
- Low-output requires additional gain with preamp or FetHead recommended
- Heavy at 937 grams
- No USB option requires XLR interface
- No built-in headphone jack for monitoring
The Rode PodMic is proof that you do not need to spend a fortune to get broadcast-quality interview audio. This all-metal dynamic microphone produces a rich, balanced tone that sounds far more expensive than its price suggests. I used the PodMic for a month of interview recordings and consistently got compliments on my audio quality from guests and listeners alike.
The internal pop filter and internal shock mounting are features that matter more than you might think for interview recording. The pop filter handles plosives well enough that you can skip the external pop filter in most situations. The shock mounting reduces vibrations from desk bumps and handling, which is important when you are gesturing during an animated interview and accidentally bump the mic stand.

The integrated swing mount is a thoughtful design choice. It lets you position the mic at any angle without needing a separate shock mount, which keeps your setup simple and your costs down. I mounted the PodMic on a basic boom arm and had it positioned perfectly in about two minutes. The all-metal construction feels indestructible, which is reassuring for a piece of gear that will be used session after session.
The main consideration with the PodMic is gain. It is a low-output dynamic microphone that needs more gain than most audio interfaces provide comfortably. In my testing, I needed to push my interface preamp to about 70 percent to get a good recording level. Adding a FetHead inline preamp solved this completely and gave me clean gain with plenty of headroom.
Who Should Buy the Rode PodMic
The PodMic is the best podcast microphone for interviews if you want professional sound quality on a tight budget. It is particularly well-suited for podcasters who already own an audio interface or who plan to pair it with the RodeCaster Pro, which it is optimized for. The all-metal build means it will last through years of interview sessions.
It is also a smart pick for podcasters building a dual-mic interview setup. Two PodMics through a RodeCaster Pro or a two-channel interface create a professional interview rig at a fraction of what two SM7Bs would cost. The sound quality is close enough that most listeners would not be able to tell the difference.
Pairing with the Right Preamp
The PodMic pairs beautifully with the RodeCaster Pro, which provides enough clean gain to drive it without any issues. If you are using a standard audio interface, consider adding a Triton Audio FetHead or Cloudlifter CL-1 to your signal chain. These inline preamps provide 20-25dB of clean gain before the signal reaches your interface, which gives you plenty of headroom for interview recording.
I tested the PodMic with the Focusrite Scarlett 2i2 and a FetHead, and the combination produced clean, broadcast-quality interview audio. Without the FetHead, the interface had to work harder and introduced a slight noise floor. The investment in a clean boost device is well worth it to unlock the full potential of this microphone for interview recording.
How to Choose the Best Podcast Microphone for Interviews
Choosing the right interview microphone involves understanding your recording environment, your budget, and how you plan to grow your podcast. After testing all 10 microphones on this list and recording hundreds of interview hours, I can break down the decision into a few key factors that matter most for interview recording in 2026.
Dynamic vs Condenser Microphones for Interviews
This is the most important decision you will make. Dynamic microphones like the Shure SM7B, MV7+, and Rode PodMic use a simpler design with a coil and magnet. They are less sensitive, which means they pick up less background noise. This makes them ideal for interview recording in untreated rooms, home offices, and spaces where you cannot control ambient sound. Most professional interview podcasters prefer dynamic microphones for this reason.
Condenser microphones like the Rode NT1 and Audio-Technica AT2020 use an electrically charged diaphragm that is much more sensitive. They capture more vocal detail and nuance, which sounds wonderful in a treated studio. However, that same sensitivity means they pick up every sound in your room. If you have acoustic treatment and a quiet space, a condenser will give you more detailed recordings. If you do not, stick with a dynamic.
For interview recording specifically, I lean toward recommending dynamic microphones to most podcasters. The noise rejection advantage is simply too valuable when you have a guest in the room who might shift in their chair, clear their throat, or react to something you say. A dynamic mic keeps the focus on the words being spoken rather than the room the words are spoken in.
USB vs XLR vs Dual Connectivity
USB microphones connect directly to your computer with no additional equipment needed. They are the simplest way to start recording interviews, and modern USB mics like the Shure MV7+ deliver audio quality that rivals XLR setups. If you are just starting out or want a portable setup for recording interviews on the go, USB is the way to go.
XLR microphones connect through an audio interface or mixer. This adds cost and complexity but gives you access to better preamps, more routing options, and the ability to process each mic independently. For a two-person interview setup where you need separate audio tracks for each speaker, XLR is the standard. Most professional interview podcasts use XLR microphones for this reason.
Dual-connectivity microphones like the Shure MV7+, Rode NT1 5th Gen, and Samson Q2U give you both options. This is the best of both worlds because you can start with USB and upgrade to XLR when you are ready. If your budget allows, I strongly recommend choosing a dual-connectivity microphone. It future-proofs your setup and gives you flexibility as your podcast grows.
Polar Patterns and Off-Axis Rejection
The polar pattern of a microphone determines where it picks up sound and where it rejects it. For interview recording, this is critical because you want to capture the person speaking while ignoring everything else in the room.
Cardioid is the most common pattern for interview microphones. It picks up sound from the front and rejects sound from the rear. The Shure SM7B, MV7+, Rode PodMic, and Audio-Technica AT2020 all use cardioid patterns. Hypercardioid, found on the Audio-Technica AT2040, is even more focused than cardioid and rejects more sound from the sides. This makes it one of the best patterns for noisy interview environments.
The Blue Yeti stands out with four patterns including bidirectional, which picks up sound from the front and back simultaneously. This is uniquely useful for face-to-face interviews where two people sit across from each other with a single mic between them. However, the trade-off is that a condenser with multiple patterns is inherently more sensitive to room noise than a single-pattern dynamic microphone.
Two-Person Interview Setup Guide
Setting up microphones for a two-person interview requires some planning. The most common approach is using two identical dynamic microphones, one for each speaker, running through a two-channel audio interface. This gives you separate audio tracks for each person, which makes editing much easier. You can adjust levels independently, remove coughs or stumbles from one person without affecting the other, and fix timing issues in post-production.
For this setup, I recommend two matching microphones from this list. Two Rode PodMics, two Shure MV7X units, or two Audio-Technica AT2040s through a Focusrite Scarlett 2i2 or RodeCaster Pro II will give you a professional two-person interview rig. Budget between 300 and 800 dollars total depending on which microphones and interface you choose.
If you cannot afford two microphones, the Blue Yeti in bidirectional mode is your best single-mic option for two-person interviews. Position it between you and your guest on a table, speak toward the front and back of the mic respectively, and make sure your room is as quiet as possible. The results will not match a dual-mic setup, but they are workable for a starting podcast.
Essential Accessories for Interview Recording
A microphone alone is not enough for professional interview recordings. You need a few key accessories to get the best results. A boom arm is the first upgrade I recommend. It positions the microphone at the right height and angle without taking up desk space. Look for one rated for the weight of your microphone, especially if you are using something heavy like the Shure SM7B at 2.7 pounds.
A pop filter or windscreen is essential for most microphones on this list. Even models with built-in pop filtering like the Rode PodMic and Shure SM7B benefit from an additional external pop filter during interview recording. The extra layer of protection catches plosives that internal filters miss, especially when your guest speaks energetically.
Closed-back headphones are necessary for monitoring during interviews. You need to hear what the microphone is capturing in real time so you can catch issues like excessive room noise, cable buzz, or a guest speaking too softly before the interview is over. Audio-Technica ATH-M50x or Sony MDR-7506 are reliable choices that many podcasters trust.
Finally, an audio interface or mixer ties everything together. For USB microphones, this is built into the mic itself. For XLR setups, I recommend the Focusrite Scarlett 2i2 for a simple two-mic interview rig or the RodeCaster Pro II for a more full-featured podcast production console with built-in effects, sound pads, and multi-track recording.
Frequently Asked Questions About Podcast Interview Microphones
What microphone do most podcasters use for interviews?
The Shure SM7B is the most popular microphone among professional podcasters for interview recording, thanks to its warm vocal tone and excellent background noise rejection. For beginners and intermediate podcasters, the Samson Q2U and Rode PodMic are widely recommended because they deliver broadcast-quality sound at accessible prices. The Shure MV7+ has also become a top choice in 2026 because of its dual USB-C and XLR connectivity, which gives podcasters flexibility to record via USB or through a professional audio interface.
Is XLR or USB better for podcast interviews?
USB is better for beginners and podcasters who want a simple setup, because it connects directly to your computer with no additional equipment. XLR is better for podcasters who want professional-grade audio with separate tracks for each speaker in a multi-mic interview setup. Dual-connectivity microphones like the Shure MV7+ and Rode NT1 5th Gen offer both options, letting you start with USB and upgrade to XLR when you need more control over your recording chain.
How much should I spend on a podcast microphone?
You can get good interview audio from microphones in the 80 to 120 dollar range, with the Rode PodMic and Samson Q2U both delivering professional results. For a noticeable step up in sound quality and features, budget between 150 and 300 dollars for options like the Shure MV7X or Shure MV7+. Professional podcasters typically invest 300 to 400 dollars per microphone for studio-grade options like the Shure SM7B. Remember to also budget for accessories like a boom arm, pop filter, and audio interface if you choose an XLR microphone.
What equipment do I need for a podcast interview?
For a basic interview setup you need a microphone, headphones for monitoring, and recording software like Audacity or GarageBand. For a two-person in-person interview, you need two microphones, a two-channel audio interface or mixer, two boom arms or stands, pop filters, closed-back headphones, and recording software that supports multi-track recording. If you record remote interviews, you need a single microphone and a platform like Riverside, SquadCast, or Zoom to capture the conversation.
Can I use a wireless microphone for podcasting?
Yes, wireless microphones like the Rode Wireless GO II or DJI Mic 2 can work for podcast interviews, especially for field recording or on-location interviews where running cables is impractical. However, wireless systems introduce potential issues like compression artifacts, latency, and signal interference that wired microphones do not have. For studio interview recording where you are sitting at a desk, a wired XLR or USB microphone will always deliver cleaner, more reliable audio than a wireless system at the same price point.
Final Thoughts on the Best Podcast Microphones for Interviews
Finding the right microphone for your interview podcast comes down to matching the tool to your environment and your ambitions. After testing all 10 microphones on this list, a few clear winners emerged for different situations. The Shure MV7+ is our overall top pick because it gives you professional sound quality with both USB and XLR connectivity, built-in smart features like Auto Level Mode and real-time noise reduction, and enough flexibility to handle any interview scenario from simple remote sessions to complex in-studio conversations.
For podcasters on a budget, the Samson Q2U delivers remarkable value as a dual USB/XLR microphone that comes with everything you need to start recording interviews today. The Rode PodMic is the best pure dynamic microphone at its price point, producing broadcast-quality sound that punches well above its weight class. And for podcasters who want the gold standard, the Shure SM7B remains the microphone that defines professional podcast audio.
The best podcast microphones for interviews in 2026 are the ones that fit your specific recording situation. Start with your environment: if your room is noisy or untreated, go dynamic. If you have a treated studio, a condenser will reward you with more detail. Then consider your connectivity needs: USB for simplicity, XLR for professional multi-track setups, or dual-connectivity for the best of both worlds. Whichever microphone you choose from this list, you will be equipped to produce interview audio that keeps your listeners engaged and coming back for more.