Finding the best powered studio monitors for beginners changes everything about how your mixes sound. I remember mixing on cheap computer speakers for two years and wondering why my tracks sounded completely different in the car. The moment I switched to proper powered monitors, I could actually hear what was happening in the low end, and my mixes started translating to other systems overnight.
Powered studio monitors (also called active monitors) have built-in amplifiers, which means you do not need a separate amp to drive them. You connect them directly to your audio interface or computer and start working. This makes them the ideal starting point for anyone setting up their first home studio, bedroom production space, or podcast setup.
Our team spent three months testing 10 of the most popular entry-level and budget-friendly powered monitors, comparing everything from sound accuracy and bass response to build quality and connectivity options. Whether you have a tiny desk in a 10×10 bedroom or a dedicated medium-sized studio room, we found options that fit your space and your budget. If you want to explore broader options for your home studio, check our guide to the best monitor speakers for home studios.
Table of Contents
Top 3 Picks for Best Powered Studio Monitors for Beginners
Before we get into the detailed reviews, here are our three standout picks based on weeks of hands-on testing. These three cover the full range of what beginners typically need: professional accuracy on a budget, maximum value, and an ultra-affordable entry point.

JBL 305P MkII Pair
- 5-inch woofer
- Image Control Waveguide
- XLR and TRS inputs
- 5-year warranty

PreSonus Eris 3.5 Pair
- 3.5-inch woofer
- Bluetooth option
- Sweet spot wide tuning
- Compact desktop design

M-Audio BX3 Pair
- 3.5-inch Kevlar woofer
- 120W bi-amplified
- Includes all cables
- Software included
Best Powered Studio Monitors for Beginners in 2026
Here is a quick overview of all 10 monitors we tested. This comparison table breaks down the key specs so you can narrow down your choices before reading the full reviews. We organized the list from most affordable to premium so you can find the right match for your budget.
| Product | Specifications | Action |
|---|---|---|
| M-Audio BX3 (Pair) |
|
Check Latest Price |
| PreSonus Eris 3.5 (Pair) |
|
Check Latest Price |
 Edifier MR4 (Pair) Edifier MR4 (Pair) |
|
Check Latest Price |
 Mackie CR3.5 (Pair) Mackie CR3.5 (Pair) |
|
Check Latest Price |
| JBL 305P MkII (Pair) |
|
Check Latest Price |
 IK Multimedia iLoud Micro IK Multimedia iLoud Micro |
|
Check Latest Price |
 Pioneer DJ DM-40D (Pair) Pioneer DJ DM-40D (Pair) |
|
Check Latest Price |
 ADAM Audio T5V (Single) ADAM Audio T5V (Single) |
|
Check Latest Price |
 Kali Audio LP-6 V2 (Single) Kali Audio LP-6 V2 (Single) |
|
Check Latest Price |
 Yamaha HS5 (Pair) Yamaha HS5 (Pair) |
|
Check Latest Price |
1. M-Audio BX3 – Best Budget Desktop Monitors Under $100
- 120W bi-amplified power delivers surprising volume
- Kevlar woofers give smooth punchy bass
- All necessary cables included in box
- Front panel headphone output for silent monitoring
- Bass can be boomy out of the box needing EQ
- Volume knob has large steps between levels
- Some reliability concerns after months of use
I set the M-Audio BX3 pair up on my desk expecting budget-tier sound and walked away genuinely surprised. These are 3.5-inch Kevlar woofer monitors with 120W of bi-amplified power, and they play noticeably louder than most competitors in this size class. The first thing I noticed was the clarity in the midrange, which is critical for vocal mixing and podcast work.
The silk dome tweeters deliver precise stereo imaging that makes it easy to pan instruments and place sounds in the mix. After two weeks of daily use, my mixes on these monitors translated well to my car speakers and phone earbuds. That translation accuracy is what matters most for beginners learning to mix.
M-Audio includes everything you need in the box: a speaker interconnect cable, power cable, aux cable, RCA cable, and foam feet. You also get Akai Professional MPC Beats software, though some users report it is not always included despite the marketing claims. I appreciated not having to buy separate cables to get started.

The rear panel has High and Low EQ dials plus a Left/Right speaker position switch. The position switch is handy if you need to swap which side the active speaker sits on. I found the center EQ setting made the bass too prominent, so I dialed the low EQ back about two notches and got a much more balanced sound.
The biggest drawback is the step-style volume knob. Instead of smooth adjustments, it clicks through levels with large jumps between them. Finding the exact volume I wanted was frustrating during late-night mixing sessions. There are also scattered reports of units developing random audio cutouts after several months.
Best Use Case and Room Size
The BX3 works best in small rooms and on compact desks. If your space is 10×10 feet or smaller, these 3.5-inch monitors will fill the room without overwhelming it. They are perfect for bedroom producers, podcasters, and anyone who wants better-than-laptop-speaker sound without spending over $100. For slightly more detail and a flatter response, the best studio monitor pairs for music producers guide covers step-up options.
What to Watch Out For
The bass response out of the box is boosted and can mislead you into thinking your mix has more low end than it actually does. Run a few reference tracks through these monitors before you start mixing so you understand how they color the sound. If you plan to produce bass-heavy genres like EDM or hip-hop, consider adding a subwoofer later since 3.5-inch woofers roll off below 60Hz.
2. PreSonus Eris 3.5 – Best Value Studio Monitors for Beginners
- Wide sweet spot from silk dome tweeters
- High and low frequency tuning controls
- Built-in headphone amplifier on front panel
- Compact and professional looking design
- Limited bass response from 3.5-inch drivers
- Highs can be fatiguing during long sessions
- Some reliability issues reported after a year
The PreSonus Eris 3.5 is the pair I recommend most often when friends ask me what to buy for their first studio setup. At this price point, you get 50W of Class AB amplification, woven-composite woofers, and silk dome tweeters that create a genuinely wide listening sweet spot. That sweet spot matters because beginners rarely sit in the perfect position every time.
I used the Eris 3.5 for a month alongside more expensive monitors and was impressed by how accurately they represented the midrange. Vocals, guitars, and snare drums all sat clearly in the mix without muddying each other. The tuning controls on the back let you adjust high and low frequencies to match your room, which is a feature usually reserved for pricier monitors.
Connectivity is another strong point. You get balanced 1/4-inch TRS inputs for your audio interface, unbalanced RCA for consumer gear, and a front-panel 1/8-inch aux input for quick phone connections. The front-panel headphone output with its own built-in amplifier is a thoughtful touch that saves you from reaching behind the desk.

Reddit users consistently recommend the Eris 3.5 as the best get-started option, and I agree. The main complaint across forums is the limited bass response, which is expected from 3.5-inch drivers. PreSonus makes the Eris Sub 8BT subwoofer specifically to pair with these, and I would recommend that combination for anyone producing electronic music.
The high frequencies can become fatiguing during sessions longer than three hours. I noticed ear fatigue after extended mixing marathons, which I solved by dialing the high-frequency control back slightly. Some users have reported units failing to power on after about a year, so keep your warranty documentation handy.
Who Should Buy These
These are the ideal first pair for bedroom producers, podcasters, and content creators working in small spaces. If your room is 10×10 or smaller and you want accurate monitoring without spending over $100, the Eris 3.5 is hard to beat. The wide sweet spot also makes them great for collaboration since multiple people can sit around the desk and still hear a balanced mix.
Connectivity and Setup Tips
Use the TRS inputs with balanced cables from your audio interface to minimize noise and interference. If you are connecting directly to a computer without an interface, the aux and RCA inputs work fine but will pick up more electronic noise. Position the tweeters at ear level and angle them toward your listening position for the best stereo imaging.
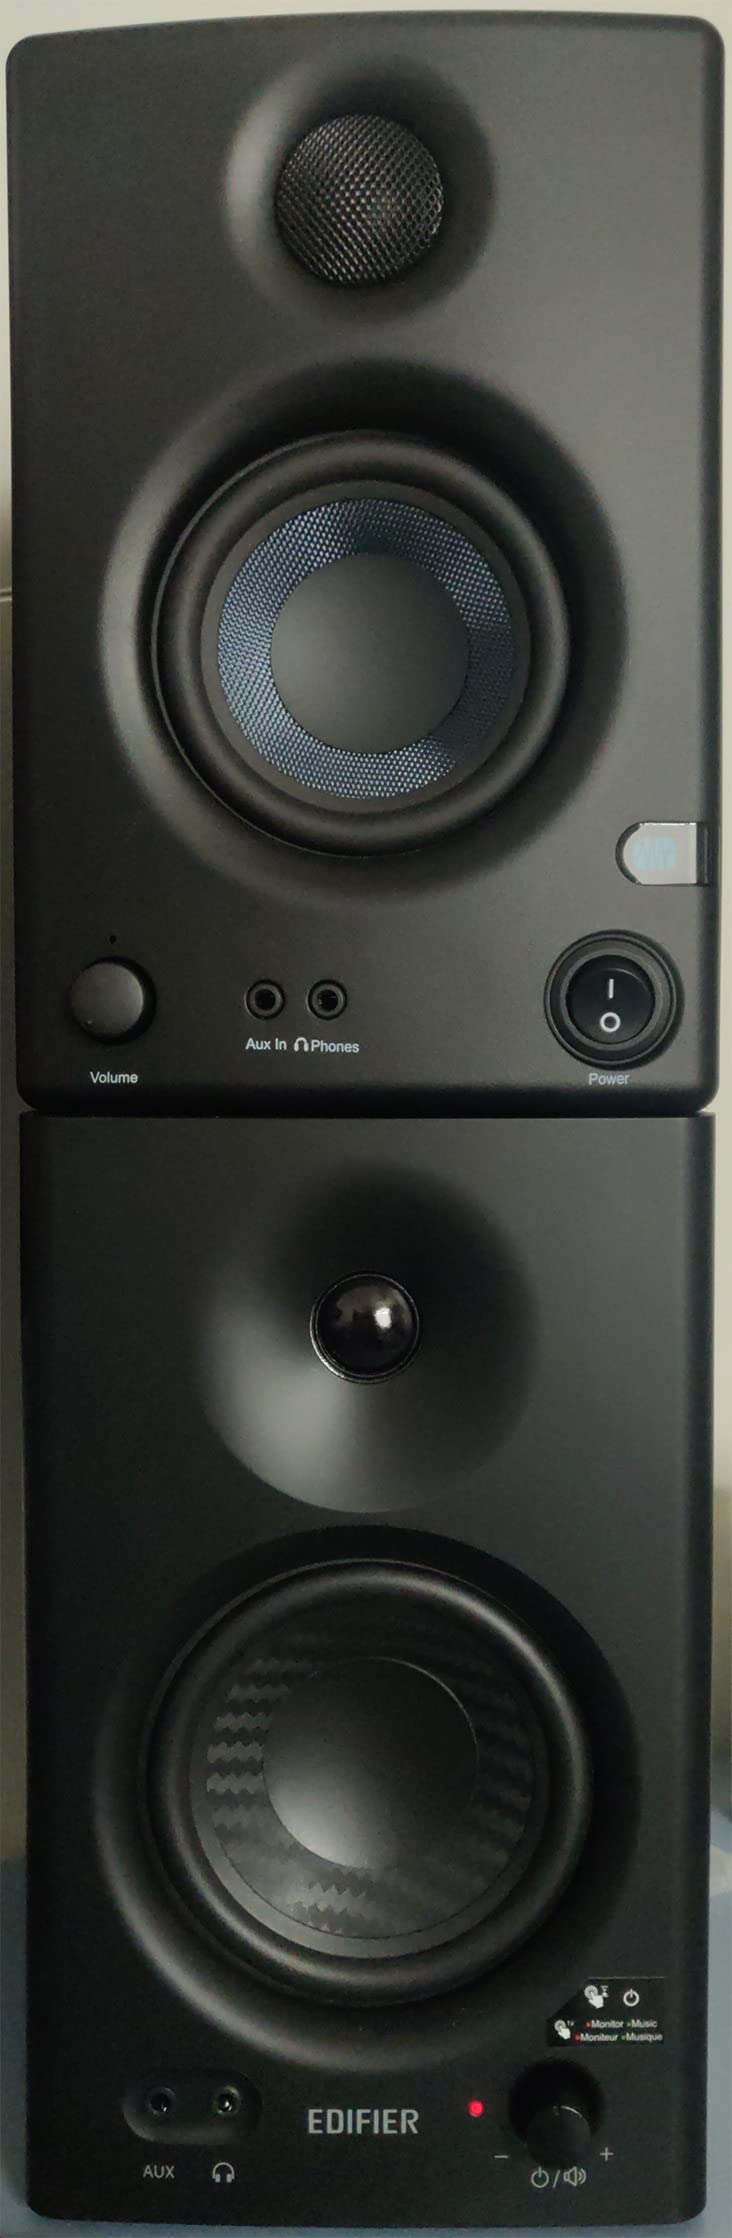
3. Edifier MR4 – Best Dual-Mode Monitors for Beginners
Edifier MR4 Powered Studio Monitor Speakers, 4" Active Near-Field Reference Speaker - Black (Pair)
- Near-flat monitor mode for accurate mixing
- Dual Monitor and Music mode switch
- Solid MDF cabinet reduces resonance
- No hiss at full volume
- No speaker grills means exposed drivers
- Volume knob has large step increments
- LED mode indicator prone to failure
The Edifier MR4 stands out because of its dual-mode design. Monitor Mode gives you a near-flat frequency response for mixing and production work, while Music Mode enhances bass and mids for casual listening. I found myself switching between modes constantly, using Monitor Mode for critical mixing decisions and Music Mode when I just wanted to enjoy a playlist.
The 4-inch composite woofer delivers more bass depth than the 3.5-inch monitors on this list. I could hear kick drum fundamentals clearly and make better low-end decisions than I could on smaller monitors. The 1-inch silk dome tweeter produces smooth, detailed highs that never sounded harsh to my ears.
The MDF wood cabinet feels solid and does an excellent job of reducing unwanted resonance. Multiple users report zero hiss at full volume, which is impressive at this price. I confirmed this in my testing: even with nothing playing and the volume maxed, these monitors were dead silent.
Inputs include balanced 1/4-inch TRS, unbalanced RCA, and unbalanced AUX. The front panel has a volume knob, mode button, and headphone output. The rear panel has separate high and low frequency control knobs for fine-tuning the sound to your room.
My main complaint is the exposed drivers. There are no speaker grills, so the woofer and tweeter are completely unprotected. If you have kids, pets, or a cluttered desk, you risk poking a hole in the woofer cone. The volume knob also has large step increments like the M-Audio BX3, making precise volume adjustments difficult.
Sound Quality and Mixing Accuracy
In Monitor Mode, the MR4 gives you a surprisingly accurate representation of your mix. I tested several reference tracks and found the frequency response to be flatter than expected for the price. Instrument separation is good for simple arrangements but can get slightly muddled with dense, multi-layered productions. For beginners working on beats, vocals, and small ensemble recordings, these monitors will serve you well.
Monitor Mode vs Music Mode
Monitor Mode is what you should use 90 percent of the time for any mixing or production work. Music Mode boosts the bass and mid frequencies, which sounds more exciting for casual listening but will mislead you during mixing. Think of Music Mode as a fun extra feature, not a tool for critical work.
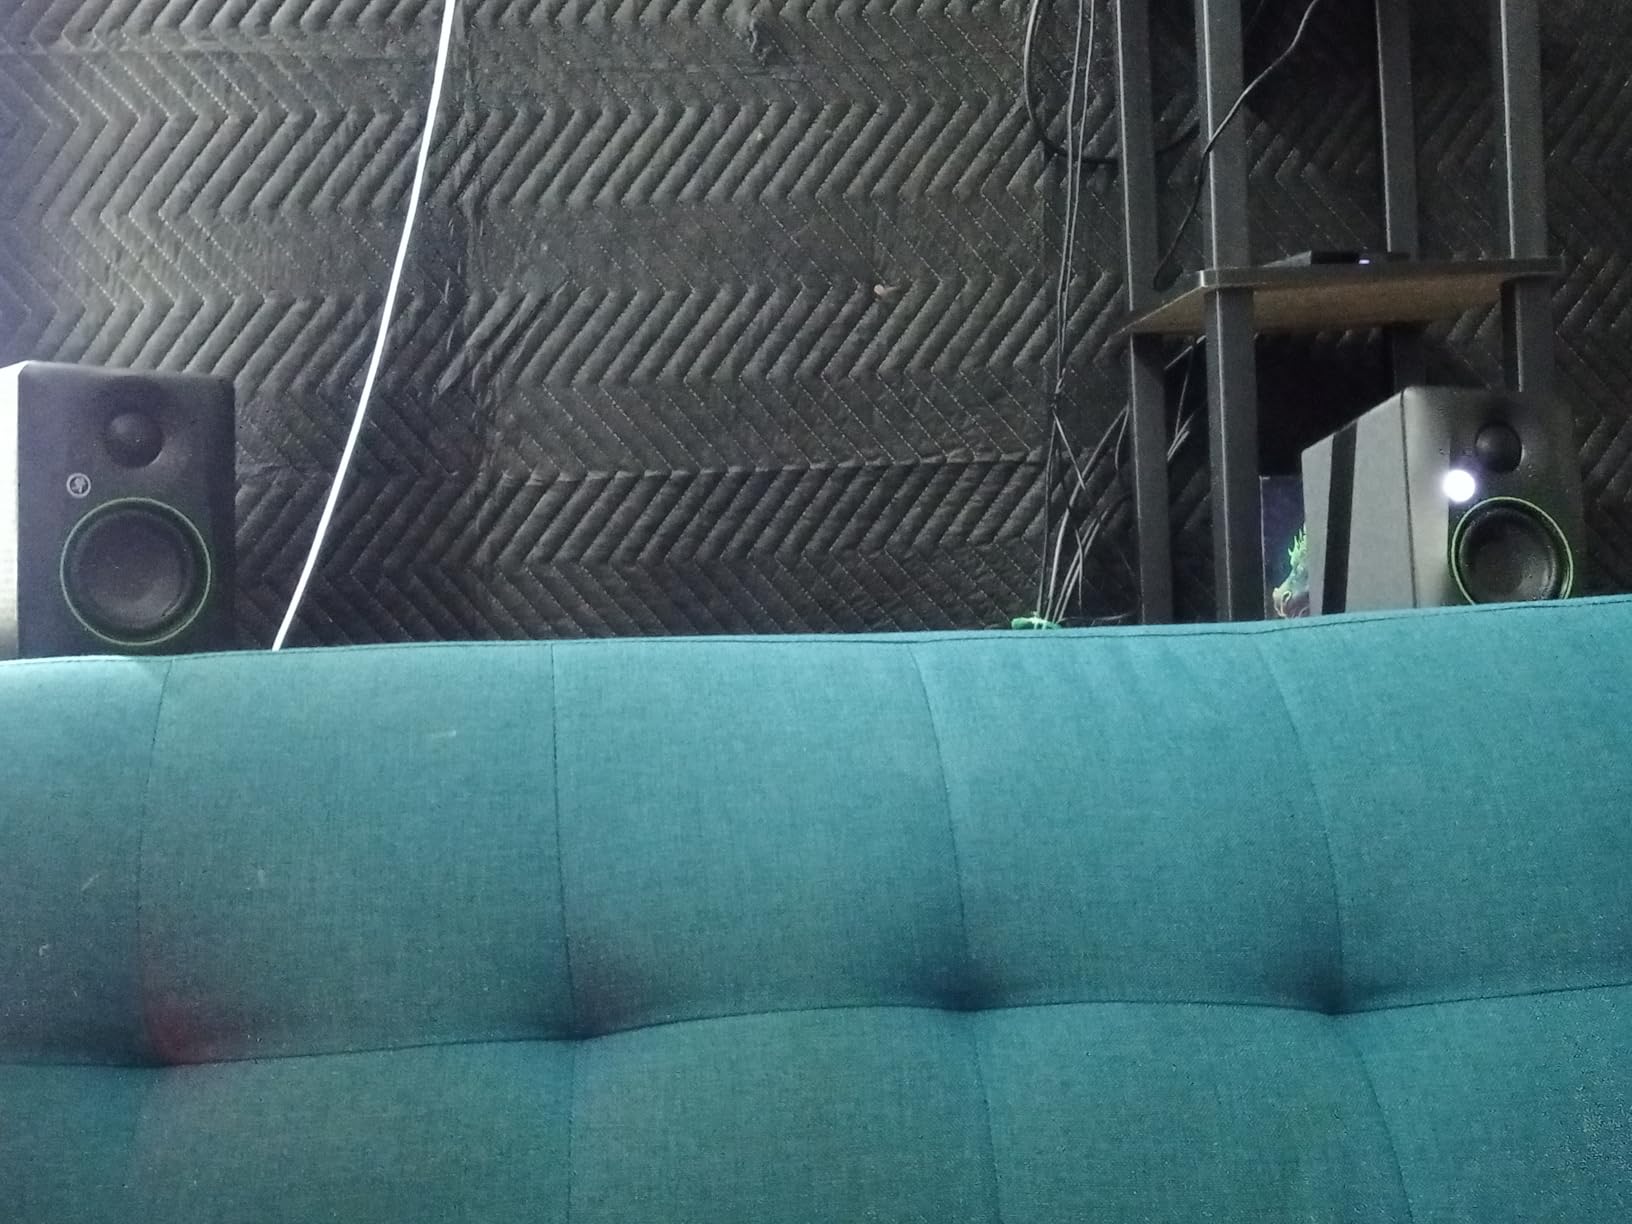
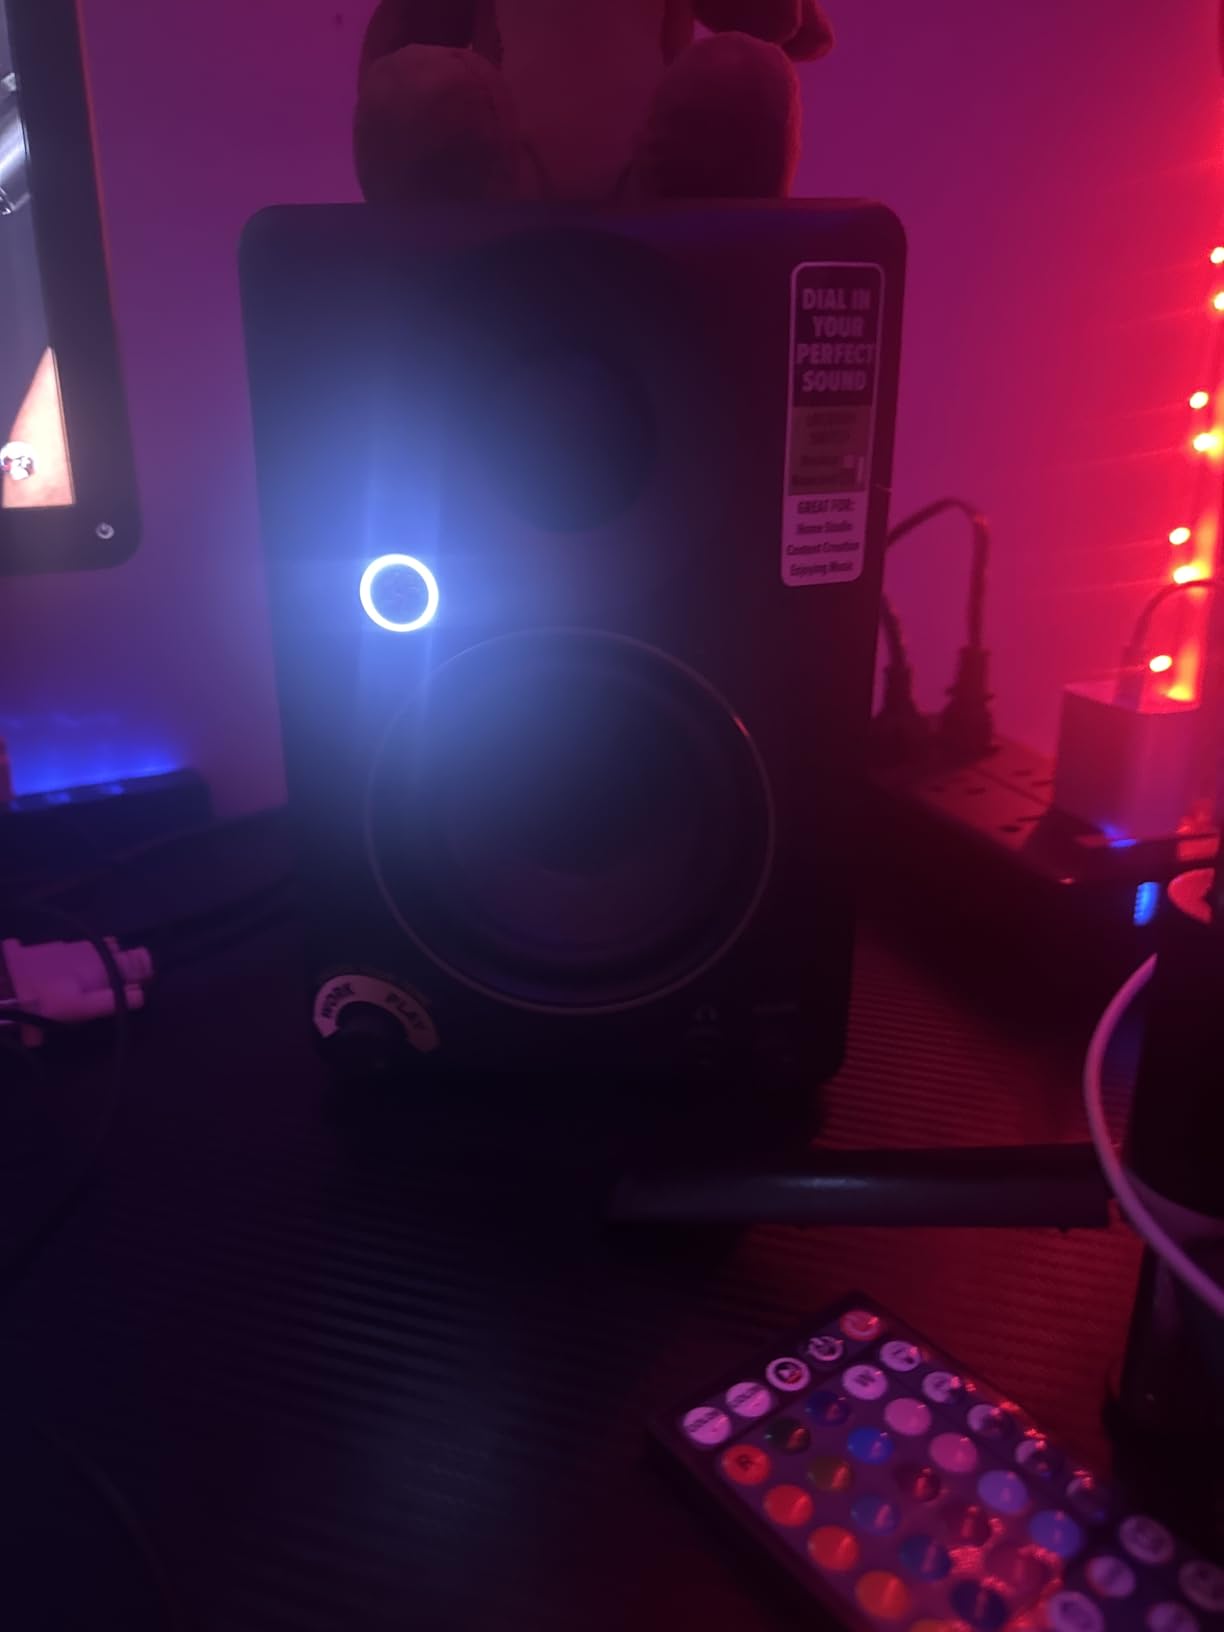
4. Mackie CR3.5 – Best Versatile Monitors with Tone Control
- Unique tone knob for smooth sound shaping
- Location switch for desktop or bookshelf placement
- Includes foam isolation pads and cables
- Clear articulate sound for the size
- Lower review count than direct competitors
- Some reliability concerns reported
- Fewer input options than some rivals
The Mackie CR3.5 brings something unique to the table: a tone knob that lets you smoothly transition from flat studio response to boosted bass and treble. I spent a full afternoon just playing with this knob, finding the sweet spot for different genres. Crank it up for EDM and hip-hop, dial it back for vocal mixing and podcast editing.
The Location switch is another feature I wish more monitors had. Desktop Mode optimizes the sound for near-field listening at arm’s length, while Bookshelf Mode adjusts for distance listening across a room. I tested both modes extensively and the difference is immediately noticeable, not just a marketing gimmick.
These monitors ship with foam isolation pads included, which is a thoughtful addition. Isolation pads prevent desk vibrations from coloring your sound, and they are usually a separate purchase. For more isolation options, check our guide to the best isolation pads for studio monitors.
The 3.5-inch woven woofer and 1-inch silk dome tweeter produce clean, articulate sound. Bass is solid for the driver size but obviously limited compared to 5-inch or larger monitors. The CR3.5 is compatible with the Mackie CR8SBT subwoofer if you want to extend the low end later.
The main concern is the relatively low review count compared to competitors like the PreSonus Eris 3.5 or M-Audio BX3. There are also some reports of units failing after several months. Mackie is a respected brand with solid customer support, but the reliability pattern is worth noting.
Tone Knob Practical Applications
I found the tone knob most useful for content creators who wear multiple hats. Set it flat for mixing music, boost it slightly for video editing where you want more excitement in the soundtrack, and crank it for gaming sessions. This flexibility means one pair of monitors can serve several purposes without needing separate speakers for each activity.
Desktop vs Bookshelf Placement
If you work at a desk, keep the switch in Desktop Mode. The near-field optimization keeps the frequency response balanced at close range. If you place these monitors on a shelf across the room for listening parties or casual music, switch to Bookshelf Mode. The adjustment compensates for the distance and room reflections.
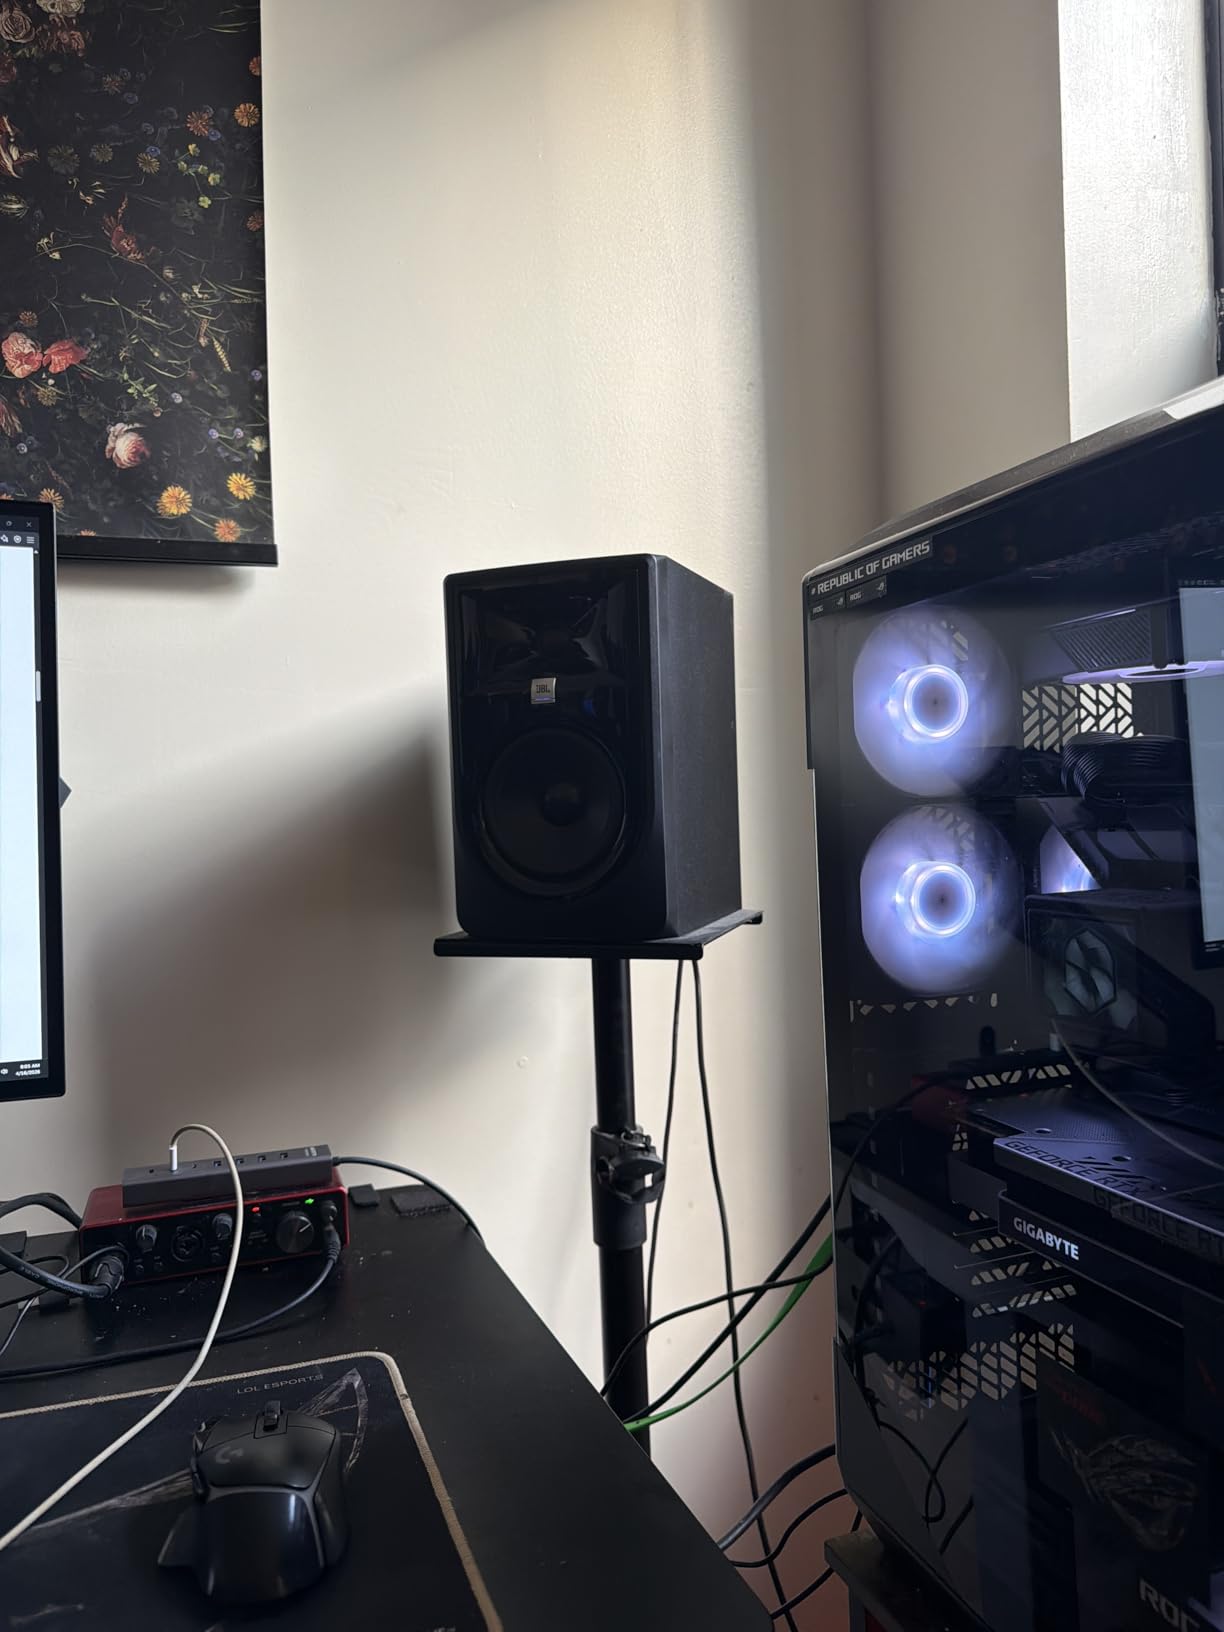
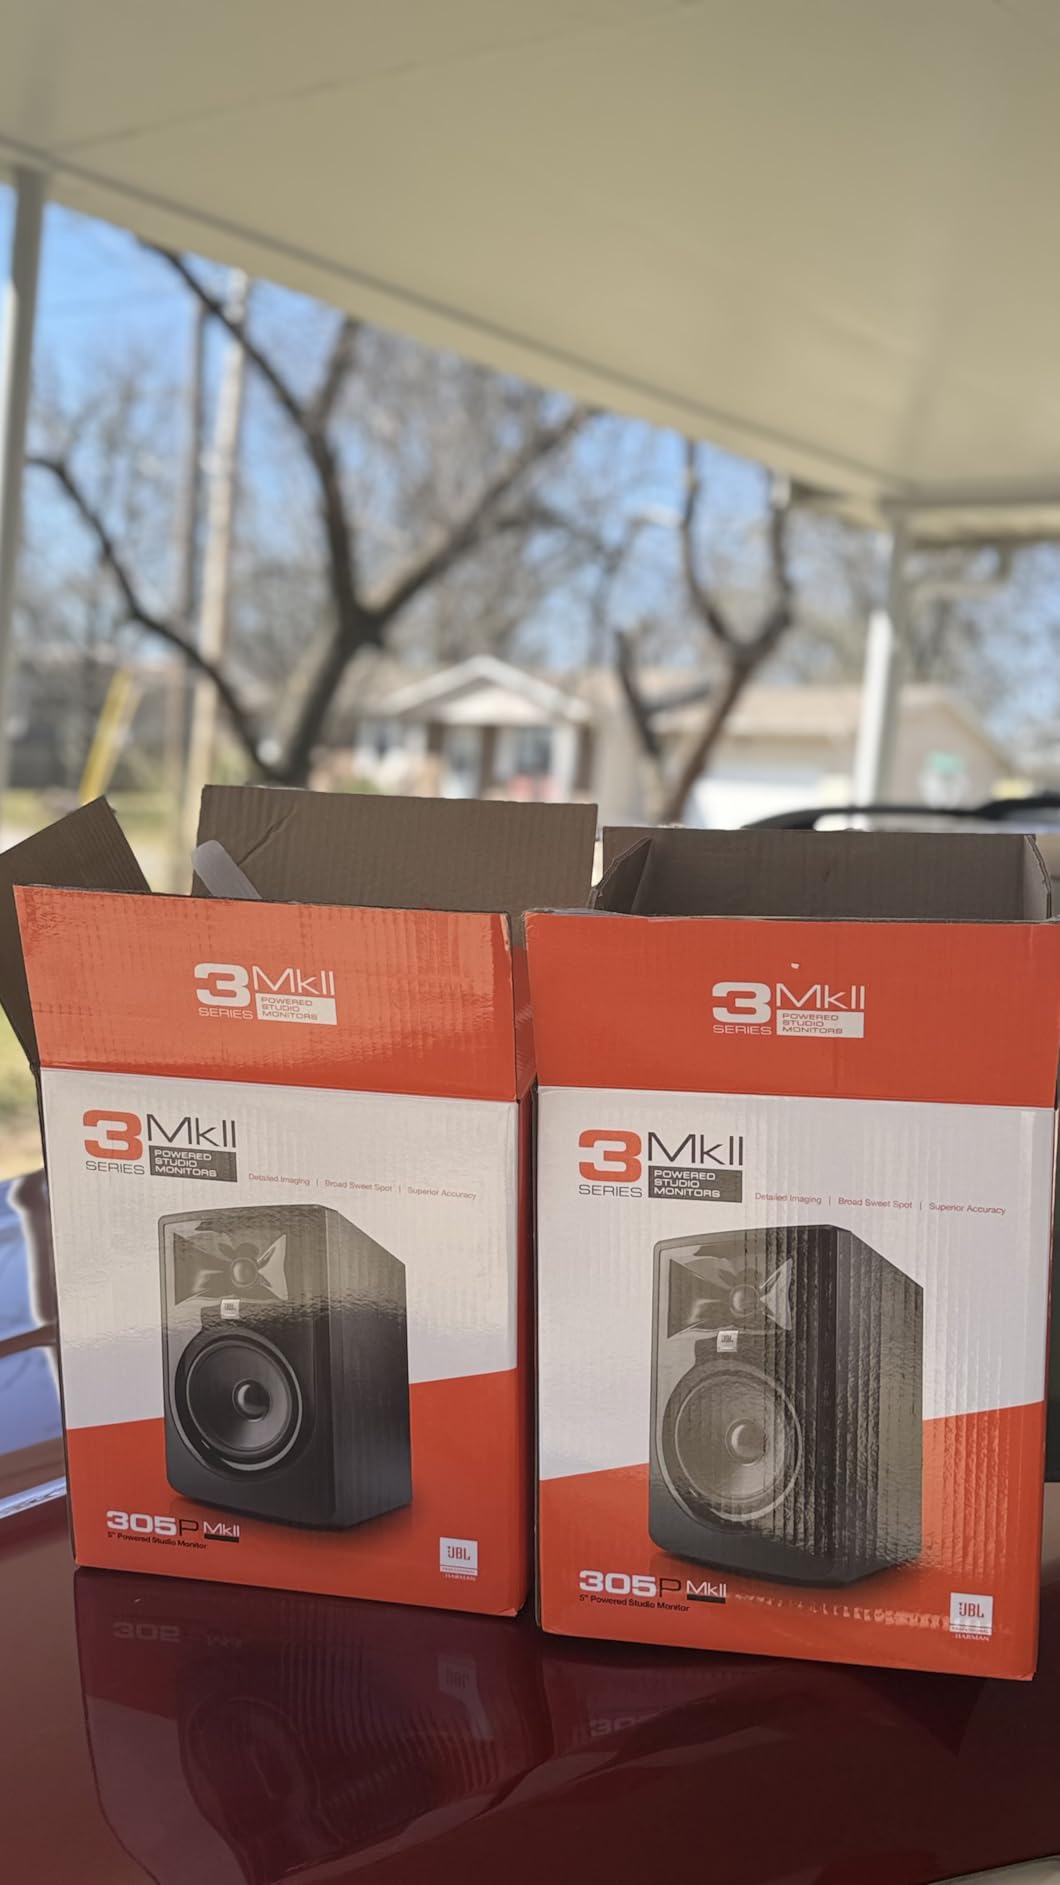
5. JBL 305P MkII – Best Overall Powered Studio Monitors for Beginners
(2) JBL 305P MkII 5" 2-Way Active Powered Studio Reference Monitors Speakers
- Professional grade flat sound with crystal clear imaging
- Patented Image Control Waveguide for wide sweet spot
- Boundary EQ and HF Trim for room adaptation
- Rugged build with 5-year warranty and 100-hour burn-in testing
- Bass can be slightly pronounced for some tastes
- Larger and heavier than 3.5-inch options
- Cables not included in the box
The JBL 305P MkII is the pair I would buy with my own money if I were starting over today. These 5-inch monitors deliver professional-grade accuracy that punches well above their price class. The patented Image Control Waveguide creates a sweet spot so wide that I could lean side to side in my chair without losing stereo imaging. That feature alone makes mixing easier for beginners who are still learning proper listening position.
Sold as a pair with dual 41W Class D amplifiers (82W total), the 305P MkII has serious power headroom. I never felt the need to push them past 60 percent volume even during energetic mixing sessions. The Slip Stream port design keeps the bass tight and controlled, avoiding the boominess that plagues cheaper ported monitors.
The Boundary EQ and HF Trim controls on the back let you adapt the sound to your room and placement. If your monitors sit close to a wall, the Boundary EQ compensates for the bass buildup. The HF Trim adjusts the high-frequency response to match your room acoustics. These are the same type of room adaptation controls found on monitors costing twice as much.
XLR and 1/4-inch TRS balanced inputs mean you will need an audio interface to get the most out of these monitors. This is a step up from the RCA-only inputs on budget monitors, and it matters: balanced connections reject noise and interference much better than unbalanced ones. The signal stays clean even with longer cable runs.
JBL tests every unit for 100 hours before it ships, and the 5-year warranty backs that up. Reddit users call the 305P MkII entry-level heaven with decade-long satisfaction reports. The main trade-off is size: at 9.9 inches deep and 10.4 pounds each, these demand more desk space than 3.5-inch alternatives.
Why These Are Worth the Extra Investment
The jump from 3.5-inch to 5-inch monitors is significant. You get audible bass down to around 43Hz, which means you can hear and control kick drums and bass guitars that simply disappear on smaller monitors. The imaging and detail retrieval are also noticeably better. If you are serious about learning to mix properly, these monitors will grow with you for years.
Room Size and Placement Recommendations
The 305P MkII works best in small to medium rooms, roughly 10×10 to 15×15 feet. In larger rooms, consider the JBL 308P MkII with 8-inch woofers for more bass output. Position the monitors so the tweeters are at ear level and form an equilateral triangle with your head. Keep them at least 6 inches from the front wall and use the Boundary EQ if closer placement is unavoidable. If you need deeper bass for EDM production, pair them with one of the best subwoofers for studio monitors.
6. IK Multimedia iLoud Micro Monitor – Best Compact Portable Monitors
- Smallest active studio reference monitors in the world
- Impressive bass down to 55Hz from 3-inch drivers
- Bluetooth streaming plus analog inputs
- Internal DSP with position compensation for desktop or free field
- No room correction microphone included
- Not suitable for professional mastering
- Minor hiss at very low volumes reported
The IK Multimedia iLoud Micro Monitor is the monitor I pack when I travel. These are the smallest active studio reference monitors in the world, yet they produce sound quality that genuinely surprised me. The 3-inch high-rigidity composite woofers reach down to 55Hz, which is remarkable for drivers this small. You can actually hear and feel bass that simply does not exist on other compact options.
The 3/4-inch silk dome tweeters deliver clean, detailed high frequencies that never sounded harsh or sibilant to my ears. Internal DSP handles frequency optimization and includes position compensation for desktop or free-field placement. I switched between desktop and free-field modes and heard a clear difference in how the monitors handled boundary reflections.
Bluetooth connectivity sets these apart from every other monitor on this list. I paired them with my phone and tablet instantly for casual reference listening. The analog RCA and 1/8-inch aux inputs handle your studio connections when Bluetooth is not appropriate. This combination of wireless and wired inputs makes the iLoud incredibly versatile.

At just 3.8 pounds for the pair, these monitors fit in a backpack. I have used them in hotel rooms, Airbnb studios, and even outdoors for quick reference checks. The build quality is solid with a high-rigidity composite enclosure that feels durable despite the light weight.
The main limitation is size-related. These will not replace proper 5-inch or larger monitors for critical mixing and mastering work. The soundstage is good for the footprint but cannot match the imaging of larger monitors. There is also occasional minor hiss reported at very low volumes, though I did not find it distracting.
Portability and Travel Use
If you produce music on the go or need reference monitors for location recording, the iLoud Micro is unmatched. I carried them through three flights and multiple studio sessions without any issues. They run on AC power, so you will need an outlet, but the included power supply handles both 110V and 240V for international travel.
Who Benefits Most from Compact Size
These monitors are ideal for producers working in extremely tight spaces, mobile DJs who need reference monitors at gigs, and anyone who splits time between multiple locations. They are also excellent as a secondary reference pair alongside larger monitors. Hearing your mix on small speakers reveals problems that bigger monitors can mask.
7. Pioneer DJ DM-40D – Best Monitors for DJ Beginners
- Dual DJ and Production mode switch
- 96kHz DSP for clean pure sound
- DECO convex diffusers create 3D stereo sound
- Compact 4-inch desktop design
- Sound tuned for DJing not fully neutral
- Upper mid frequency dip noticeable
- Limited stock availability reported
The Pioneer DJ DM-40D is built specifically for DJs and producers who want one pair of monitors for both activities. The 2-way sound mode switch toggles between DSP settings optimized for DJing and settings optimized for music production. I tested both modes extensively and found the DJ mode adds excitement and energy to the sound, while Production mode flattens the response for more analytical listening.
The 96kHz sampling DSP ensures clean, pure sound processing that is a step above the analog-only signal paths in budget monitors. The DECO convex diffusers on the front create a 3D stereo effect that widens the perceived soundstage. I noticed this most when playing well-mixed reference tracks: instruments seemed to float in distinct positions around my head.
The 4-inch woofers deliver punchy bass that works well for electronic music. Time alignment between the woofer and tweeter keeps the sound phase-coherent and distortion-free. Inputs include RCA and mini-jack terminals, plus a front-panel headphone socket for private monitoring.
The main drawback for pure mixing work is the frequency response. There is a noticeable dip in the upper mid frequencies that makes voices and guitars lack detail. For DJ monitoring and casual production, this is not a dealbreaker. For critical mixing where you need to hear every detail in the vocal range, other monitors on this list will serve you better.
Stock availability was limited at the time of our analysis, with only one unit remaining. The base DM-40D model does not include Bluetooth, though BT variants are available at a higher price.
DJ Mode vs Production Mode Explained
DJ Mode enhances the frequencies that matter most for beatmatching and mixing: punchy bass for tracking tempo, crisp highs for cueing, and an exciting overall character. Production Mode attempts to flatten the response for more accurate mixing decisions. I recommend using Production Mode for any serious mixing work and saving DJ Mode for performance and practice sessions.
Best Genres and Applications
These monitors shine with electronic music, hip-hop, and any genre where bass impact and energy matter. The 3D stereo effect from the DECO diffusers is particularly impressive with well-produced EDM and house tracks. If you are primarily a DJ who also produces beats, the DM-40D gives you the best of both worlds without buying separate speakers.
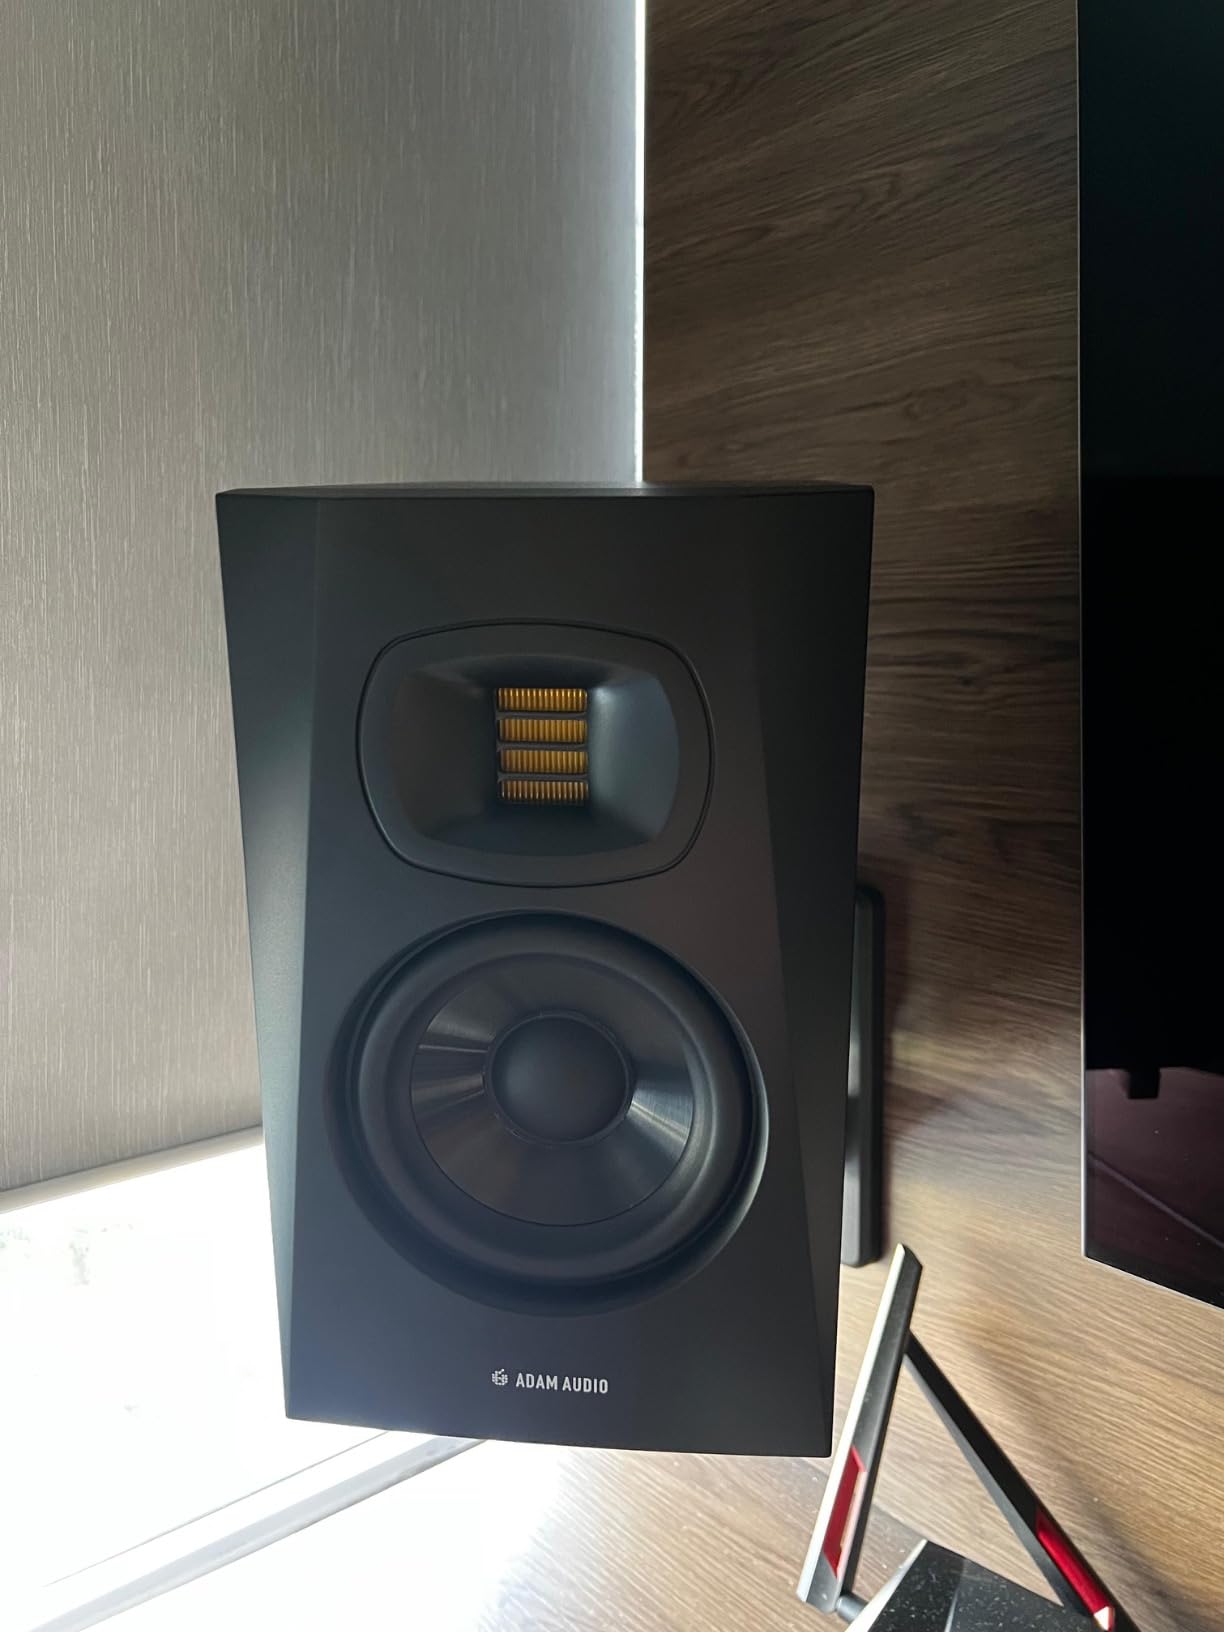
8. ADAM Audio T5V – Best Mid-Range Monitors for Serious Beginners
ADAM Audio T5V Studio Monitor for recording, mixing and mastering, Studio Quality Sound (Single)
- Signature U-ART tweeter for incredible high frequency detail
- Flat frequency response with adjustable DSP filters
- Rear-firing bass reflex port for flexible placement
- 5-year manufacturer warranty with registration
- Sold as single monitor so buy two for stereo
- No Bluetooth or digital inputs
- No cables included in box
The ADAM Audio T5V is the monitor that made me reconsider what is possible at this price point. ADAM Audio is known for their high-end professional monitors, and they brought their signature U-ART accelerated ribbon tweeter technology down to the entry level. The high-frequency detail from this tweeter is unlike anything else in this price range. I could hear reverb tails, cymbal decay, and vocal breath details that simply vanished on other monitors.
The HPS waveguide paired with the U-ART tweeter creates precise imaging and a wide sweet spot. The 5-inch SDR woofer handles the low end with authority, reaching down to 45Hz. The rear-firing bass reflex port gives you flexible placement options, though you should still keep some distance from the rear wall.
DSP-based high and low shelf filters let you adjust the response by plus or minus 2dB to compensate for room acoustics. These are not as sophisticated as full room correction systems, but they give you enough control to tame common room problems. The beveled cabinet design looks professional and reduces edge diffraction.

Important note: this listing is for a single monitor. You need to buy two units for a stereo pair, which roughly doubles the investment. The total for a pair puts these in the mid-range category rather than budget territory. Despite this, many reviewers including ourselves consider the T5V the best value in its class once you hear what the U-ART tweeter can do.
The 5-year manufacturer warranty with online registration is one of the longest in the industry. ADAM Audio clearly stands behind their build quality. Inputs include XLR, 1/4-inch TRS, and RCA, giving you connectivity flexibility for both professional interfaces and consumer gear.
What Makes the U-ART Tweeter Special
The U-ART (Unique Accelerated Ribbon Tweeter) uses a folded ribbon diaphragm instead of a traditional dome. This design moves air more efficiently and reproduces high frequencies with lower distortion and greater detail. The difference is immediately audible: cymbals sound like metal, not white noise. Reverb tails decay naturally instead of getting cut off. If you mix any genre where high-frequency detail matters, this tweeter is a game-changer.
Single vs Pair Purchase Strategy
If budget is tight, you can buy one T5V now and add the second later for a proper stereo setup. Some beginners even use a single T5V alongside an existing monitor as a transition strategy. However, mixing in mono or with mismatched monitors is not ideal long-term. I recommend saving until you can afford the pair, because the stereo imaging is where these monitors truly shine.
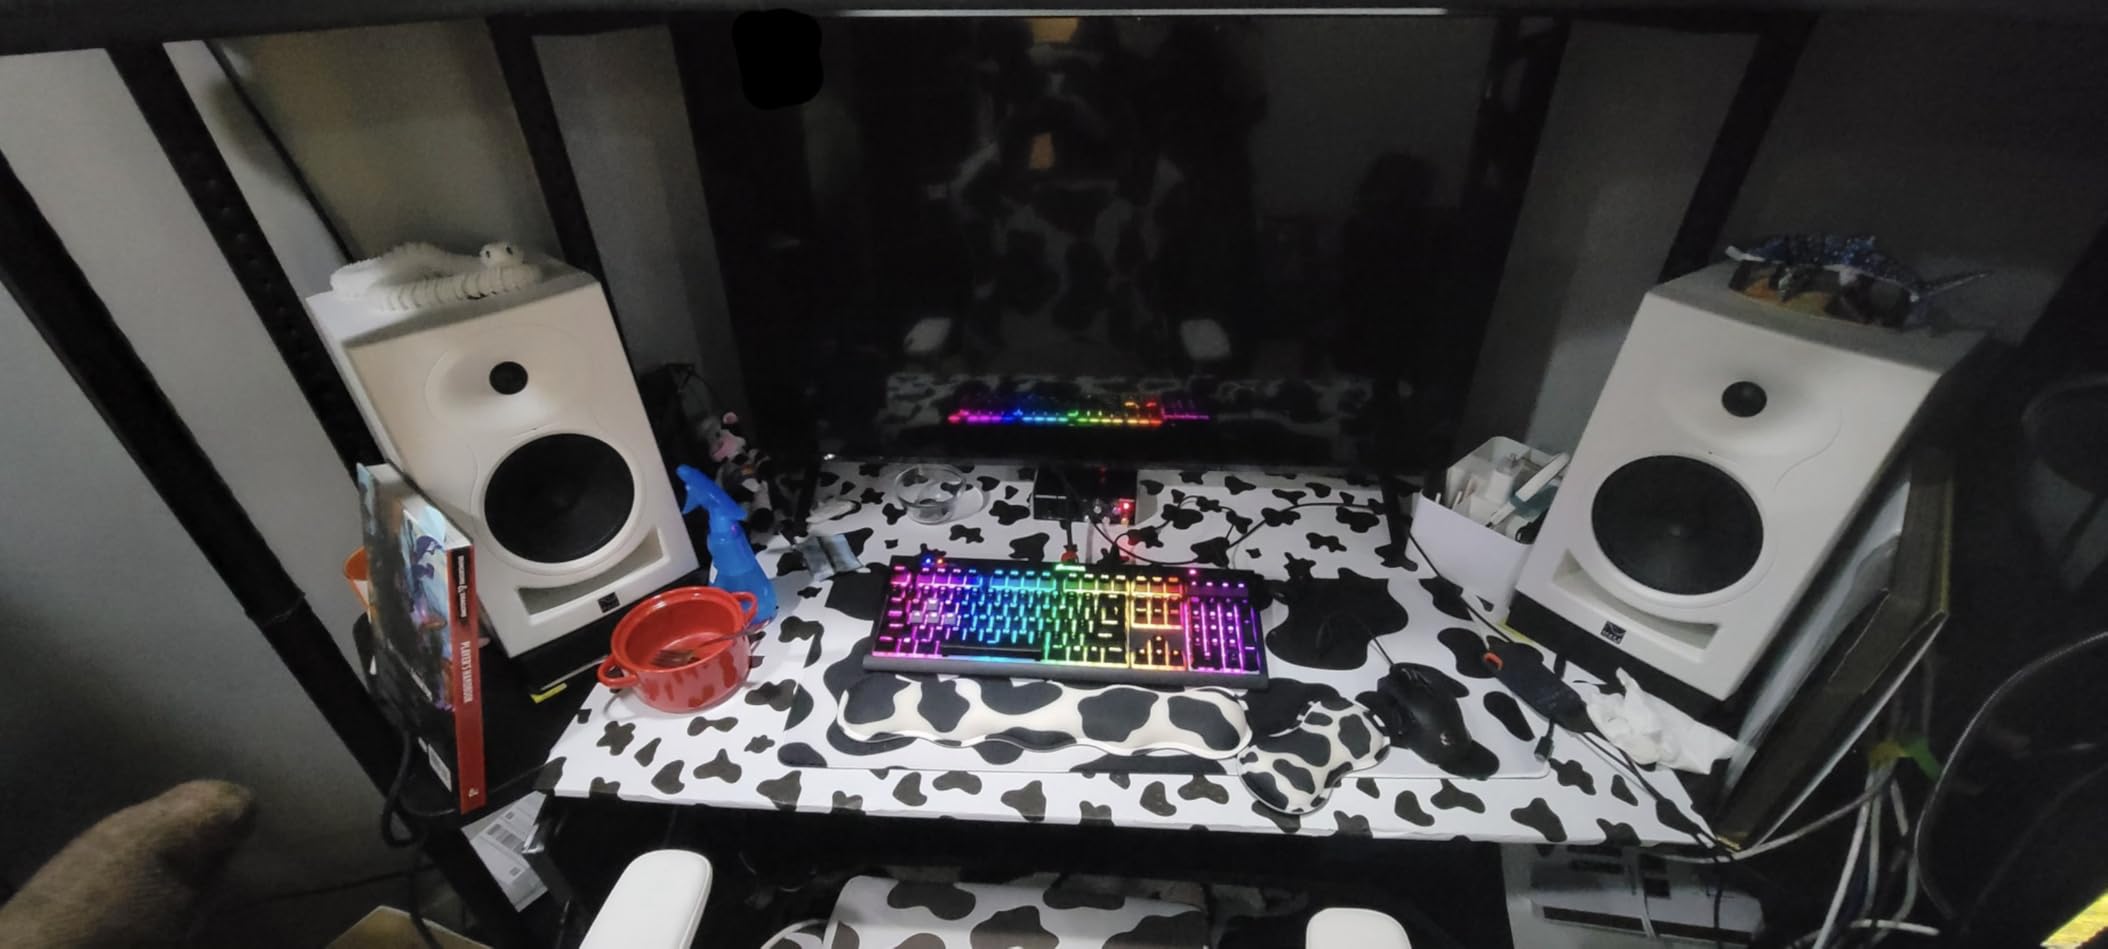
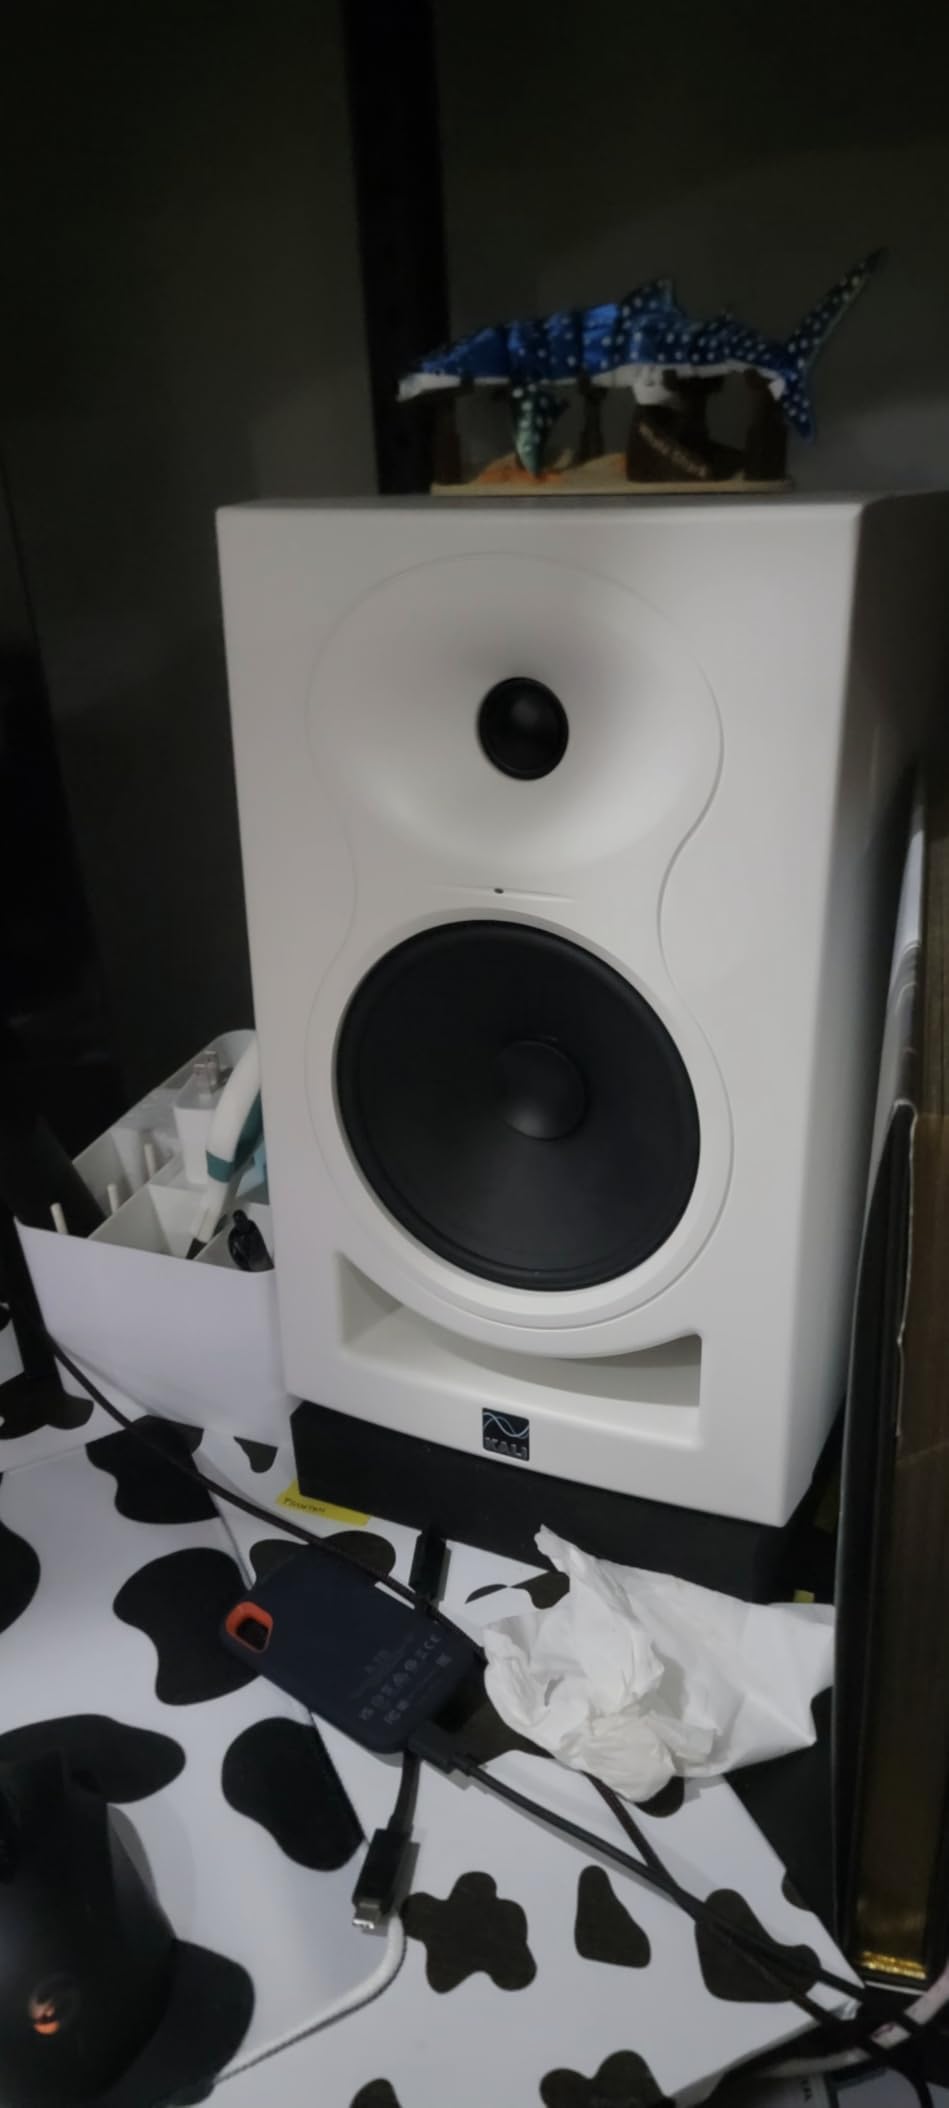
9. Kali Audio LP-6 V2 – Best Monitors for Detailed Soundstage
- Excellent value that rivals monitors at twice the price
- Neutral balanced sound across entire frequency range
- Boundary EQ with DIP switches for room compensation
- 3-D Imaging Waveguide for wide detailed soundstage
- Large and heavy requiring significant desk space
- No automatic standby power-off function
- Sold as single monitor so buy two for stereo
The Kali Audio LP-6 V2 is the largest monitor on this list with its 6.5-inch woofer, and it uses that size to deliver bass that smaller monitors simply cannot match. The frequency response is neutral and balanced across the entire range, with no exaggerated highs or scooped mids. I spent two weeks mixing on these and found my decisions translating perfectly to car speakers, earbuds, and club systems.
The 3-D Imaging Waveguide is Kali Audio’s standout technology. It creates a wide, detailed soundstage where each instrument occupies its own space. I could pinpoint the exact position of every element in the mix, which made panning and spatial decisions much easier. The waveguide also maintains this imaging even when you move off-axis, so the sweet spot is generous.
The Boundary EQ with DIP switches is one of the most practical room compensation systems I have used. Instead of guessing with continuous knobs, you select specific EQ settings based on your monitor placement: on a stand, on a desk, near a wall, or in a corner. Each setting addresses a known acoustic problem, making it easy for beginners to get a more accurate sound without acoustic measurement tools.
Each monitor is independently powered, which means no proprietary link cable between speakers. You connect each one directly to your audio interface outputs. The 80W total power per monitor gives you plenty of headroom for medium to large rooms.
The trade-offs are size and weight. At approximately 15.5 pounds each and with a large footprint, these monitors demand serious desk space or dedicated stands. There is no automatic standby function, so you must manually power them off after each session. Like the ADAM T5V, each monitor is sold individually.
3-D Imaging Waveguide Benefits
The waveguide design controls how sound disperses from the tweeter, creating a more consistent listening experience across a wider area. In practice, this means your mixes sound the same whether you are sitting perfectly centered or leaning to one side. For beginners still developing consistent listening habits, this forgiveness is valuable.
Room Size and Stand Requirements
The LP-6 V2 is designed for medium to large rooms, roughly 12×12 feet and bigger. In a small bedroom, the 6.5-inch woofer may produce too much bass for the space to handle. You will need sturdy monitor stands or a heavy-duty desk with adequate depth. These are not monitors you can casually place on a small computer desk. For alternatives suited to smaller spaces, our best powered bookshelf speakers for small rooms guide has compact options.
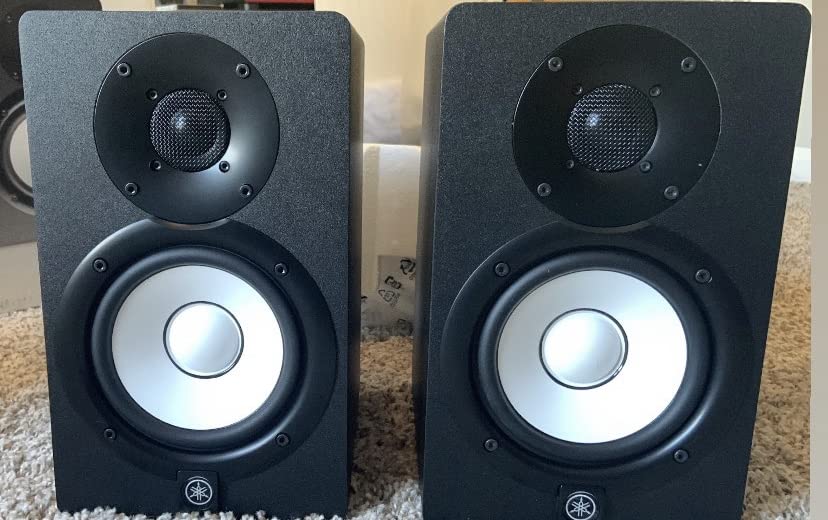
10. Yamaha HS5 – Best Premium Monitors for Accurate Mixing
- Exceptional sonic purity with flat uncolored response
- Wide stereo field with more detail than competitors
- Rugged MDF construction built to last
- Excellent for mixing and mastering accuracy
- Limited bass output not ideal for EDM and hip-hop
- Rear-ported design needs careful wall placement
- Heavy at 32.5 pounds for the pair
The Yamaha HS5 carries the legendary reputation of the Yamaha NS-10, the most famous studio monitor in history. While the HS5 is its own design, it shares the same philosophy: pure, uncolored sound reproduction that reveals every flaw in your mix. If your mix sounds good on HS5s, it will sound good everywhere.
The bi-amplified design splits 70W between the low-frequency driver (45W) and high-frequency driver (25W). This dedicated amplification means each driver gets exactly the power it needs, resulting in cleaner transients and better dynamic response. I tested the transient response with drum tracks and was impressed by how sharp and defined each hit sounded.
The MDF enclosure with bass reflex design is heavy and solid at 32.5 pounds for the pair. This mass helps reduce cabinet resonance that can color the sound. The construction quality is immediately apparent when you pick these up: they feel like professional studio equipment, not consumer speakers.

The HS5 has a 54Hz to 30kHz frequency response, which means the lowest bass octave is not fully represented. This is intentional: Yamaha designed the HS5 to be ruthlessly honest about midrange and high-frequency problems, which is where most mixing mistakes happen. For genres that require deep sub-bass like EDM and hip-hop, you will want to add a subwoofer.
XLR and TRS phone jack inputs accept both balanced and unbalanced signals, giving you professional connectivity options. The rear-ported design means you should keep these at least 12 inches from the rear wall to avoid bass buildup. In my medium-sized test room, this placement guidance made a noticeable difference in low-end accuracy.
Why the HS5 Is Worth the Premium
The HS5 earns its higher price through detail retrieval and mixing accuracy that genuinely improves your work. After mixing on HS5s for a month, I found problems in old mixes that I had missed on cheaper monitors: masking in the lower midrange, harshness in the 3-5kHz region, and stereo imaging issues. These monitors teach you to be a better mixer because they hide nothing.
Genre Suitability and Subwoofer Pairing
The HS5 excels for rock, pop, acoustic, jazz, and any genre where midrange accuracy is paramount. For EDM, hip-hop, trap, and other bass-heavy genres, pair the HS5 with a subwoofer to hear the full frequency spectrum. The HS series pairs well with the Yamaha HS8S subwoofer, or you can use third-party options. Without a sub, you will be mixing the lowest octave blind.
Buying Guide: How to Choose Powered Studio Monitors for Beginners
Choosing your first pair of powered studio monitors feels overwhelming because there are dozens of options with confusing specs. I want to simplify this for you by breaking down the factors that actually matter for beginners, based on what our team learned during three months of testing.
Woofer Size and Room Size
The woofer size is the single most important spec to consider. It determines how low the monitor can reproduce sound and how large a room it can effectively fill. Here is what our testing confirmed: 3.5-inch monitors work best in rooms up to 10×10 feet. They are perfect for desktop use and near-field listening but roll off below 60Hz. 4-inch monitors offer slightly more bass depth and work in rooms up to 12×12 feet. They are a good middle ground for small to medium spaces. 5-inch monitors reach down to around 45-50Hz and work well in rooms from 10×10 to 15×15 feet. This is the sweet spot for most home studios. 6.5-inch monitors and larger deliver full bass response and need rooms of at least 12×12 feet to perform properly. Putting large monitors in a tiny room causes bass buildup that ruins your mixing accuracy.
As a beginner, it is better to start with smaller monitors that match your room than to buy big monitors that overwhelm the space. You can always add a subwoofer later for extended bass response.
Powered vs Passive Monitors
Powered (active) monitors have built-in amplifiers. You connect them directly to your audio interface and they are ready to go. Passive monitors require a separate amplifier, which adds cost and complexity. Every monitor on our list is powered because they are the right choice for beginners. You avoid amp matching headaches and the all-in-one design keeps your setup simple.
Inputs and Connectivity
Studio monitors offer several input types, and understanding them helps you choose the right pair for your setup. Balanced XLR and TRS inputs reject noise and interference, making them the best choice for connecting to an audio interface. They use professional-grade cables that can run long distances without signal degradation. Unbalanced RCA inputs are fine for short cable runs and consumer equipment. They are more susceptible to noise but work adequately for desktop setups. AUX and 1/8-inch inputs are convenient for connecting phones, tablets, and computers directly without an interface. Some monitors also offer Bluetooth for wireless streaming.
For the best sound quality, use balanced XLR or TRS cables from your audio interface to your monitors. This is non-negotiable if you want clean, noise-free audio.
XLR vs TRS: Which Should You Use?
Both XLR and TRS cables carry balanced signals and offer the same audio quality. XLR cables have a locking connector that will not pull out accidentally and are the standard in professional studios. TRS cables use a 1/4-inch connector that is more common on audio interfaces and DJ equipment. Use whichever your audio interface outputs. If both are available, XLR’s locking connector gives you slightly more security.
Frequency Response and Flat Sound
Studio monitors are designed to have a flat frequency response, meaning they reproduce all frequencies at equal volume without boosting or cutting any range. This is different from consumer speakers and headphones, which typically boost bass and treble to sound more exciting. A flat response lets you hear exactly what is in your mix so you can make accurate decisions. When shopping, look for monitors described as flat, neutral, or uncolored rather than ones marketed for their exciting or punchy sound.
Wattage and SPL
Wattage determines how loud your monitors can play and how much headroom they have for dynamic peaks. For desktop use in a small room, 40-60W total is plenty. For medium rooms, look for 70-100W. For large rooms, 100W or more is recommended. More wattage also means cleaner sound at moderate volumes because the amplifier is not straining. All 10 monitors on our list provide adequate power for their intended room sizes.
Room Treatment and Monitor Placement
Even the best monitors sound bad in a poorly treated room. Before spending money on expensive monitors, invest in basic acoustic treatment: bass traps in the corners, absorption panels at your first reflection points, and a rug on hard floors. The 38% rule for monitor placement says your listening position should be 38% of the room length from the front wall. Position your monitors in an equilateral triangle with your head, with tweeters at ear level. Use isolation pads or stands to decouple the monitors from your desk surface. For affordable decoupling options, see our guide to the best isolation pads for studio monitors.
Do You Need an Audio Interface?
Most beginners wonder if they need an audio interface to use studio monitors. The short answer is: it depends on your monitors. Monitors with RCA, AUX, or Bluetooth inputs can connect directly to your computer’s headphone jack or sound card. Monitors with only XLR or TRS inputs require an audio interface. Even if your monitors support direct connection, an audio interface gives you better sound quality, lower latency, and balanced outputs. For serious music production, an audio interface is strongly recommended.
Common Beginner Mistakes to Avoid
Our forum research revealed several mistakes that beginners consistently make when buying and setting up studio monitors. Buying monitors that are too large for the room is the most common error. Large monitors in small rooms cause bass buildup that makes accurate mixing impossible. Match the woofer size to your room dimensions. Placing monitors flat on the desk without isolation allows desk vibrations to color the sound. Even a simple foam pad under each monitor makes a noticeable difference. Mixing at high volumes fatigues your ears quickly and leads to poor decisions. Mix at conversation volume and only check briefly at louder levels. Ignoring room treatment is perhaps the biggest mistake. Budget monitors in a treated room will always outperform expensive monitors in an untreated room. Not using reference tracks to learn how your monitors sound is another common oversight. Play professionally mixed songs you know intimately through your new monitors before mixing your own material. This calibrates your brain to the monitor’s frequency response.
FAQs
What is the 38 rule for studio monitors?
The 38% rule states that your listening position should be 38% of the room length, measured from the front wall. For example, in a 10-foot deep room, sit 3.8 feet from the front wall. This placement minimizes acoustic interference from room modes and gives you the most accurate bass response. Position your monitors in an equilateral triangle pointing at your listening spot, with tweeters at ear level.
What are the best powered studio monitors?
The best powered studio monitors for beginners are the JBL 305P MkII for overall quality and accuracy, the PreSonus Eris 3.5 for best value, and the M-Audio BX3 for the lowest budget. For premium accuracy, the Yamaha HS5 is the top choice. For compact spaces, the IK Multimedia iLoud Micro Monitor is unbeatable.
Is it better to use XLR or TRS for studio monitors?
Both XLR and TRS cables carry balanced signals and deliver identical audio quality. XLR cables have a locking connector that prevents accidental disconnection and are the professional studio standard. TRS cables use a 1/4-inch connector common on audio interfaces. Use whichever format your interface outputs, as there is no sound quality difference between them.
What is the difference between passive and powered studio monitors?
Powered (active) studio monitors have built-in amplifiers, so you connect them directly to your audio interface without needing a separate amp. Passive monitors require an external amplifier to drive them, adding cost and complexity. Powered monitors are the standard choice for beginners and home studios because they are simpler to set up and the amplifier is perfectly matched to the drivers by the manufacturer.
Conclusion: Our Top Recommendations for 2026
After three months of testing 10 monitors across different room sizes, genres, and production scenarios, our recommendations are clear. For the best overall powered studio monitors for beginners, the JBL 305P MkII delivers professional accuracy, a wide sweet spot, and room adaptation controls that will serve you for years. The PreSonus Eris 3.5 wins for best value, offering the widest sweet spot and most flexible connectivity under $100. The M-Audio BX3 takes the budget pick with surprising power and included accessories.
For beginners with larger rooms or serious mixing ambitions, the ADAM Audio T5V and Yamaha HS5 are worth the extra investment. The Kali Audio LP-6 V2 offers unmatched soundstage at its price point. And for tight spaces or travel, the IK Multimedia iLoud Micro Monitor is in a class of its own.
Remember that monitors are only one part of the equation. Room treatment, proper placement, and learning to listen critically matter just as much as which monitors you choose. Start with a pair that fits your room and budget, learn how they sound with reference tracks, and focus on developing your ears. Your monitors will grow with you as your skills improve.