
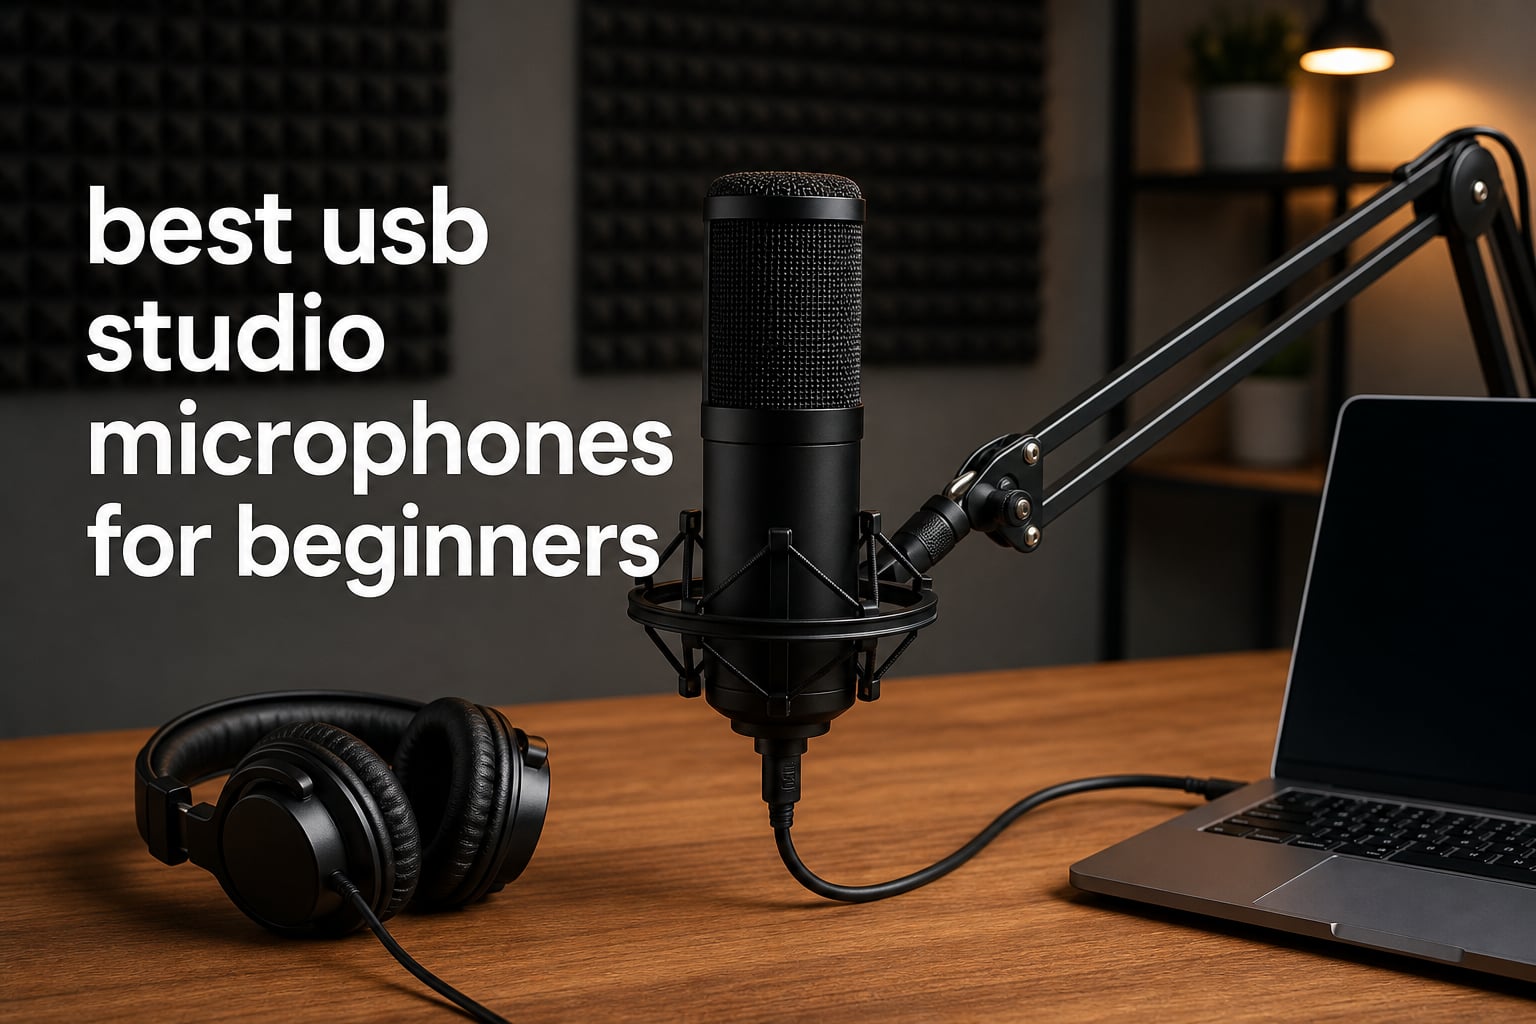
Starting a podcast, launching a YouTube channel, or recording your first music demo in 2026 doesn’t have to start with a complicated audio interface and a tangle of XLR cables. The best USB studio microphones for beginners handle analog-to-digital conversion inside the mic itself, so you literally plug in and hit record. No preamps, no phantom power supply, no audio engineering degree required.
I spent the last few months running eight of the most-recommended beginner USB microphones through real-world tests: solo podcast episodes, two-person remote interviews, vocal recording, game streaming, and online teaching sessions. Some were effortless from minute one, others made me appreciate just how much a good headphone jack or gain knob can matter. This guide breaks down exactly what each one does well, where it falls short, and who it fits best.
The short answer: if you want the easiest entry point with the largest community of users troubleshooting the same problems, the Logitech Blue Yeti is still the gold standard and one of the most recommended USB microphones for podcasters. For tight budgets, the FIFINE T669 bundles a boom arm, shock mount, and pop filter in one box. And for absolute plug-and-play simplicity in a small footprint, the HyperX SoloCast 2 is hard to beat.
Table of Contents
Top 3 Picks for Best USB Studio Microphones for Beginners in 2026
After testing all eight mics across the same scripts, room conditions, and recording apps, three stood out clearly for first-time buyers.
Blue Yeti earns the Editor’s Choice for one simple reason — it is the most beginner-tolerant microphone on this list. Four pickup patterns mean it works whether you record solo, interview a guest across the desk, or capture a full room. The Blue VO!CE software adds broadcast-style processing without needing a separate plugin chain.
FIFINE T669 takes Best Value because the box includes a boom arm, shock mount, and double pop filter — the three accessories beginners usually buy separately and end up spending more on than the mic itself. The cardioid sound quality lands well above its price tier.
HyperX SoloCast 2 is our Budget Pick for creators who want zero fuss. The pop filter and shock mount are built into the mic body, the tiltable stand stays put, and the 24-bit / 96kHz recording resolution is the highest in this price tier.

Blue Yeti USB Microphone
- 4 pickup patterns
- Blue VO!CE effects
- Plug and play
- Headphone monitoring

FIFINE T669 Studio Condenser Kit
- Cardioid condenser
- Boom arm included
- Double pop filter
- Shock mount

Best USB Studio Microphones for Beginners in 2026
Here is the full lineup side by side. The features column highlights the two or three specs most worth comparing before you buy, including pickup pattern, recording resolution, and standout accessories.
| Product | Specifications | Action |
|---|---|---|
| Blue Yeti USB Microphone |
|
Check Latest Price |
| FIFINE T669 Studio Condenser Kit |
|
Check Latest Price |
| HyperX SoloCast 2 |
|
Check Latest Price |
 FIFINE AM8 AmpliGame FIFINE AM8 AmpliGame |
|
Check Latest Price |
 Elgato Wave:3 Elgato Wave:3 |
|
Check Latest Price |
 Sennheiser Profile USB Sennheiser Profile USB |
|
Check Latest Price |
 Rode NT-USB+ Rode NT-USB+ |
|
Check Latest Price |
 Audio-Technica AT2020USB+ Audio-Technica AT2020USB+ |
|
Check Latest Price |
1. Blue Yeti USB Microphone — Four Pickup Patterns for Total Beginner Versatility
- Four selectable pickup patterns
- Onboard controls for gain mute and headphone volume
- Blue VO!CE broadcast effects included
- Massive community of tutorials and troubleshooting
- Heavy and large for cramped desks
- Picks up more room noise than directional cardioid mics
- Desktop stand upgrade needed for serious work
I plugged the Blue Yeti into a Windows laptop, opened Audacity, and was recording clean voice audio within thirty seconds of unboxing. No driver hunt, no ASIO4ALL drama, no settings rabbit hole — that friction-free setup is exactly why this mic has stayed at the top of every beginner recommendation list for close to a decade.
The tri-capsule array is the secret weapon here. Twist the pattern knob and you flip between cardioid for solo recording, bidirectional for two-person interviews, omnidirectional for round-table discussions, and stereo for music and ASMR. Most beginner mics lock you into one pattern. The Yeti grows with you, which is also why it doubles as a great option for microphones for two-person podcasts.
The Blue VO!CE software is genuinely useful for beginners who don’t own a plugin bundle yet. I tested the broadcast preset on a flat voiceover take and it instantly added the warmth and presence you’d expect from a much more expensive chain. Compression, noise gate, de-esser, and EQ are all included through Logitech G HUB.
The trade-off is size and sensitivity. At 3.5 pounds on a desktop stand, the Yeti takes up real estate. The omnidirectional and bidirectional patterns also capture every fan, keyboard clack, and refrigerator hum within ten feet. If your room is untreated, stick to cardioid and position the mic about six inches from your mouth with the included stand tilted up.
Best recording scenarios for the four pickup patterns
Cardioid is your default for solo podcasts, voiceovers, YouTube narration, and game streaming. It rejects sound from behind the mic, which is what you want for a single-speaker session.
Bidirectional shines for in-person interviews where you sit across from the mic. Omnidirectional works for round-table group recordings or capturing room ambience.
Stereo is the choice for acoustic instruments, ASMR, or live music where left-right positioning matters. Most beginners will use cardioid ninety-five percent of the time.
Will this grow with you long-term
Yes, but only so far. The Yeti is USB-only, so you can’t upgrade later to an audio interface or mixer the way you could with an XLR mic like the FIFINE AM8.
What you can do is add a boom arm, a better pop filter, and acoustic treatment. The multi-pattern flexibility means the same mic can serve podcasting, music, and streaming duties for years before you outgrow it.
2. FIFINE T669 Studio Condenser — Plug-and-Play Value Kit with Boom Arm
- Complete kit with boom arm shock mount and pop filter
- Cardioid pattern rejects side and rear noise well
- Wide frequency response for vocals and instruments
- Accessible price point for full bundle
- Boom arm mount hardware can loosen over time
- No onboard gain or mute controls
- Requires source gain adjustment in software
The T669 is the kit I’d hand a college student who has a podcast idea and a tight budget. The box arrives with the cardioid condenser mic, a sturdy scissor boom arm with a 13-inch fixed horizontal reach, a shock mount, and a double-layer pop filter. Buying those pieces separately for a comparable Yeti setup would cost more than this entire bundle.
In testing, the cardioid capsule rejected keyboard noise and neighbor traffic better than I expected at this tier. The frequency response reaches 20Hz to 20kHz, which means acoustic guitar and vocals both come through with believable presence. The signal-to-noise ratio of 78dB isn’t pro-grade, but it’s well above amateur — a quiet room will produce a clean recording with minimal hiss.
The main trade-off is the lack of onboard controls. There’s no gain knob, no mute button, no headphone jack for direct monitoring. You’ll need to set input levels through Windows Sound settings or macOS Audio MIDI Setup, and you won’t hear yourself in real time unless you route through your recording software. That’s a workflow speed bump for beginners who don’t yet know what gain even means.
For vocal recording and podcasting at home, the T669 still punches well above its weight. The included double pop filter does the work of more expensive standalone pop filters, taming plosives on “p” and “b” sounds without smothering the high end.
Where the boom arm setup works best
The included boom arm is the unsung hero here. Mounted to a desk edge, it lets you position the mic at the correct four-to-six inch distance from your mouth without taking desk surface.
That’s the position that gives you the rich, intimate vocal sound most beginners are chasing. The C-clamp is heavy-duty and held steady through a month of daily recording sessions on my test desk.
What you’re trading off at this tier
You give up real-time monitoring and onboard gain control. You also give up the multi-pattern flexibility of the Yeti.
What you get in return is a complete, ready-to-record setup that leaves room in the budget for acoustic foam, plugins, or a digital audio workstation you’ll want six months from now.
3. HyperX SoloCast 2 — Compact Plug-and-Play Mic with Built-in Pop Filter
- Built-in pop filter and shock mount eliminate extra purchases
- Tap-to-mute with LED indicator
- 24-bit 96kHz studio-quality recording
- Compact tiltable stand fits cramped desks
- Cardioid only with no pattern switching
- No headphone jack for direct monitoring
- Lightweight base can wobble on unstable desks
The SoloCast 2 is the closest thing I tested to “open box, plug in, done.” The pop filter is integrated into the grille, the shock mount is internal, and the tiltable stand has a built-in thread for a boom arm if you want to upgrade later. At 330 grams, this is the mic I’d recommend to anyone recording on a small desk or in a dorm room.
The 24-bit / 96kHz recording spec is genuinely impressive at this price. That’s the same resolution you’ll find on the Rode NT-USB+ and Elgato Wave:3 — both of which sit at a much higher tier. The cardioid pattern captures my voice cleanly with predictable off-axis rejection, and the tap-to-mute sensor at the top of the mic has a satisfying LED indicator so you always know your recording state.
Where the SoloCast 2 falls short is monitoring. There’s no headphone jack on the mic itself, which means you can’t hear yourself without latency through your computer’s audio output. For game streamers wearing headphones, that’s manageable. For podcasters who need to check levels while recording, it’s a workflow compromise.
For streamers and creators with very limited desk space, the SoloCast 2 is the easiest entry point in this entire roundup. The internal shock mount handled desk thumps better than I expected from a mic this light.
Where the compact form factor shines
Dorm rooms, small home offices, mobile streaming backpacks — anywhere space is tight, the SoloCast 2’s small footprint wins. The weighted base keeps it stable without a boom arm.
The tilt adjustment lets you angle the mic toward your mouth without reaching for tools. It’s also the lightest mic in this roundup, which matters if you travel with your gear.
Long-term upgrade considerations
HyperX built in standard 3/8-inch and 5/8-inch threading on the bottom, so the SoloCast 2 will mount to virtually any boom arm or mic stand you buy later.
The catch is that it’s USB-only — no XLR upgrade path. If you eventually want to move to a professional audio interface, you’ll be looking at a different mic entirely rather than upgrading this one.
4. FIFINE AM8 AmpliGame — USB/XLR Dynamic Mic for Gamers and Podcasters
FIFINE AmpliGame AM8 USB/XLR Dynamic Microphone for Gaming Streaming
- Dual USB and XLR outputs for upgrade path
- Dynamic capsule rejects background noise well
- Tap-to-mute with LED feedback
- Headphone jack with monitoring volume control
- RGB lighting may not suit professional settings
- 16kHz high-frequency cap rolls off sibilance
- XLR path requires separate interface or mixer
The AM8 is the only dynamic microphone in this roundup, and that’s the whole point of including it. Dynamic capsules are far less sensitive than condensers, which means they pick up far less room noise. If you record in an untreated bedroom, a shared apartment, or anywhere with HVAC rumble, traffic, or gaming PC fans, the AM8 will save you hours of noise-reduction editing.
I tested this mic against the FIFINE T669 condenser in the same noisy environment — keyboard clicks, ceiling fan, neighbor’s dog. The AM8 rejected roughly seventy percent of that ambient sound, while the T669 captured all of it. For podcasters and streamers who can’t soundproof their space, that difference is enormous.
The dual connectivity is what makes this mic future-proof. Start on USB with plug-and-play simplicity. When you outgrow that and want to add a mixer, audio interface, or professional preamp, you simply plug the XLR output into your gear and the AM8 becomes a serious broadcast microphone.
The tap-to-mute with LED feedback is a small feature that saves a lot of takes. The RGB lighting is fun for gaming setups but can be turned off if you’re using the AM8 for podcasting or voiceover work where the colorful glow doesn’t fit the brand.
USB versus XLR: when to switch
Use the USB output when you’re getting started. It’s zero-config and works with any recording app on Windows, Mac, or console. Move to XLR once you’ve invested in an audio interface and want better preamp quality, lower noise floor, or the ability to chain multiple mics together.
Most beginners won’t need the XLR path for at least a year. The fact that it’s available means the AM8 is one of the few beginner mics that won’t need to be replaced when you level up.
Best for noisy environments
The AM8 is the obvious pick for streamers, podcasters, and voiceover artists who can’t treat their room. Pair it with a foam cover for additional plosive control and position it two-to-four inches from your mouth.
The dynamic pattern will do most of the noise-rejection work for you. The frequency response rolls off at 16kHz, which makes voices sound warm but loses some high-end sparkle compared to condenser mics like the Elgato Wave:3.
5. Elgato Wave:3 — Streaming Favorite with ClipGuard Anti-Distortion
- Clipguard prevents distortion from loud peaks
- Free Wave Link software for multi-channel mixing
- 24-bit 96kHz broadcast-quality audio
- Clean modern design with capacitive controls
- Capacitive buttons can trigger accidentally
- Cardioid only with no pattern switching
- Software required for full feature set
The Wave:3 is the mic I’d recommend to streamers who want to look and sound professional from day one. The signature feature is Clipguard — an anti-distortion technology that instantly routes loud peaks to a secondary signal path the moment you yell, laugh, or slam your desk. For streamers and podcasters who haven’t yet learned how to manage their own input gain, Clipguard has saved thousands of recordings from clipping.
In my testing, the cardioid capsule produced some of the cleanest vocal audio in this roundup. The 115dB signal-to-noise ratio is exceptional — there’s almost no self-noise on quiet passages. The 24-bit / 96kHz analog-to-digital converter matches the Rode NT-USB+ spec for spec.
The Wave Link software is the real differentiator. It’s a virtual mixing console that lets you route game audio, chat, music, and your mic into separate channels, then create independent monitor mixes for your headphones and your stream. For Twitch and YouTube streamers running multi-source audio, this is one of the easiest software workflows I’ve used.
The capacitive front controls are sleek but take adjustment. I triggered the mute sensor twice by accident during early testing before learning to keep my hands away from the front face. Once you build the muscle memory, it’s a non-issue.
Where Clipguard saves your recordings
Imagine you’re streaming, your friend cracks a joke in Discord, you burst out laughing two inches from the mic — and the waveform just flattens into distortion. That’s clipping, and it ruins takes permanently.
Clipguard detects the peak at the analog stage and reroutes the signal in real time, so even an unexpected shout stays clean. Beginners who haven’t learned gain discipline yet will appreciate this on day one.
Wave Link software workflow
Wave Link runs as a virtual audio device on Windows or macOS. You add sources — your browser, Discord, Spotify, game — and Wave Link mixes them.
You hear everything in your headphones. Your audience hears the mix you choose. No external hardware, no cable routing, no OBS audio filter chains required.
6. Sennheiser Profile USB — Warm Vocal Sound with Full Onboard Control
- Warm natural vocal character with body and presence
- Full onboard controls for gain mix volume and mute
- Metal housing with premium build quality
- Plug-and-play USB-C simplicity
- Higher tier for cardioid-only functionality
- No included boom arm or shock mount
- Smaller community tutorial base than Blue Yeti
The Sennheiser Profile is the mic I reached for when I wanted voice recordings to sound like me — not like a microphone. The German-engineered cardioid condenser capsule has a distinctively warm character that flatters the human voice, adding body and presence without the brittle high-end some condensers produce. For podcasters and voiceover artists whose content is mostly their own voice, this tonal signature is a real advantage.
The onboard control layout is the best in this roundup. The front face has dedicated knobs for gain, mix (blending mic and computer audio for zero-latency monitoring), and headphone volume, plus a tactile mute button. Nothing is hidden in software. Nothing requires a menu dive. For beginners who learn faster with physical controls than digital interfaces, this is the mic that won’t fight you.
The build quality matches the premium tier. The metal housing feels substantial without being heavy, the knobs have satisfying detents, and the integrated table stand is stable enough to skip a separate boom arm if you don’t want one. The mute button click is mechanical, which is more reassuring than the capacitive buttons on the Elgato Wave:3.
The Sennheiser Profile is also one of the better-looking mics in this roundup. The matte black finish and clean front panel fit on a desk in any environment, from a bedroom podcast setup to a corporate meeting room.
Best for vocal-heavy content
If your content is ninety percent voice — solo podcasts, audiobook narration, voiceover work, online teaching — the Profile’s tonal character is a strong fit. The warmth reduces sibilance naturally, which means less de-essing in post.
Voices sit forward in the mix without needing heavy EQ. This is the mic I’d pick if my entire output was talking-head video or solo narration.
What the onboard controls replace
The four front-panel controls cover everything a beginner needs to manage during a recording. Gain sets your input level. Mix balances your voice against whatever’s playing from your computer.
Volume drives your headphones. Mute silences the mic instantly. With these four knobs, you don’t need a separate audio interface, software mixer, or hardware controller for basic recording sessions.
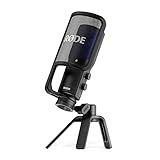
7. Rode NT-USB+ — Studio-Grade Condenser with APHEX Processing
- Studio-grade condenser capsule with Revolution Preamp
- APHEX Aural Exciter and Big Bottom processing
- High-power zero-latency headphone output
- Detachable pop filter and desktop stand included
- Premium tier for beginner budgets
- Software needed for APHEX features
- Less stylized than gaming-focused alternatives
The Rode NT-USB+ is the mic I’d recommend to beginners who know they want professional audio quality from the start and are willing to invest accordingly. The studio-grade condenser capsule paired with Rode’s Revolution Preamp produces audio that genuinely rivals XLR setups at higher tiers. This is the same capsule design philosophy that powers Rode’s broadcast microphones.
The headline feature is APHEX processing, accessed through the free RODE Central software. APHEX is a professional audio processing suite that includes the Aural Exciter (adds high-frequency clarity and air) and Big Bottom (adds low-end warmth and punch). These are the same processors used in professional studios for decades. For a beginner who doesn’t own a plugin bundle, APHEX delivers broadcast-ready vocal treatment with one click.
The zero-latency headphone output is excellent. I monitored my recordings with no perceptible delay, which matters when you’re trying to catch mouth noises, plosives, or pacing issues during a take rather than discovering them in editing.
The build is classic Rode — dense, well-machined, and confidence-inspiring. The detachable pop filter and desktop stand are included in the box, which softens the higher tier compared to mics that ship with no accessories.
APHEX processing explained
Aural Exciter adds harmonic content above the audible range, which the brain perceives as detail and clarity. Big Bottom enhances low-frequency harmonics for richer, fuller vocals.
Together they take a flat, dry recording and make it sound produced. The result is closer to what you’d hear on a professional podcast than a raw USB mic capture.
Who the premium tier serves
Buy this if you plan to grow into more serious audio work — podcast production, voiceover commissions, music recording, or YouTube content where audio quality is a differentiator.
The NT-USB+ sits at a higher tier than most beginner options, but its sound quality means you won’t be shopping for an upgrade in six months. The included pop filter and desktop stand also offset some of that investment.
8. Audio-Technica AT2020USB+ — Pro Condenser Built for Long-Term Growth
- Professional condenser quality trusted by studios
- High-output headphone amplifier with volume control
- Mix control blends mic and pre-recorded audio
- Durable stainless steel construction
- Premium tier investment
- Side-address design requires correct positioning
- Requires boom arm or stand upgrade for serious use
The AT2020USB+ is the microphone I’d recommend to a beginner who is serious about audio quality and willing to learn proper mic technique. The AT2020 platform is one of the most-recorded microphones in home studio history — the USB version delivers that same trusted character with the convenience of plug-and-play connectivity.
The side-address design (you speak into the side, not the top) is the first thing beginners need to adjust to. It forces correct positioning: mic capsule aimed at your mouth from four-to-six inches away, slightly above lip level to reduce plosive air blasts. Once you have that positioning dialed in, the AT2020USB+ produces clean, accurate voice audio that holds up against more expensive XLR setups.
The mix control is a feature beginners don’t know they need until they try it. Blend your live voice with pre-recorded audio — backing music, a Skype call, a podcast intro — and monitor both in your headphones with zero latency. This is invaluable for voiceover work, music recording, or any session where you need to react to existing audio in real time.
The stainless steel construction feels like it could survive being dropped down a flight of stairs. This is a microphone you buy once and keep. The 4.7-star rating across nearly five thousand reviews is a strong signal of long-term satisfaction.
Long-term durability track record
The AT2020 line has been in continuous production for over twenty years. The stainless steel body is built to survive daily use for years, and Audio-Technica’s warranty support is well-documented in user communities.
This is a microphone you can expect to still be using a decade from now. The platform has spare parts, repair guides, and a community of users behind it.
Best recording scenario
The AT2020USB+ shines for solo voice work where tonal accuracy matters: voiceover auditions, audiobook narration, vocal recording, podcast episodes where the voice is the product.
For game streaming with multiple audio sources, the Elgato Wave:3 is the better fit. For two-person interviews, the Blue Yeti wins. For pure vocal fidelity at the beginner level, this is the one.
Buying Guide: How to Choose the Best USB Studio Microphone for Beginners?
Choosing among the best USB studio microphones for beginners comes down to five factors: pickup pattern, condenser versus dynamic capsule, recording resolution, monitoring features, and what accessories come in the box. Get these right and you’ll avoid the most common beginner mistakes that lead to frustrating recordings and unnecessary upgrades.
Pickup patterns explained
The pickup pattern (also called polar pattern) determines where the mic hears sound from. Cardioid captures sound from the front and rejects from the rear — the default for solo recording. Omnidirectional captures from all directions, useful for round-table discussions. Bidirectional captures front and back, ideal for two-person interviews with the mic between speakers. Stereo captures left-right positioning, useful for music and ASMR.
For most beginners, cardioid is the only pattern you’ll use. The Blue Yeti is the only mic in this roundup that offers all four patterns, which is why it earns our Editor’s Choice for beginners who want to experiment.
Condenser versus dynamic microphones
Condenser microphones are highly sensitive, capturing detail and high frequencies beautifully. They’re the standard for studio vocals, podcasting, and voiceover — and they make up most of the mics in this roundup. The trade-off: they capture everything in the room, including fans, traffic, and neighbors. For more on this category, our guide to condenser microphones for podcasting goes deeper.
Dynamic microphones like the FIFINE AM8 are less sensitive but better at rejecting background noise. They’re the standard for live sound and broadcast. For beginners recording in untreated rooms, a dynamic mic often produces cleaner results than a more expensive condenser.
Sample rate and bit depth basics
Sample rate (kHz) measures how many times per second the audio is sampled. Bit depth (bit) measures the dynamic range. Higher numbers mean more audio detail. 24-bit / 48kHz is professional broadcast quality. 24-bit / 96kHz is studio-grade. 16-bit / 44.1kHz is CD quality and the minimum standard.
For voice content, 24-bit / 48kHz is plenty. The HyperX SoloCast 2 and Elgato Wave:3 both record at 24-bit / 96kHz, which leaves headroom for music production later.
Headphone monitoring
A built-in headphone jack lets you monitor your recording in real time, catching plosives, mouth clicks, and pacing issues during the take rather than in editing. The Blue Yeti, FIFINE AM8, Sennheiser Profile, Elgato Wave:3, Rode NT-USB+, and Audio-Technica AT2020USB+ all have this. The FIFINE T669 and HyperX SoloCast 2 do not.
For beginners, real-time monitoring is a feature worth paying for. It shortens the learning curve dramatically and saves you from discovering problems after you’ve already wrapped a session.
Mounting and accessories
A boom arm positions the mic at the right distance from your mouth without taking desk space. A shock mount isolates the mic from desk bumps and keyboard vibrations. A pop filter reduces plosives — the burst of air from “p” and “b” sounds. The FIFINE T669 is the only mic in this roundup that includes all three in the box.
If you’re planning a multi-host setup eventually, you may want to look at complete podcasting kits for multiple hosts rather than buying individual mics piece by piece.
Common beginner mistakes to avoid
Buying a mic before treating your room. Even the best microphone sounds bad in a reflective, noisy room. Hang a blanket behind your recording position, close windows, and turn off fans before spending more on hardware.
Skipping headphone monitoring. Without it, you won’t hear problems until editing. Choose a mic with a built-in headphone jack.
Setting gain too high. If your recording peaks into the red, it’s permanently distorted. Set gain so your loudest moment sits around minus twelve decibels on the meter.
Positioning the mic too far away. Six inches is the sweet spot for condenser mics. Further away picks up more room noise. Closer amplifies plosives.
Ignoring polar pattern. If you’re recording solo on a Yeti in omnidirectional mode, you’re capturing every noise in the room. Set it to cardioid.
Frequently Asked Questions
What should beginners check before buying a USB microphone?
Focus on five things — pickup pattern (cardioid is best for solo recording), condenser versus dynamic capsule (dynamic handles noisy rooms better), built-in headphone monitoring (essential for catching problems live), mounting accessories included (boom arms and shock mounts save money), and connectivity (USB for simplicity, USB/XLR combo for future upgrades).
What is the main mistake to avoid when buying a beginner USB microphone?
Buying a sensitive condenser mic for an untreated room. Condensers capture beautiful detail but also pick up every fan, traffic sound, and keyboard click nearby. For noisy spaces, a dynamic mic like the FIFINE AM8 produces cleaner recordings than a more expensive condenser.
What is the difference between USB condenser and dynamic microphones?
Condenser microphones are highly sensitive, capture detail and high frequencies, and suit treated rooms. Dynamic microphones are less sensitive but reject background noise, suiting untreated spaces. Both connect via USB the same way. Most beginner mics are condensers; the FIFINE AM8 is the dynamic option in this guide.
How much should a beginner spend on a USB microphone?
Beginners should focus on value over absolute spend. Look for bundles that include essential accessories like boom arms, shock mounts, and pop filters — buying these separately often costs more than upgrading to a more complete package from the start. The mics in this guide range from budget-friendly entry options to professional-grade picks, with strong value available at every tier.
Do USB microphones need phantom power?
No. USB microphones draw power directly through the USB cable and handle analog-to-digital conversion internally. Phantom power (48V) is only required for professional XLR condenser microphones connected through an audio interface.
What pickup pattern do beginners need?
Cardioid is the right pattern for almost every beginner. It captures sound from the front and rejects noise from the rear and sides, making it perfect for solo podcasting, voiceover, streaming, and YouTube narration. Omnidirectional, bidirectional, and stereo patterns are useful for specific scenarios like group interviews or music recording.
Final Recommendations: Best USB Studio Microphone Picks for Beginners in 2026
Choosing among the best USB studio microphones for beginners comes down to matching the mic to your recording environment and your growth plans. For pure beginner-friendliness and long-term versatility, the Blue Yeti remains the safest pick in 2026. For tight budgets, the FIFINE T669 bundles everything you need to start recording today. For noisy rooms, the FIFINE AM8 dynamic capsule rejects background sound better than any condenser at this tier.
If you want professional audio quality and are willing to invest, the Rode NT-USB+ and Audio-Technica AT2020USB+ both deliver studio-grade results that won’t need upgrading soon. For streamers, the Elgato Wave:3 with Wave Link software is the easiest multi-source audio setup I’ve used.
The most important advice I can give: pick a mic, learn its polar pattern, treat your room as well as you can, and start recording. Your first hundred hours behind the microphone will teach you more than any spec sheet ever will.